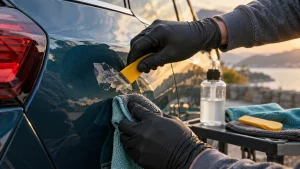
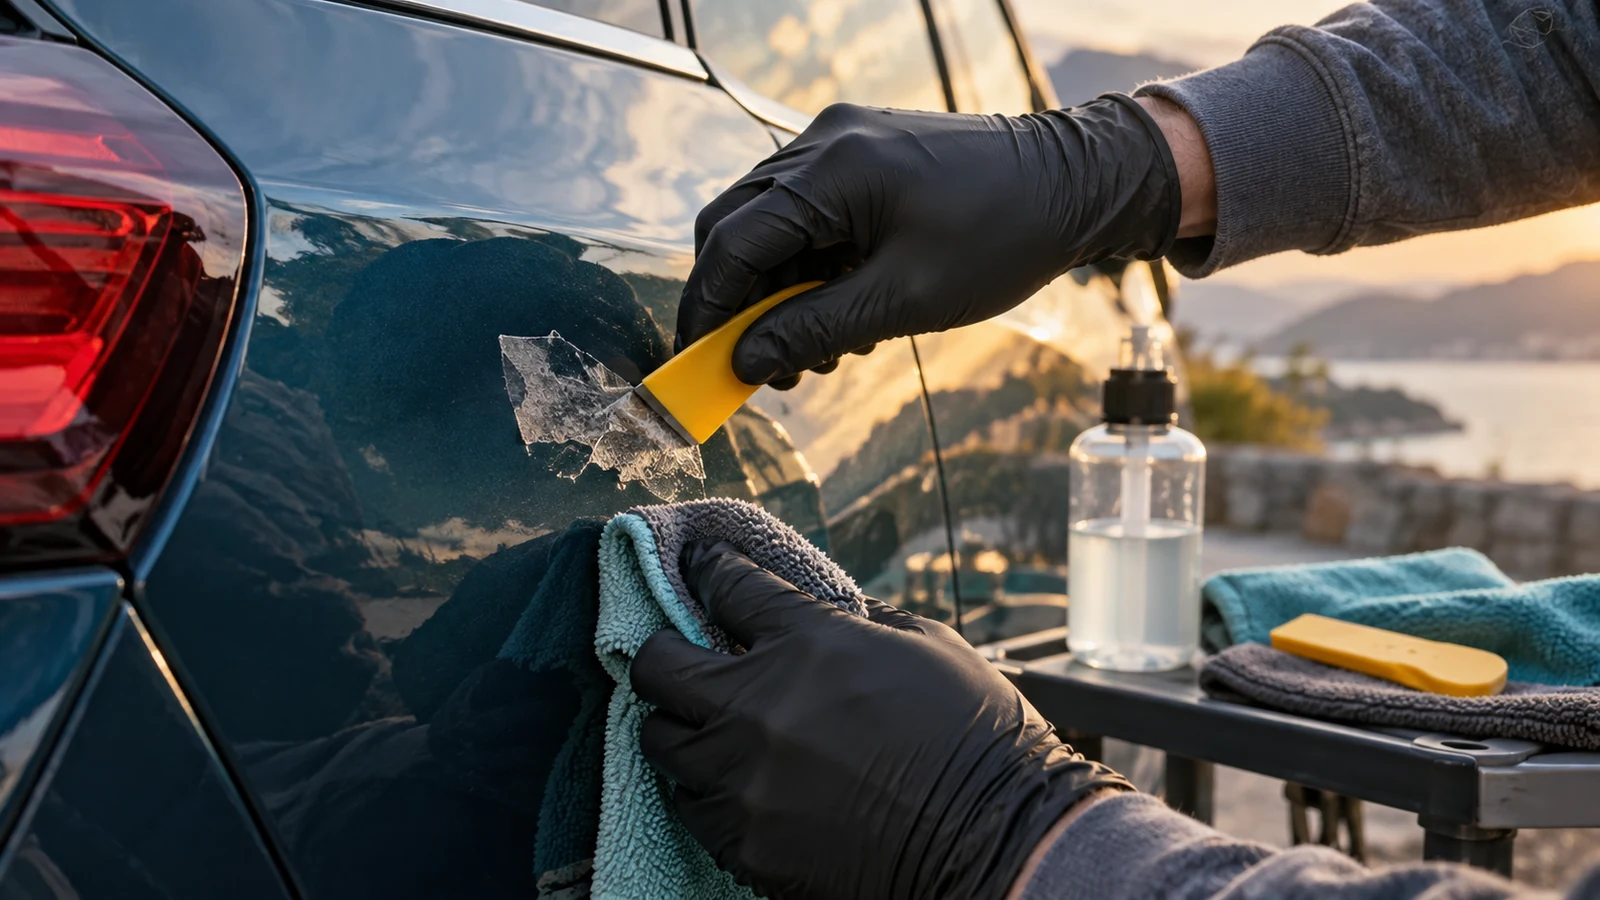
How to remove adhesive from car paint depends on the residue, paint condition, and panel material. The safest method is to wash first, soften thick adhesive with controlled warmth, dissolve the remaining film with an automotive-safe remover, wipe in straight lines, then wash and protect the surface.
Key Facts / Quick Answer
Work on a clean panel between 60°F and 85°F, or 15°C and 30°C.
Keep panel temperature below approximately 122°F, or 50°C, when using heat.
Use a plastic razor or nylon scraper at roughly 15-30 degrees, never a metal blade.
Allow automotive adhesive remover to dwell for about 2-5 minutes, following its label.
Isopropyl alcohol suits thin films, while thick foam tape usually needs heat and a stronger automotive solvent.
Wash after solvent use and replace the wax, sealant, or coating protection removed during cleaning.
What Adhesive Removal Does to Car Paint
Adhesive removal breaks the bond between a residue and the clearcoat without cutting, swelling, or clouding the finish. Heat makes many pressure-sensitive adhesives flexible, while a compatible solvent penetrates the adhesive and turns it into a wipeable slurry.
Automotive paint normally consists of a colored basecoat protected by a clearcoat. The clearcoat provides gloss and much of the chemical resistance, but it is not immune to abrasion, strong solvents, heat, or prolonged contamination. A sticker may leave glue behind even when the sticker itself comes away cleanly.
The residue may contain acrylic adhesive, rubber-based adhesive, foam tape, vinyl plasticizer, road tar, or tree sap. Each material responds differently. A citrus cleaner that works well on tar may take too long on aged acrylic tape, while a rubber eraser wheel that removes pinstriping can damage a soft plastic bumper.
How heat and solvent work together
Heat changes adhesive flexibility rather than “melting the paint.” A warm adhesive stretches and rolls instead of fracturing into small pieces. Solvent then reduces the remaining bond strength and allows the residue to transfer to a microfiber towel.
In practice, the most efficient sequence is bulk removal first and chemical removal second. Scraping a softened thick layer requires less solvent, reduces smearing, and shortens the time that chemicals remain on the clearcoat.
Identify the Residue Before Choosing a Product
Residue identification determines the safest tool and solvent. Thick foam tape needs controlled lifting, thin sticker film needs a light solvent, and tar or sap often responds best to a lubricated petroleum or citrus formula.
| Residue source | Typical appearance | First method | Typical working time |
|---|---|---|---|
| Paper sticker | Thin brown or clear film | Warm water, plastic scraper, light solvent | 5-15 minutes |
| Vinyl decal | Flexible colored film with glue lines | Hair dryer, plastic scraper, adhesive remover | 10-30 minutes |
| Emblem or badge | Thick foam tape | Heat, nylon line, plastic scraper, solvent | 15-45 minutes |
| Road tar | Black or brown soft spots | Automotive tar remover | 5-20 minutes |
| Tree sap | Amber, clear, or dark hardened drops | Citrus or petroleum-based remover | 5-15 minutes |
| Pinstriping | Narrow aged vinyl or tape | Controlled heat or rubber eraser wheel | 15-60 minutes |
Inspect the surrounding paint before starting. If the surface is chalky, cracked, peeling, deeply scratched, or already cloudy, adhesive removal may expose an existing defect rather than create a new one.
Check for ceramic coating, PPF, and repainted panels
Paint-protection film and ceramic coatings change the risk calculation. A solvent labeled safe for cured automotive paint may stain, soften, or reduce the performance of an aftermarket film or coating. Check the installer’s care instructions first and test an inconspicuous edge.
Repainted panels also deserve caution. Freshly refinished paint may remain solvent-sensitive for weeks, depending on the paint system and cure process. A body shop can confirm the cure status more reliably than a general product label.
Choose the Right Adhesive Remover
Automotive adhesive removers fall into four practical groups: petroleum distillates, citrus-based formulas, isopropyl alcohol, and rubber erasers. The correct choice depends on residue thickness, substrate, ventilation, and the finish’s condition.
| Remover type | Best use | Typical dwell | Main limitation |
|---|---|---|---|
| Petroleum or naphtha formula | Acrylic tape, badge glue, heavy residue | 2-5 minutes | Flammable vapors and possible trim sensitivity |
| d-Limonene citrus formula | Sap, tar, sticker film | 3-10 minutes | Oily residue and slower action on aged tape |
| 70%-91% isopropyl alcohol | Thin film, fingerprints, final wipe | 30-90 seconds | Weak against thick foam adhesive |
| Rubber eraser wheel | Pinstriping and thick vinyl on rigid metal | Continuous short passes | Heat, dust, and panel damage if stationary |
| Adhesive-removal gel | Vertical panels and localized residue | 2-10 minutes | More cleanup and possible staining on porous trim |
Use only a product whose label identifies automotive paint or cured clearcoat as a compatible surface. “Natural,” “biodegradable,” and “citrus” do not automatically mean safe for every coating, plastic, or fresh repair.
How much remover is needed?
A typical 4-ounce bottle handles several small sticker patches when applied to a towel or limited area rather than flooded across the panel. A full vehicle with old wrap glue may require 16-32 ounces, depending on residue thickness and how often towels are changed.
| Project size | Remover quantity | Microfiber towels | Typical labor |
|---|---|---|---|
| One 4-inch sticker | 0.25-1 ounce | 2-3 towels | 5-15 minutes |
| Two badges | 1-3 ounces | 3-5 towels | 15-45 minutes |
| One door with decal glue | 3-8 ounces | 6-10 towels | 30-90 minutes |
| Full vehicle wrap residue | 16-32 ounces | 20-40 towels | 2-5 hours |
| Heavy professional correction | 32 ounces or more | 40 or more towels | 4-8 labor hours |
These are typical planning ranges, not product guarantees. Absorbent towels, porous residue, wind, and repeated applications increase consumption.
How to Remove Sticker and Badge Adhesive
The safest removal process uses the least aggressive method that works. Do not begin with a blade, drill, or strong solvent when warmth and a plastic edge can remove most of the material.
- Wash the panel. Use car shampoo and clean water to remove grit. Dry with a clean microfiber towel.
- Inspect the surface. Check for peeling clearcoat, repainted edges, plastic trim, PPF, and ceramic coating.
- Test the product. Apply a small amount to an inconspicuous spot. Wait one minute, wipe, and inspect for color transfer, haze, or texture change.
- Warm the residue. Use a hair dryer or a low heat gun setting. Keep the tool moving 6-8 inches from the panel.
- Lift the bulk. Use a plastic razor, nylon scraper, or fishing line behind an emblem. Keep the tool flat and use light pressure.
- Apply remover. Put the product on the residue or towel according to the label. Keep the working area small.
- Allow controlled dwell. Start with two minutes. Extend toward five minutes only if the label permits and the residue remains firm.
- Wipe straight. Use overlapping linear passes with a clean section of a high-pile microfiber towel.
- Repeat rather than force. A second short application is safer than aggressive rubbing.
- Wash and protect. Remove solvent residue with car shampoo, dry the panel, and apply a compatible wax, sealant, or coating topper.
A plastic razor should sit at approximately 15-30 degrees to the surface. The edge should slide under softened residue, not dig into the paint. Replace the blade when its edge becomes nicked because a damaged plastic blade can drag dirt across the finish.
Removing an emblem without damaging the panel
Warm the emblem, protect the paint with masking tape, and pull dental floss or fishing line behind the badge with a sawing motion. Do not twist a screwdriver under the emblem. After the badge comes off, remove foam tape in small rolls and treat the remaining adhesive with solvent.
The body panel may reveal a darker or glossier outline after badge removal. That difference is often paint oxidation or UV exposure around the covered area, not leftover glue. Solvent will not restore faded paint.
Chemical Versus Mechanical Removal
Chemical removal is usually safer for thin residue and irregular paint surfaces. Mechanical removal is faster for thick vinyl or pinstriping on rigid metal, but it creates more heat and requires greater control.
| Method | Suitable surface | Best residue | Risk level | Stopping rule |
|---|---|---|---|---|
| Plastic scraper | Cured paint and glass | Softened films and tape | Low | Stop when the edge catches |
| Nylon line | Rigid painted panels | Badge foam tape | Low | Stop if line contacts paint |
| Solvent and towel | Cured clearcoat, after testing | Thin to medium films | Low to medium | Stop at haze or color transfer |
| Rubber eraser wheel | Rigid painted metal | Pinstriping and vinyl | Medium | Stop every 10-15 seconds to cool |
| Abrasive compound | Healthy clearcoat only | Shadowing and micro-marring | Medium | Stop when gloss evens out |
| Metal razor | None for ordinary DIY use | None | High | Do not use on automotive paint |
A rubber eraser wheel must keep moving. Short passes of 10-15 seconds followed by a cooling pause limit localized heat. The wheel should contact rigid metal lightly and never be used on flexible plastic bumpers, textured trim, PPF, or thinly painted edges.
Can a drill eraser wheel damage paint?
A drill-mounted eraser wheel can damage paint when pressure, speed, or dwell time creates excessive heat. It may smear rubber, haze the clearcoat, lift weak paint, or expose an edge. Use it only when chemical and hand methods are inefficient, and keep the drill at the manufacturer’s recommended speed.
Temperature, Ventilation, and Safety Limits
Temperature control protects both paint and the operator. The useful panel range is approximately 60°F-85°F, while the surface should remain below about 122°F during heat-assisted work.
| Condition | Effect on adhesive | Recommended adjustment |
|---|---|---|
| Below 50°F, 10°C | Adhesive becomes brittle and solvent acts slowly | Move indoors or extend dwell cautiously |
| 60°F-85°F, 15°C-30°C | Most workable range | Use normal short applications |
| Direct summer sun | Panel can exceed safe heat rapidly | Work in shade and check temperature |
| Above 100°F, 38°C panel temperature | Solvent flashes off quickly | Stop, cool panel, and reduce area |
| High humidity | Slower evaporation and more residue streaking | Use smaller sections and more towels |
A hair dryer is easier to control than a heat gun. If using a heat gun, keep it moving and measure the panel with an infrared thermometer when possible. Never heat a solvent-soaked surface near a flame, spark, cigarette, or poorly ventilated electrical source.
Expert insight: A warm panel can make a weak solvent appear effective because the adhesive is already soft. Test the solvent on a cool, hidden section before assuming the product is safe.
Household Alternatives: What Works and What Does Not
Some household products can handle a thin residue, but they are less predictable than automotive formulas. Test every substitute first and avoid mixing chemicals.
| Household option | Likely result | Suitable use | Main concern |
|---|---|---|---|
| Warm water and car shampoo | Softens paper residue | Fresh water-based sticker film | Ineffective on cured acrylic tape |
| 70% isopropyl alcohol | Dissolves light film | Final residue and fingerprints | Can strip wax and dry trim |
| Dental floss | Cuts adhesive mechanically | Badge removal | Can scratch if grit is trapped |
| Cooking oil | Lubricates some residue | Very small tar spot | Leaves an oily film and attracts dirt |
| WD-40-type penetrant | May loosen adhesive | Small tested area | Requires thorough degreasing afterward |
| Acetone or nail-polish remover | Aggressive solvent action | Not recommended | Can haze clearcoat and damage plastic |
Acetone, lacquer thinner, gasoline, and paint stripper do not belong in a routine paint-safe removal process. They can soften clearcoat, stain plastic, dissolve trim coatings, or spread damage beyond the original residue.
Expert insight: “Natural” does not describe a solvent’s paint compatibility. d-Limonene is plant-derived, yet its concentrated formula can stain porous trim and leave an oily film that requires additional cleaning.
What to Do After the Glue Is Gone
Post-cleaning determines whether the panel stays glossy. Adhesive removers can strip wax and sealants, while repeated wiping can leave light marring even when the clearcoat remains intact.
Wash the panel with car shampoo after solvent removal. Inspect it under direct but diffuse light, then feel the surface with clean fingertips or a plastic bag over the hand. If the surface is smooth but the gloss differs from the surrounding paint, a light finishing polish may correct the appearance.
| Final condition | Correct next step | Avoid |
|---|---|---|
| Smooth, glossy, no outline | Apply wax or sealant | Immediate abrasive polishing |
| Slight haze or towel marks | Light finishing polish | Heavy compound first |
| Dark glue remains | Repeat solvent dwell | Forceful dry rubbing |
| Pale or darker sticker outline | Assess oxidation or UV fade | Assuming solvent will restore color |
| Peeling or cloudy clearcoat | Stop and consult a body shop | More heat or chemicals |
| Sticky film on plastic trim | Use plastic-safe cleaner | Rubber wheel or metal scraper |
Wax or sealant can be applied after the panel is clean and dry. If the vehicle has a ceramic coating, use the coating manufacturer’s compatible maintenance product rather than ordinary wax.
When Professional Help Is Safer
Professional correction is appropriate when residue covers multiple panels, the clearcoat is failing, the car has valuable original paint, or a coating and PPF are involved. A detailer can measure paint thickness before polishing, while a body shop can evaluate delamination and repaint requirements.
Stop immediately if paint color transfers to the towel, the clearcoat becomes cloudy, the surface feels soft, or an edge begins lifting. Also stop when the residue is bonded to peeling paint. Removing the glue may remove the remaining paint with it.
Typical consumer costs range from $7-$12 for a citrus cleaner, $15-$40 for a professional adhesive remover, and $10-$25 for a rubber eraser wheel. Professional adhesive and decal removal commonly costs about $75-$300 for a small area and $300-$1,000 or more for extensive wrap residue, depending on labor and paint correction.
Expert insight: The visible glue is not always the main problem. Old decals can protect paint from ultraviolet exposure, so removing them may reveal a permanent color boundary that no solvent can erase.
Frequently Asked Questions About how to remove adhesive from car paint
Can Goo Gone damage automotive paint?
Automotive-labeled Goo Gone products are generally intended for cured automotive surfaces, but compatibility still depends on clearcoat condition, plastic trim, PPF, and coatings. Test first, use a short dwell, keep the area small, and wash afterward. Do not assume a household formula is safe merely because it contains citrus oil.
Will rubbing alcohol remove sticker residue from a car?
Isopropyl alcohol can remove a thin adhesive film, fingerprints, and oily residue, especially at 70%-91% concentration. It is usually too weak for thick foam tape. Alcohol can also strip wax or dry unprotected rubber, so apply it to a towel, work briefly, and re-protect the panel.
How do you remove old 3M tape from a vehicle?
Warm the tape, cut behind an emblem with nylon line, roll away softened foam, and apply an automotive adhesive remover to the remaining film. Use several short applications instead of forceful scraping. A rubber eraser wheel may help on rigid metal, but it should not touch plastic, PPF, or textured trim.
Why is the paint lighter where the sticker was?
A lighter or darker sticker-shaped area usually indicates different ultraviolet exposure, oxidation, or paint fading rather than adhesive. Solvent removes residue but does not reverse color change. A detailer may improve the boundary with polishing, although severe fading or thin clearcoat can require refinishing.
Can adhesive remover be used on a plastic bumper?
Only use a product labeled safe for automotive plastic and test it first. Plastic can discolor, soften, or retain oily residue more readily than painted metal. Avoid metal blades and rubber eraser wheels on bumpers, because flexible panels amplify pressure and heat.
How long should adhesive remover stay on car paint?
Begin with approximately two minutes and extend toward five minutes only when the product label allows it. Longer dwell is not automatically better, especially in direct sun or on plastic. If the residue does not soften, remove the product, cool the panel, and reassess the residue type.
Conclusion
The safest way to remove adhesive from car paint is to identify the residue, wash away grit, warm thick glue carefully, lift it with plastic or nylon tools, and use a tested automotive remover for the remaining film. Keep the panel below approximately 122°F, avoid metal blades and acetone, then wash and restore surface protection.