Knowing how to mix epoxy resin starts with one rule: use the exact resin-to-hardener ratio specified for your particular product. A 1:1, 2:1, 3:1 or 5:1 ratio does not indicate increasing strength. Each system is formulated to cure at its own ratio, and adding extra hardener can leave the finished epoxy soft, sticky or weak.
This guide explains measurement by weight versus volume, mixing technique, pot life, curing conditions and common mistakes, with examples from WEST SYSTEM and Loctite.
Mixing Epoxy Resin
Understanding Epoxy Components
Most two-part epoxy systems contain a resin (Part A) and a hardener (Part B). Combining them in the prescribed proportions starts a chemical cross-linking reaction that forms the cured material. The specific chemistry and performance depend on the products involved.
| Component | Function | What to check |
|---|---|---|
| Resin (Part A) | Provides the epoxy base for the reaction. | Exact product name, batch and compatible hardener. |
| Hardener (Part B) | Reacts with the resin to develop the cured network. | Specified ratio, working time and temperature range. |
Importance of Accurate Mixing
There is no universal standard epoxy mixing ratio. For example, WEST SYSTEM 105 Resin with 205 or 206 Hardener uses a nominal 5:1 resin-to-hardener proportion, while 105 Resin with 207 or 209 Hardener uses 3:1 by volume and 3.5:1 by weight. Loctite Clear Epoxy uses equal parts in its dual-syringe system. These are different formulations, not rankings of bond strength.
| Mixing consideration | Correct practice | Why it matters |
|---|---|---|
| Manufacturer-specified ratio | Read the label or current technical data sheet for the exact resin and hardener. | An arbitrary ratio may prevent complete curing. |
| Weight vs. volume | Use the method stated in the instructions; do not assume their numerical ratios match. | Different densities can change the correct weight proportion. |
| Pot life | Mix only the quantity you can apply within the stated working period. | The material can thicken and heat up after mixing. |
| Thorough blending | Stir for the specified time and scrape the container’s sides and bottom. | Unmixed areas can remain soft or tacky. |
| Common ratio mistake | Never add extra hardener to make epoxy cure faster or become stronger. | Excess hardener can interfere with the chemical balance. |
WEST SYSTEM explains its product-dependent proportions in its dispensing and mixing guide. Loctite likewise advises using the manufacturer’s recommended ratio rather than changing the amount of hardener.
Measurement and Mixing Techniques
Measuring Epoxy Resin
Start by identifying whether the product calls for measuring by volume (such as milliliters) or weight (such as grams). Use a clean graduated cup for volume or a calibrated scale for weight. Do not switch methods without the manufacturer’s corresponding ratio.
| Method | Best practice | Common error |
|---|---|---|
| By volume | Read markings at eye level and use appropriately sized, clean containers. | Using a weight ratio as a volume ratio. |
| By weight | Tare the container and measure each component accurately. | Assuming a manufacturer’s volume ratio is identical by weight. |
| Metering pumps | Use the correct matched pumps and complete each full stroke. | Partial strokes or pumps intended for a different ratio. |
If you are calculating project volume before mixing, see how much epoxy resin you need.
Factors Affecting Mixing Time
Mixing duration is not universal. A small adhesive syringe may call for approximately a minute, while a coating system may require a different procedure. Follow the product directions rather than assuming all resin must be mixed for five to ten minutes. Thick material, larger batches and cool working conditions may require special handling.
- Use a clean, appropriately sized container and a compatible stirrer.
- Scrape the sides, corners and bottom while stirring.
- For products requiring a two-cup process, transfer the blended material into a second clean cup and stir again.
- Do not use a high-speed mixer unless the manufacturer permits it; aggressive mixing can introduce bubbles.
Ideal Working Temperature
Temperature changes viscosity, pot life and curing speed. Warm conditions generally accelerate the reaction; cooler conditions can delay curing or fall below the product’s minimum application temperature. There is no single ideal temperature for every epoxy. Keep materials and the project within the range stated on the label or technical data sheet, and avoid direct sunlight on the mixing cup.
Techniques for Mixing Epoxy Resin
Hand Mixing vs. Paddle Mixers
Hand Mixing
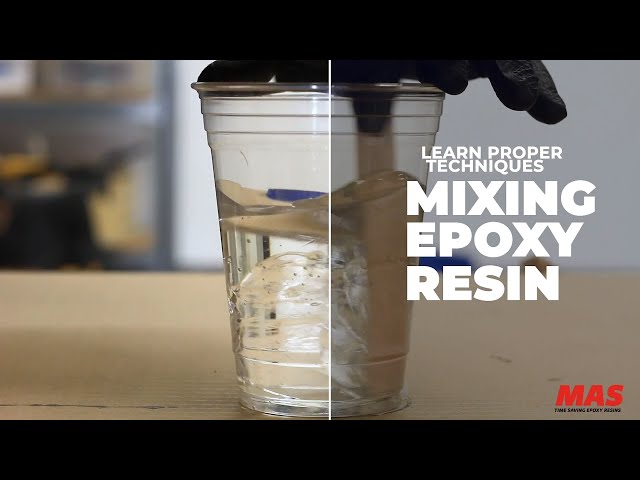
For small batches, slowly stir with a flat mixing stick, scraping the container’s sides and bottom. Keep the stick in the mixture rather than whipping it through the air. Continue for the exact time required by the product.
Paddle Mixers
For larger, manufacturer-approved batches, a low-speed paddle can help mix evenly. Select the correct paddle, container size and speed. A power mixer is not automatically better: too much speed can introduce bubbles, and overly large batches can generate excess heat.
| Method | Suitable situation | Key caution |
|---|---|---|
| Hand mixing | Small repairs, crafts and sample batches. | Scrape thoroughly to prevent unmixed pockets. |
| Low-speed paddle | Larger batches when allowed by the supplier. | Avoid air entrainment and excessive exotherm. |
Tips for Bubbling Prevention
Work within the recommended temperature range, measure accurately and stir steadily without whipping air into the cup. Mix clean, dry materials and pour in the thickness permitted by the product. Some products permit gentle surface warming to remove bubbles, but others may discolor, overheat or become unsafe if heated. Never use an open flame or a heat gun unless the specific manufacturer explicitly permits that technique.
Mixing Guidelines for Best Results
- Read the current instructions and safety data sheet for both components.
- Confirm that the resin and hardener are a compatible pair.
- Prepare the surface, work area, PPE and mixing tools before dispensing.
- Measure the correct ratio using the instructed method.
- Combine and mix thoroughly for the specified period, scraping all surfaces of the container.
- Transfer to a suitable working container if the instructions require it.
- Apply immediately within the stated working time and thickness limits.
- Keep the project undisturbed for the required cure period before loading, sanding or recoating.
For application-specific techniques, read how to pour epoxy resin.
Epoxy Resin Curing Process
Chemical Reaction for Curing
After the components are mixed, the epoxy begins cross-linking and releases heat. Three timing terms are important: pot life is the period a mixed quantity remains usable under specified test conditions; working time is the useful application window on the project; and full cure is the time required to develop the stated final properties. They are not interchangeable.
| Stage | Meaning | Practical action |
|---|---|---|
| Pot life | Usable time of a specified mass of epoxy in a container. | Plan small batches and watch for heating or thickening. |
| Initial set | Material begins to hold its form or resist movement. | Do not confuse this with full strength. |
| Handling or recoat window | Product-specific point for moving or recoating. | Follow the stated interval and surface-preparation requirements. |
| Full cure | Development of the intended final properties. | Wait before exposing the project to service loads or chemicals. |
Temperature’s Effect on Curing
Higher temperature usually shortens working time and can increase heat buildup; lower temperature slows the reaction. The size and shape of a mixed batch also matter: a large, deep cup may become much hotter than a thin film. If a batch overheats, smokes or gels unexpectedly, do not attempt to rescue it by adding solvent or hardener. Follow the product’s safety instructions.
For more on delayed curing, see how to cure epoxy resin.
Best Practices for Epoxy Resin Projects
Safety Precautions for Working with Epoxy
- Use gloves and eye protection appropriate to the product’s safety data sheet; protect skin from uncured resin and hardener.
- Work with suitable ventilation and follow any specific respiratory-protection requirements in the SDS. An ordinary dust mask does not protect against chemical vapors.
- Keep food, drinks, children and pets away from the work area.
- Avoid skin exposure and clean spills using the manufacturer’s recommended method.
- For grinding or sanding cured epoxy, control dust and wear suitable respiratory and eye protection.
Choosing the Right Epoxy Resin Type
Select an epoxy for the actual project rather than by mixing ratio. Consider substrate compatibility, maximum pour depth, pot life, clarity, heat resistance, UV exposure, coating thickness and when the project must return to service.
| Epoxy category | Typical project | Check before purchasing |
|---|---|---|
| Fast-setting adhesive | Small bonding repairs. | Assembly time and full-strength cure. |
| Coating epoxy | Protective surfaces and tabletops. | Recoat window and maximum film thickness. |
| Casting epoxy | Specified-depth pours and molds. | Maximum pour depth and exotherm limits. |
| Structural epoxy | Load-bearing repairs where specified. | Manufacturer’s substrate and performance approvals. |
Enhancing Epoxy Resin Projects
Adding Color with Pigments
Use pigments explicitly compatible with the chosen epoxy. There is no universal five-percent pigment allowance: loading limits depend on the resin chemistry and pigment type. Too much pigment, moisture or incompatible colorant may disrupt curing or spoil the finish. Add colorants only as directed and run a small sample test first.
Avoiding Common Mixing Errors
| Mistake | Possible result | Correction |
|---|---|---|
| Changing the resin-to-hardener ratio | Soft or uncured epoxy. | Measure exactly as specified; never add extra hardener. |
| Confusing weight with volume | Incorrect chemical proportions. | Use the ratio for the selected measurement method. |
| Insufficient stirring | Sticky patches and uneven cure. | Scrape thoroughly and follow the required mixing procedure. |
| Mixing too much at once | Short pot life and excessive heat. | Use smaller batches within the product’s stated limits. |
| Ignoring temperature limits | Premature gel or very slow cure. | Work within the manufacturer-approved temperature range. |
| Adding unapproved pigment or solvent | Discoloration or compromised cure. | Use approved additives and permitted quantities only. |
Bottom line: The strongest practical result comes from the correct product, accurate measurement, thorough mixing and proper curing—not from choosing a numerically higher mixing ratio.