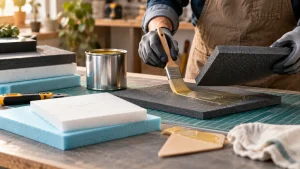
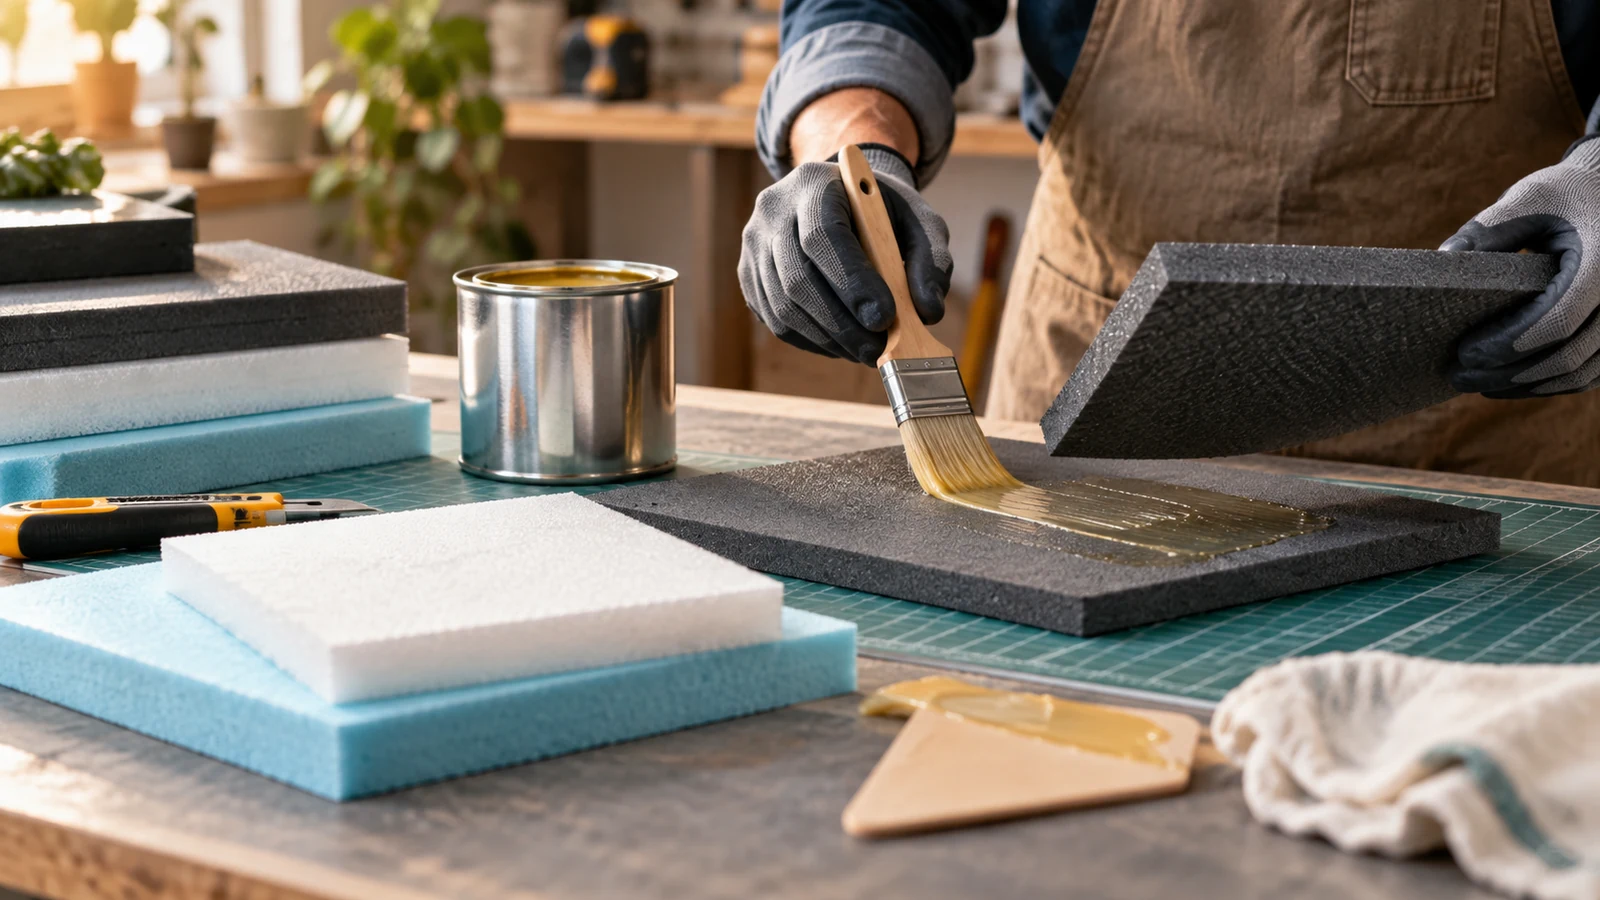
Contact cement can be used on foam when the adhesive chemistry matches the foam. Solvent-based contact cement is usually suitable for closed-cell EVA foam, but its solvents can dissolve EPS and XPS polystyrene. Water-based contact adhesive may work on more foam types, yet “water-based” does not automatically mean universally foam-safe, so test a hidden area and follow the product label.
Key Facts at a Glance
- Contact cement is usually an excellent adhesive for closed-cell EVA foam because it creates a flexible, high-tack bond.
- Traditional solvent-based contact cement can melt or severely pit EPS foam and XPS insulation board.
- Contact cement normally requires a thin coat on both surfaces, followed by drying until the layers feel tacky rather than wet.
- Contact cement bonds immediately on contact, so dry fitting and alignment marks matter more than clamping.
- Polyurethane construction adhesive, foam-safe spray adhesive, and compatible hot-melt glue are safer starting points for many polystyrene projects.
- Adhesive labels and safety data sheets override generic foam-compatibility advice because formulas differ between brands and countries.
Can Contact Cement Be Used on Foam?
Yes, contact cement can be used on foam, but the correct answer depends on the polymer, adhesive formula, and mechanical load. Solvent-based contact cement is a common choice for EVA costume foam, shoe components, and flexible laminations; the same product can destroy polystyrene insulation within seconds.
Contact cement is a rubber-based adhesive, commonly using neoprene or another synthetic elastomer dissolved or dispersed in a carrier. The adhesive is applied to both mating faces, allowed to release solvent or water, and then pressed together. The bond develops immediately rather than through a long wet-curing period.
The first decision is therefore not “Which brand is strongest?” It is “What polymer is the foam?” Foam color alone cannot identify the material reliably. A black sheet may be EVA, neoprene, polyethylene, or polyurethane, while a pink insulation board is commonly XPS but still requires label confirmation.
What determines compatibility?
| Foam type | Typical structure | Contact cement result | Better starting option |
|---|---|---|---|
| EVA craft foam | Closed-cell ethylene-vinyl acetate | Solvent formulas usually bond well | Contact cement or compatible flexible adhesive |
| EPS bead board | Expanded polystyrene | Solvent formulas can dissolve beads | Foam-safe polyurethane or spray adhesive |
| XPS insulation board | Extruded polystyrene | Solvent attack can pit or melt the surface | Loctite PL 300 or labeled foam adhesive |
| Upholstery foam | Open-cell polyurethane | Surface may absorb adhesive and stiffen | Foam adhesive spray or flexible upholstery adhesive |
| PE foam | Closed-cell polyethylene | Many adhesives bond poorly without treatment | Product specifically labeled for polyethylene |
| Neoprene foam | Closed-cell rubber | Compatible rubber adhesive often works | Contact cement or neoprene adhesive |
Why Does Solvent Contact Cement Melt Polystyrene?
Solvent-based contact cement can melt EPS and XPS because its organic solvents penetrate and plasticize polystyrene. Acetone, toluene, MEK, and related solvents are common examples of chemicals that can attack polystyrene, although the exact ingredients vary by product.
The visible result may be immediate shrinkage, a glossy crater, softened edges, or complete loss of the foam’s cellular structure. A short exposure can damage a surface even when the adhesive later appears dry. Do not rely on a thin coat to make a solvent formula safe for polystyrene.
A product labeled “contact cement” is not chemically interchangeable with every other contact adhesive. Some water-dispersed formulas avoid the aggressive solvent system responsible for melting, while others still contain co-solvents that require testing. Read the technical data sheet, not only the front label.
Which formula is safest?
| Formula class | Typical dry time before assembly | Fume level | EVA compatibility | EPS/XPS compatibility |
|---|---|---|---|---|
| Solvent-based neoprene cement | 5-15 minutes | High VOC odor | Usually suitable | Usually unsafe |
| Water-based contact adhesive | 30-60 minutes | Low odor after drying | Often suitable | Only if the label confirms it |
| Foam-safe spray adhesive | 2-15 minutes | Low to moderate | Product dependent | Suitable when labeled |
| Polyurethane adhesive | 20-60 minutes open time | Low odor, moisture reactive | Often suitable, may stiffen | Commonly suitable |
| Hot-melt glue | 10-60 seconds | Low chemical odor | Suitable for light loads | May deform thin foam |
Water-based contact adhesive is not automatically safe for every foam. Manufacturers formulate products differently, and some water-based adhesives have poor adhesion to low-energy polyethylene surfaces. A hidden test remains necessary.
How Should You Identify the Foam?
Identify the foam from its packaging, technical label, or supplier specification before selecting adhesive. Texture and color provide clues, but they cannot establish polymer identity because pigments, laminates, and manufacturing processes overlap.
Use this sequence:
- Check the packaging. Look for EVA, EPS, XPS, polyurethane, polyethylene, or neoprene.
- Inspect the cells. Beaded white structure suggests EPS; a uniform fine-cell board often indicates XPS.
- Assess flexibility. EVA bends without crumbling; polystyrene boards are rigid and brittle; upholstery foam compresses and rebounds.
- Check the intended use. Floor mats and cosplay sheets are often EVA, while building boards are commonly XPS.
- Perform a compatibility test. Apply a small amount to scrap, wait the label’s stated time, and inspect for softening, shrinkage, discoloration, or tack loss.
Do not use a flame test to identify foam. Burning polymers can release toxic gases and the test gives unreliable information about adhesive compatibility.
How Should You Apply Contact Cement to Foam?
Apply contact cement to clean, dry, accurately fitted surfaces in a thin, even layer on both faces. Let the adhesive reach the manufacturer’s dry-to-touch stage, then align the pieces and apply firm pressure once, because contact cement generally cannot be slid into position after mating.
Before You Start
| Requirement | Typical value |
|---|---|
| Small EVA project time | 30-90 minutes |
| Full bond development | 24-72 hours, product dependent |
| Difficulty | Moderate |
| Small project adhesive quantity | 15-60 mL |
| Recommended ventilation | Outdoor or cross-ventilated workspace |
| Useful tools | Utility knife, abrasive pad, roller, gloves, scrap foam |
Step 1: Dry fit and mark the joint
Cut the foam accurately and assemble it without adhesive. Add pencil registration marks, shallow notches, or strips of low-tack tape outside the bond line so the edges meet correctly.
Success checkpoint: The pieces align without force and the joint closes evenly.
Common mistake: Applying adhesive before discovering a gap or twisted edge.
Step 2: Prepare the surfaces
Remove dust, release agents, and loose particles. Lightly abrade glossy EVA with fine sandpaper, typically 120-220 grit, then brush away debris. Avoid deep grooves that reduce the actual contact area.
Success checkpoint: The surface is clean, dull, and dry.
Common mistake: Saturating porous foam with solvent cleaner, which can swell or weaken it.
Step 3: Apply a thin coat to both faces
Spread a uniform film over both mating surfaces. A disposable brush, short-nap roller, or scrap foam applicator can distribute the cement without leaving thick ridges.
Success checkpoint: Coverage is continuous but does not pool in corners.
Common mistake: Coating only one side, which produces weak or partially cured areas.
Step 4: Allow the adhesive to flash off
Wait until the adhesive is dry to the touch, matte, and tacky rather than wet. Typical solvent formulas need 5-15 minutes; water-based products often need 30-60 minutes, but temperature, humidity, coat thickness, and substrate absorption alter the timing.
Success checkpoint: A lightly touched adhesive surface does not transfer wet material to a gloved finger.
Common mistake: Joining wet cement, which traps solvent and creates a soft, weak seam.
Step 5: Align and press once
Use the registration marks and bring the surfaces together from one edge to the other. Apply strong, even pressure with a roller or firm hand pressure for 30-60 seconds.
Success checkpoint: The seam resists lifting at the edges and contains no visible open channels.
Common mistake: Sliding the parts after contact, which contaminates the tacky layers and creates a misaligned seam.
Step 6: Allow the assembly to rest
Avoid heavy flexing immediately after bonding. Many contact cements can be handled immediately, but maximum bond performance commonly develops over 24 hours, with some water-based products requiring longer.
Success checkpoint: The seam remains stable after gentle flexing the following day.
Common mistake: Stressing the joint while trapped solvent or water is still leaving the bond line.
How Long Should Contact Cement Dry?
Contact cement typically needs 5-15 minutes of flash-off for solvent-based formulas and 30-60 minutes for many water-based products. Full bond development commonly takes about 24 hours, although a manufacturer may specify 48-72 hours for thick, nonporous, or heavily loaded assemblies.
| Stage | Solvent-based typical range | Water-based typical range | Practical test |
|---|---|---|---|
| Application window | 2-10 minutes | 5-20 minutes | Film remains spreadable |
| Flash-off | 5-15 minutes | 30-60 minutes | Surface is matte and tacky |
| Safe light handling | Immediate to 10 minutes | 10-30 minutes | Seam does not spring open |
| Stronger working bond | 1-4 hours | 4-24 hours | Gentle flexing causes no lift |
| Near-full development | 24 hours | 24-72 hours | Joint survives intended stress |
Temperature below about 15°C, high humidity, thick coats, and low airflow extend drying time. A fan can improve airflow, but do not use concentrated heat or an open flame around solvent vapors.
Which Adhesive Should You Use for Polystyrene?
Use a polyurethane adhesive or a product explicitly labeled safe for EPS or XPS when bonding polystyrene. Standard solvent-based contact cement is a poor choice because chemical compatibility matters more than its immediate grip.
| Adhesive option | EPS/XPS safety | Typical cure | Flexibility | Best application |
|---|---|---|---|---|
| Loctite PL 300 | Labeled for foam board | 24-72 hours | Medium | Insulation board joints |
| Foam-safe spray adhesive | Product specific | 15 minutes-24 hours | Medium | Large-area laminations |
| Water-based contact adhesive | Label dependent | 24-72 hours | High | Flexible, tested laminations |
| PVA craft glue | Usually safe | 12-24 hours | Low to medium | Paper-faced craft foam |
| Solvent contact cement | Usually unsafe | 24 hours | High | EVA, not polystyrene |
Polyurethane construction adhesives often require temporary support because they do not create the instant grab of contact cement. Their longer cure is the trade-off for avoiding solvent damage and achieving a stronger structural joint in rigid foam board.
How Does Contact Cement Compare With Alternatives?
Contact cement is best when a flexible, immediate, thin bond is more important than repositioning time. Hot glue suits temporary craft assemblies, polyurethane suits rigid insulation, and foam-safe spray adhesive suits large surfaces where even coverage matters.
| Adhesive | Initial grab | Repositioning | Seam flexibility | Typical cost range |
|---|---|---|---|---|
| Solvent contact cement | Immediate | None after mating | High | $6-$25 |
| Water-based contact adhesive | Fast after drying | Very limited | High | $15-$60 |
| Hot glue | 10-60 seconds | Seconds | Low to medium | $5-$20 |
| Polyurethane construction adhesive | Low to medium | 10-30 minutes | Medium | $8-$15 |
| Foam-safe spray adhesive | Fast | Limited | Medium | $12-$30 |
Hot glue can become rigid and lumpy, especially on thin EVA. A high-temperature glue gun may also deform delicate foam. Low-temperature glue reduces heat damage but generally produces a less durable bond under sustained load.
Contact cement is also a poor choice where the joint must be adjusted after assembly. Use a contact adhesive only after the fit, orientation, and seam position are already certain.
What Changes for Upholstery Foam and Open-Cell Foam?
Open-cell polyurethane upholstery foam requires an adhesive that spreads without soaking deeply into the cells. Solvent contact cement may create a hard, concentrated bond line, while a compatible upholstery spray adhesive can cover broad surfaces more evenly and preserve cushion flexibility.
Apply spray adhesive in light passes rather than one saturated coat. Oversaturation can stiffen the foam, increase odor, and create a visible dark patch through fabric. For a cushion repair, test compression and recovery after curing because a seam that holds statically may fail when repeatedly flexed.
For high-load upholstery work, follow the furniture adhesive manufacturer’s instructions and test the finished seam under repeated compression. Contact cement can work on dense foam edges, but it is rarely the best default for large, soft cushions.
Can Contact Cement Bond Polyethylene Foam?
Contact cement can bond polyethylene foam only when the adhesive is specifically designed or tested for low-surface-energy plastics. Ordinary contact cement often peels from PE foam because the substrate resists wetting and chemical adhesion.
Polyethylene foam may require corona, plasma, flame, or specialized primer treatment in industrial settings. Those treatments are not interchangeable with casually passing a lighter over the surface. For household work, choose an adhesive labeled for polyethylene and follow its preparation method.
A roughened surface can improve mechanical grip, but abrasion alone does not solve every PE adhesion problem. Test peel strength after the adhesive has fully cured, not immediately after application.
What Are the Costs and Coverage?
A small 3-ounce tube of contact cement typically costs $6-$10, while a quart of solvent-based product commonly costs $15-$25. Professional water-based contact adhesives may cost $45-$60 per quart, and actual coverage varies substantially with film thickness, surface porosity, and application method.
| Container or product class | Typical price | Approximate usable coverage | Suitable project scale |
|---|---|---|---|
| 3-ounce tube | $6-$10 | 5-15 sq ft | Repairs and small props |
| 8-ounce can | $10-$18 | 15-30 sq ft | Several EVA seams |
| 1-quart solvent can | $15-$25 | 50-70 sq ft | Repeated workshop use |
| 1-quart water-based can | $45-$60 | 100-200 sq ft | Large laminations |
| Foam-safe spray can | $12-$30 | 20-60 sq ft | Sheet bonding |
Treat coverage figures as typical estimates, not guaranteed yields. Two coats, rough foam, open-cell absorption, and waste in the applicator can reduce actual coverage by half.
What Are the Most Common Bonding Failures?
Most failed foam seams result from incompatible chemistry, wet assembly, poor surface preparation, or movement before the adhesive has developed strength. The failure pattern usually identifies the cause.
| Failure symptom | Likely cause | Repair or prevention |
|---|---|---|
| Foam shrinks or forms a crater | Solvent attacked EPS/XPS | Remove damaged area and use foam-safe adhesive |
| Seam stays gooey | Joined before flash-off | Separate if possible, remove residue, reapply thin coats |
| Edge peels immediately | One-sided or incomplete coverage | Clean, abrade lightly, coat both faces |
| Seam is hard and brittle | Thick adhesive or rigid glue | Use a thinner coat or flexible adhesive |
| Joint misaligns | No registration marks | Dry fit and mark before coating |
| Bond peels from PE foam | Low surface energy | Use PE-rated adhesive or surface treatment |
| Foam dents under pressure | Excessive clamping | Use broad, light support rather than point clamps |
One practitioner rule is especially important: a strong adhesive cannot compensate for a weak foam edge. If the foam tears beside the seam, the adhesive may have exceeded the substrate’s strength; increasing adhesive quantity will not solve that failure.
How Should You Handle Safety and Heat?
Use solvent-based contact cement outdoors or with strong cross-ventilation, keep it away from ignition sources, and follow the product safety data sheet. Nitrile gloves protect against incidental contact, while a properly fitted organic-vapor respirator may be appropriate for products whose label permits respirator use.
A dust mask or N95 filters particles, not solvent vapors. It is not a substitute for ventilation or an organic-vapor cartridge. Do not assume a respirator is protective unless it fits correctly and the cartridge matches the chemical hazard.
Cured contact cement commonly tolerates moderate service temperatures, often around 65-80°C, but the exact limit depends on the product and load. A dark EVA prop left inside a parked car can exceed the adhesive’s safe range and soften or creep even when the foam itself remains intact.
Heat reactivation is a specialist repair technique, not a universal fix. A brief, controlled warming may restore tack to some contact cements, but a heat gun can deform EVA, accelerate solvent release, or ignite vapors. Reapply adhesive after proper preparation unless the manufacturer specifically supports reactivation.
FAQ
Can you use contact cement on EVA foam without sealing it?
Yes. Contact cement commonly bonds directly to clean, lightly abraded EVA foam without a primer. Sealing EVA with paint, Plasti Dip, or another coating changes the surface and can weaken adhesion unless the adhesive is compatible with that coating. Test the actual finished surface before constructing the final piece.
Is Barge contact cement safe for Styrofoam?
Traditional Barge solvent-based contact cement should not be assumed safe for Styrofoam or other polystyrene. Check the current technical data sheet, but use a product explicitly labeled for EPS or XPS instead. If the adhesive contains aggressive solvents or the label excludes polystyrene, choose polyurethane or foam-safe spray adhesive.
Can you use contact cement on foam board?
You can use contact cement on foam board only when the board’s facing and foam core are compatible with the formula. EVA-faced craft board may accept contact cement, while EPS and XPS cores can be damaged by solvent formulas. Test an offcut because paper, foil, and plastic facings change adhesion.
Does contact cement stay flexible on foam?
Contact cement generally stays more flexible than PVA, brittle craft glue, or cured hot glue. Flexibility depends on film thickness, rubber formulation, temperature, and the foam itself. A thick application can become a rigid ridge, so use thin, uniform coats on both surfaces.
Can you remove contact cement from foam?
Removal is difficult because solvents that soften the adhesive may also damage the foam. On EVA, carefully peel or trim cured residue and abrade the area lightly. On EPS or XPS, avoid solvent removers entirely; cut away contaminated foam and replace it if the surface has melted.
Should you clamp foam after applying contact cement?
Contact cement usually does not require clamps because it develops immediate grab when dry adhesive films meet. Roll or press the seam firmly for 30-60 seconds instead. Clamps can crush soft foam, force adhesive out of the joint, or create a permanently distorted edge.
The Bottom Line
Can contact cement be used on foam? Yes, especially on EVA and some other closed-cell foams, provided the formula is compatible and the surfaces are dry before assembly. Do not use traditional solvent-based contact cement on EPS or XPS unless the manufacturer explicitly confirms compatibility. Identify the foam, test scrap, apply thin coats to both surfaces, wait for the correct flash-off time, and select polyurethane or foam-safe adhesive when polystyrene is involved.