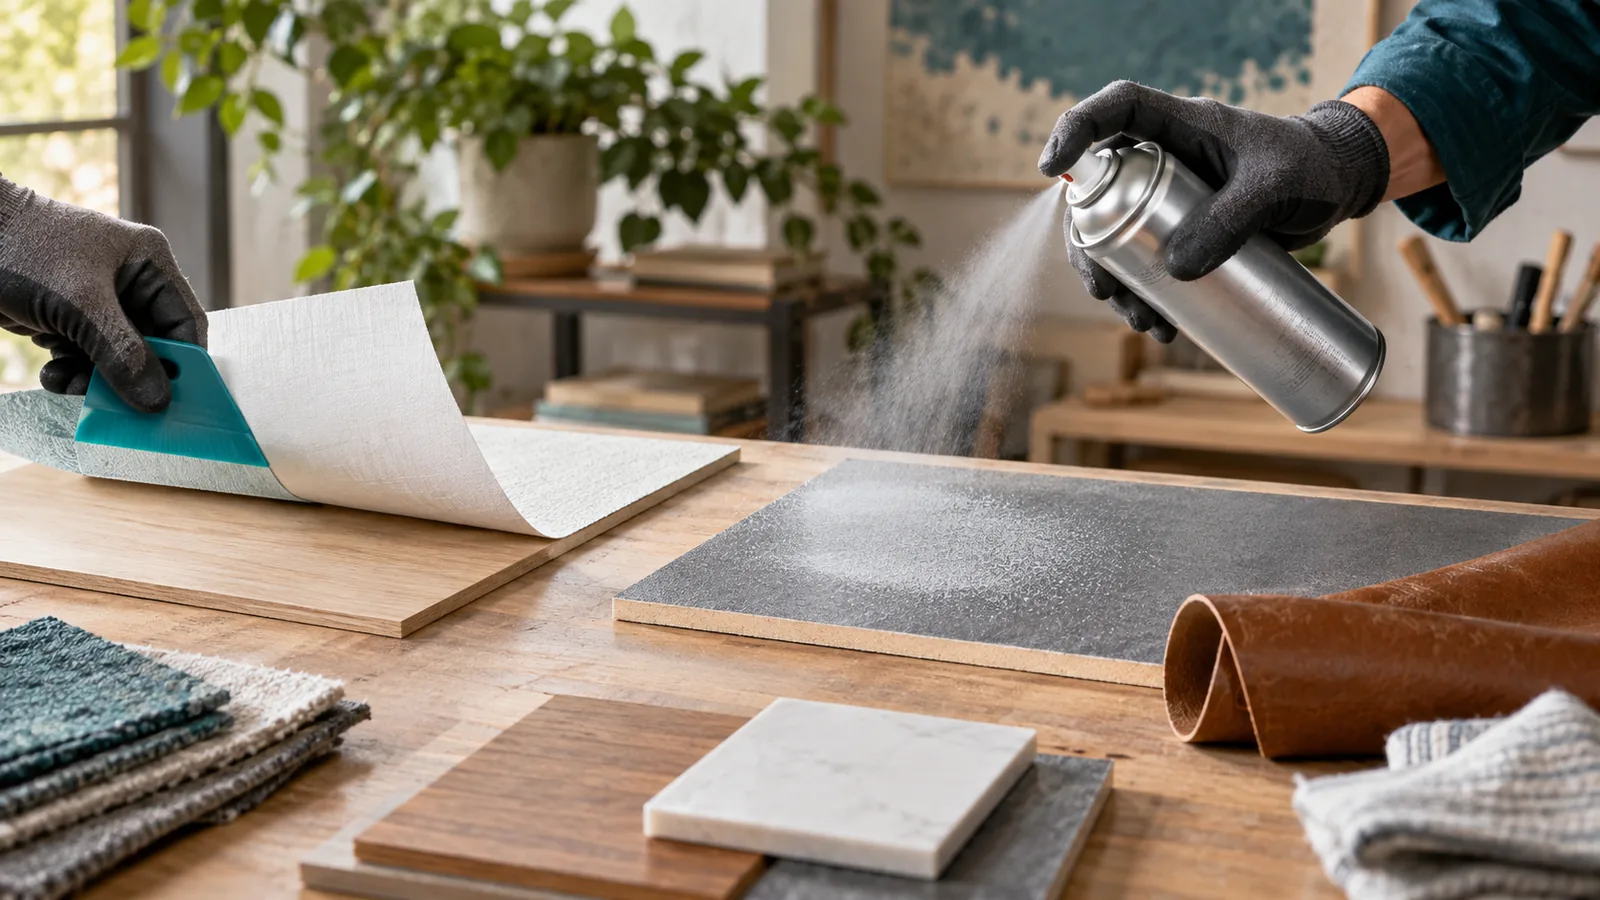
Spray adhesive can be permanent, but permanence depends on the adhesive formulation, bonded materials, surface preparation, and exposure conditions. Temporary repositionable sprays remain peelable, while permanent general-purpose and heavy-duty formulas can hold for years when applied to compatible surfaces and fully cured.
Key Facts at a Glance
A product labeled repositionable, temporary, or removable is not intended to create a permanent bond.
Permanent spray adhesive usually bonds best when both clean surfaces receive a light, even coat and are joined after the specified flash-off time.
Typical aerosol coverage is about 25-70 square feet per 10-12 ounce can, depending on coat thickness and whether one or two surfaces are sprayed.
Handling strength may develop within minutes, but many products need 24 hours for maximum bond development.
Spray adhesive is usually strongest in broad-area bonds, not narrow joints carrying heavy peel or structural loads.
Solvent-based spray adhesive can damage polystyrene foam, some plastics, painted surfaces, and flexible vinyl.
What Determines Whether Spray Adhesive Is Permanent?
The label and technical data sheet determine intended permanence more reliably than the word “spray.” Adhesive aerosol products use different resin systems, tackifiers, solvents, and propellants, so two cans that look similar can have completely different peel strength, temperature resistance, and removability.
A permanent product normally uses wording such as permanent bond, high strength, industrial, automotive, or laminating adhesive. A temporary product normally uses wording such as repositionable, removable, mounting, or stencil adhesive. Those descriptions indicate design intent, not a guarantee for every material.
Permanence also depends on stress. A broad sheet of fabric bonded to cardboard may last for years, while a small tab repeatedly pulled away from metal can fail quickly. Peel force is especially damaging because it concentrates stress at one advancing edge.
Permanent versus temporary formulations
| Formula type | Typical bond behavior | Common materials | Typical working use |
|---|---|---|---|
| Repositionable | Peelable, low-to-moderate tack | Paper, stencils, fabric | Temporary layouts and quilting |
| General-purpose permanent | Permanent on lightweight substrates | Paper, cardboard, fabric, felt | Crafts and laminating |
| Heavy-duty | Higher shear and peel resistance | Wood, metal, leather, rigid plastic | Panels and demanding repairs |
| Foam-safe | Permanent if compatible with foam | Polystyrene, polyurethane foam | Insulation and model work |
| High-temperature | Permanent across a wider heat range | Automotive fabric, headliners | Vehicle interiors and heated areas |
How Does Spray Adhesive Bond Materials?
Spray adhesive bonds materials by depositing a thin polymer film after aerosolized solvent evaporates. The remaining film becomes tacky or chemically sets, and pressure brings the two adhesive-coated surfaces into close contact.
Unlike water-based PVA wood glue, spray adhesive generally does not soak deeply into a porous substrate. That creates a clean, fast bond on large areas, but it also means dust, oil, loose fibers, and surface coatings can prevent adhesion.
The spray pattern affects strength. A mist that is too light can leave dry gaps, while a wet, heavy application can trap solvent, wrinkle fabric, and produce a soft bond. A controlled overlap pattern is more reliable than holding the nozzle stationary.
What are tack time, open time, and cure time?
These terms describe different stages of bonding and should not be treated as interchangeable.
| Timing stage | Typical range | What the user should observe | Consequence of missing it |
|---|---|---|---|
| Flash-off | 30 seconds-3 minutes | Surface feels tacky, not wet | Solvent may remain trapped |
| Open time | 5-15 minutes | Coated surfaces can still mate | Adhesive may lose useful tack |
| Handling strength | 5-60 minutes | Bond stays together under light handling | Early loading can shift materials |
| Functional cure | 15 minutes-24 hours | Bond reaches intended performance | Heat or moisture may weaken it |
| Full reliability check | 24-72 hours | Test bond survives expected use | Premature testing can mislead |
Product directions control these ranges. Temperature, humidity, coat weight, airflow, and substrate porosity can move the actual timing outside typical values.
Which Types of Spray Adhesive Create a Permanent Bond?
Permanent spray adhesive is selected by the materials and environment, not by maximum tack alone. General-purpose formulas suit lightweight indoor materials, while heavy-duty, automotive, marine, and foam-safe formulas address more demanding conditions.
General-purpose permanent spray adhesive
General-purpose spray adhesive is commonly used for paper, poster board, cardboard, fabric, felt, photographs, and light laminates. It offers speed and broad coverage, but it is a poor choice for structural joints, continuous outdoor exposure, or surfaces that become hot.
Heavy-duty spray adhesive
Heavy-duty products typically provide greater initial tack and better resistance to shear. They are more suitable for leather, rubber, wood veneer, some metals, and rigid plastics, although compatibility must still be confirmed because “heavy-duty” does not mean universal.
Specialty and high-temperature formulas
Automotive headliner adhesive is designed for fabric-to-substrate bonding under elevated cabin temperatures. Marine and exterior products may resist moisture better, but water resistance, UV resistance, and temperature resistance are separate properties. A product can have one without having the others.
Foam-safe spray adhesive
Foam-safe adhesive uses a formulation intended not to dissolve or melt the foam. Standard solvent-based aerosol adhesive can attack expanded polystyrene, often called EPS or Styrofoam, and some polyurethane foams. Always test a hidden area before covering a large panel.
Which Materials Can Spray Adhesive Bond?
Spray adhesive works best when the substrate is clean, dry, stable, and broad enough to distribute stress. The material pair matters more than the adhesive’s stated strength because coatings, plasticizers, porosity, and surface energy control wetting.
| Material pair | Suitability | Preparation | Main risk |
|---|---|---|---|
| Paper to cardboard | High | Remove dust; use light coat | Wrinkling from excess solvent |
| Fabric to foam | Medium-high | Test foam and fabric dye | Solvent attack or bleed-through |
| Wood veneer to panel | Medium-high | Sand lightly and remove dust | Bubbles from uneven pressure |
| Metal to laminate | Medium | Degrease with compatible cleaner | Poor wetting on glossy metal |
| Leather to fabric | Medium | Clean and roughen only if allowed | Stiffening or visible strike-through |
| Polystyrene foam | Formula-dependent | Use foam-safe product | Melting and surface collapse |
| Polyethylene plastic | Low-medium | Abrasion or primer may be needed | Low surface energy |
| Vinyl to substrate | Formula-dependent | Check plasticizer compatibility | Softening, shrinkage, or curl |
Spray adhesive is not automatically suitable for polyethylene, polypropylene, silicone, waxed surfaces, dusty masonry, or flexible materials that move at different rates. A permanent label cannot overcome incompatible chemistry.
How Do You Apply Spray Adhesive for a Permanent Bond?
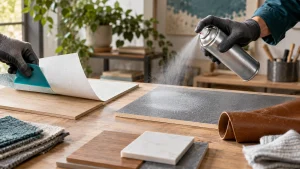
Apply spray adhesive in a ventilated area, prepare both surfaces, spray a thin uniform coat at the label’s distance, allow the specified flash-off, then align and press the materials together. A typical small project takes 10-20 minutes to assemble and up to 24 hours to cure.
Before you start
| Requirement | Typical specification |
|---|---|
| Adhesive | 10-12 ounce can, compatible formula |
| Work area | Outdoor location or cross-ventilated workspace |
| Temperature | Usually 15-30°C, or 60-86°F |
| Tools | Masking paper, gloves, ruler, roller or squeegee |
| Surface condition | Clean, dry, dust-free, stable |
| Project cost | Typically $8-$25 for one can |
Step 1: Confirm compatibility
Read the can for material restrictions, temperature limits, and indoor-use instructions. Spray a test patch on each substrate, then wait at least 24 hours before judging the bond.
Success checkpoint: The test patch does not melt, wrinkle, discolor, remain oily, or release under moderate hand pressure.
Common mistake: Assuming the same adhesive works on wood, vinyl, plastic, and foam.
Step 2: Prepare and mask the work area
Remove dust and grease with a substrate-compatible cleaner. Mask edges, nearby floors, hardware, and finished faces because aerosol droplets travel beyond the visible spray pattern.
Success checkpoint: The surfaces are dry and the intended bond area is fully exposed.
Common mistake: Cleaning with a solvent that softens paint or leaves an oily residue.
Step 3: Apply a light, even coat
Shake the can according to its label and hold it at the specified distance, commonly 15-30 centimeters. Move continuously in parallel passes, overlapping each pass slightly rather than creating a wet pool.
Success checkpoint: The surface looks uniformly covered without puddles or dry stripes.
Common mistake: Spraying heavily to compensate for an absorbent substrate.
Step 4: Allow flash-off
Wait until the adhesive feels tacky but does not transfer wet material to a fingertip or scrap test surface. The correct wait may be 30 seconds-3 minutes, but the can’s instructions take priority.
Success checkpoint: The adhesive grips on contact without remaining liquid.
Common mistake: Joining immediately and trapping solvent inside the bond.
Step 5: Align and apply pressure
Mate the pieces carefully because tacky spray adhesive can grab before final alignment. Apply firm, even pressure with a roller, squeegee, or clean block, working from the center outward to remove air pockets.
Success checkpoint: No bubbles, lifted corners, or sliding appear after pressure is released.
Common mistake: Pressing only the center while leaving edges poorly contacted.
Step 6: Cure before loading
Leave the assembly undisturbed for the product’s stated cure period. Avoid tension, washing, heat, bending, and outdoor exposure until the bond has reached functional strength.
Success checkpoint: A concealed edge resists careful lifting without stringing, creep, or soft residue.
Common mistake: Testing final strength after only five minutes.
How Much Spray Adhesive Do You Need?
A typical 10-12 ounce can covers approximately 25-70 square feet for one light coat, but two-sided application can reduce effective project coverage to roughly 12-35 square feet. Absorbent fabric, overspray, heavy coats, and repeated passes reduce coverage.
| Project | Approximate bond area | Typical cans |
|---|---|---|
| Four 20-by-30-inch poster boards, one side | 16.7 square feet | 1 can |
| Two 4-by-8-foot lightweight panels, one side | 64 square feet | 1-3 cans |
| One 6-by-9-foot fabric panel, both surfaces | 108 square feet of sprayed surface | 2-4 cans |
| Small 12-by-12-inch craft pieces | 1-5 square feet | A fraction of one can |
| Vehicle headliner panel | 25-40 square feet, both surfaces as directed | 1-2 cans |
Coverage is a planning range, not a performance specification. The adhesive layer must be continuous enough to prevent dry islands, but excess product rarely increases strength proportionally.
Is Spray Adhesive Waterproof, Heatproof, or Suitable Outdoors?
Spray adhesive is waterproof or heat resistant only when the product label specifically provides those properties. Many indoor permanent formulas tolerate occasional humidity but soften under standing water, prolonged condensation, high heat, or ultraviolet exposure.
| Exposure condition | Typical indoor formula | Exterior or specialty formula | Selection question |
|---|---|---|---|
| Occasional humidity | Often acceptable | Usually acceptable | Does the label list moisture resistance? |
| Direct rain | Usually unsuitable | Sometimes suitable | Is the cured bond rated for immersion or weather? |
| Sunlight | UV aging possible | Better if UV-rated | Does the data sheet mention UV stability? |
| 60-80°C heat | May soften | Often better | What is the continuous temperature rating? |
| Vehicle cabin heat | Often unreliable | Automotive headliner formula preferred | Is the adhesive designed for headliners? |
| Freezing cycles | Bond may become brittle | Product-dependent | Has freeze-thaw performance been specified? |
Outdoor permanence also depends on the materials. Wood can swell, fabric can absorb water, and plastic can expand differently from metal. The adhesive may remain intact while the substrate interface fails.
Is Spray Adhesive Stronger Than Other Glues?
Spray adhesive is stronger than many alternatives for broad, lightweight laminations, but it is usually not the best choice for concentrated structural loads. PVA, cyanoacrylate, epoxy, and contact cement each perform better in different joint geometries.
| Adhesive | Best geometry | Typical strength profile | Main limitation |
|---|---|---|---|
| Spray adhesive | Large-area laminate | Flexible, distributed bond | Overspray and limited structural load |
| PVA wood glue | Close-fitting porous joint | Strong wood-to-wood bond | Slow drying and moisture sensitivity by grade |
| Cyanoacrylate | Small rigid joint | Fast, hard bond | Brittle under shock and peel |
| Two-part epoxy | Gap-filling joint | High shear and gap tolerance | Longer cure and accurate mixing |
| Contact cement | Large laminate surfaces | Immediate high tack after flash-off | Difficult repositioning and strong solvent odor |
The right comparison is not “Which glue is strongest?” It is “Which adhesive tolerates the load, substrate, temperature, and movement?” Spray adhesive wins when speed, thinness, flexibility, and broad coverage matter more than maximum structural strength.
What Causes Permanent Spray Adhesive to Fail?
Permanent spray adhesive commonly fails because of contamination, incompatible materials, wrong timing, inadequate pressure, excessive adhesive, or environmental stress. Failure analysis should begin at the interface, not with the word “permanent” on the label.
- Adhesive transfers wetly: Wait longer for solvent flash-off, improve airflow, and apply less product.
- Edges lift first: Increase edge coverage, apply uniform pressure, and reduce peel stress.
- Foam melts: Remove the damaged surface and switch to a foam-safe formulation.
- Bond slides during assembly: Use alignment marks and allow more tack before mating.
- Bond becomes gummy: Excess thickness or trapped solvent may be preventing cure.
- Surface releases cleanly: Clean contamination, abrade only when appropriate, and retest.
- Fabric bleeds through: Use a lighter coat, a lower-solvent formula, or a barrier layer.
- Bond fails after heat exposure: Select an adhesive with a documented continuous temperature rating.
A useful practitioner rule is to test the weakest interface first. If the fabric tears before the adhesive releases, the bond may already exceed the substrate’s strength. If the adhesive peels from a glossy plastic sheet, increasing pressure alone will not solve the surface-energy problem.
How Do You Remove Permanent Spray Adhesive?
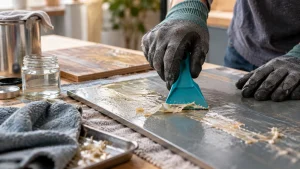
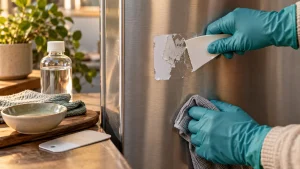
Remove permanent spray adhesive by lifting thick residue mechanically, softening the remaining film with a substrate-compatible cleaner, and testing every solvent in an inconspicuous area first. Isopropyl alcohol, mineral spirits, citrus cleaners, or vegetable oil may work on some surfaces and damage others.
| Surface | First removal approach | Avoid initially |
|---|---|---|
| Glass | Plastic scraper and isopropyl alcohol | Metal blade on coated glass |
| Bare metal | Plastic scraper and mineral spirits | Abrasive pads on polished finishes |
| Painted wall | Gentle heat and mild cleaner | Strong solvent and aggressive scraping |
| Fabric | Freeze or blot test, then fabric-safe cleaner | Rubbing wet adhesive deeper |
| Wood finish | Plastic scraper and finish-safe cleaner | Unverified acetone |
| Plastic | Mechanical lifting and mild detergent | Acetone or lacquer thinner |
Removal can destroy the substrate, especially on paper, foam, painted drywall, and thin veneer. Permanent spray adhesive is therefore a poor choice where future repositioning is likely.
Frequently Asked Questions
Is spray adhesive permanent on cardboard?
Permanent spray adhesive can bond cardboard for years when the cardboard is clean, dry, and protected from moisture. Lightweight cardboard may tear before the adhesive releases. Use a light coat because excess solvent can curl, stain, or wrinkle the sheet.
Can spray adhesive hold fabric to a wall?
Spray adhesive can hold lightweight fabric to a wall temporarily or permanently, depending on the formula and wall finish. Painted walls, textured surfaces, dust, humidity, and fabric weight reduce reliability. Test removal first because permanent adhesive can pull paint or leave residue.
Can I use spray adhesive on photographs?
Photo-safe spray adhesive can mount photographs, but general-purpose aerosol adhesive may discolor prints, stain paper, or cause curling. Choose a product specifically labeled for photos or archival mounting, spray in a controlled area, and avoid saturating thin photographic paper.
Does spray adhesive expire?
Spray adhesive can lose performance as the resin, solvent, or propellant ages, especially after storage in high heat or below freezing. A can may still spray while producing weak or uneven adhesive. Store it according to the label and test an old can before using it on a finished project.
Should I spray one side or both sides?
Spray one or both sides according to the manufacturer’s instructions and the materials being joined. Two-sided application can improve coverage on dense, nonporous substrates, but it also increases solvent, cost, and cure time. Porous materials may need a light seal coat rather than a heavy second coat.
The Bottom Line
Spray adhesive is permanent when the can specifies a permanent formulation and the adhesive is matched to the materials, load, temperature, and moisture exposure. Temporary sprays remain repositionable, while heavy-duty and specialty formulas provide more durable bonds. For reliable results, test compatibility, apply a thin even coat, allow proper flash-off, press the full area, and wait for complete cure before loading the joint.