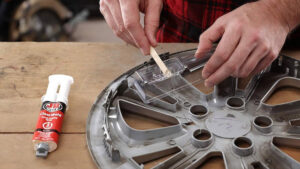
To remove super glue from wood, let the cyanoacrylate harden, identify the surface finish, and lift the deposit with the least aggressive suitable method. Use a plastic scraper first, then apply a tiny amount of acetone or commercial debonder only after a hidden-area test. Sanding is usually the final step for unfinished wood.
Key Facts at a Glance
- Dried cyanoacrylate is best removed in layers, not by flooding the wood with solvent.
- Acetone can soften super glue, but it can also dissolve shellac, damage lacquer, dull some paints, and mark certain plastics.
- A plastic razor, old bank card, or nylon scraper is safer than a screwdriver or forceful metal blade.
- Unfinished wood usually needs localized scraping followed by progressive sanding.
- Veneer, MDF, laminate edges, and antique finishes tolerate less moisture and solvent exposure than solid unfinished timber.
- A typical small glue spot takes 5-20 minutes to remove and costs $0-$15 in materials.
Before You Start
The surface determines the removal method more than the adhesive brand does. A glossy polyurethane tabletop, a raw pine board, and a shellac-coated antique require different levels of solvent exposure because the glue and the finish occupy different layers.
Preparation checklist
| Item | Typical amount or specification | Purpose | Typical cost |
|---|---|---|---|
| Nitrile gloves | 1 pair, solvent-resistant | Protect skin from acetone and debonder | $0.25-$1 |
| Plastic scraper | 1, 20-40 mm edge | Lift softened or raised glue | $1-$6 |
| Cotton swabs | 4-8 swabs | Apply solvent precisely | $2-$5 |
| Acetone | 5-15 mL for a small spot | Soften cured cyanoacrylate | $3-$7 |
| Painter’s tape | 30-60 cm | Protect surrounding finish during sanding | $3-$8 |
| Sandpaper | 600, 800, and 1,000-1,200 grit | Blend a mark on raw wood | $5-$8 |
Work in ventilation, keep acetone away from flames, and do not mix solvents. Cyanoacrylate can bond cotton and wool rapidly while producing heat, so use synthetic applicators where practical and keep solvent-soaked cotton away from clothing.
Do not begin by wiping a liquid glue spill. A wet smear can spread across a larger area and force adhesive into open pores. If the glue is still liquid, place a disposable plastic edge beside the spill and remove the bulk without dragging it across the surface; then allow the remaining film to cure.
Identify the wood surface
| Surface | Common appearance | Main risk | Starting method |
|---|---|---|---|
| Raw hardwood or softwood | Visible open grain, no sheen | Glue penetrates pores and sanding creates a dip | Scrape, then localized sanding |
| Polyurethane or varnish | Clear, glossy or satin film | Solvent can cloud or soften topcoat | Plastic scraper, then spot test |
| Lacquer | Thin, smooth, often glossy film | Acetone may attack the finish quickly | Mechanical removal first |
| Shellac or waxed antique finish | Warm sheen, age-related patina | Alcohol or acetone can strip repair layers | Gentle scraping and conservator advice |
| Painted wood | Opaque color coat | Solvent can remove paint | Plastic scraper and minimal solvent |
| Veneer or MDF | Thin face over a composite core | Moisture can swell edges or lift veneer | Dry mechanical removal |
Which Method Fits the Wood?
The safest choice is the least aggressive method that can reach the glue. Start with dry mechanical lifting, test a solvent on an inconspicuous area, and reserve sanding for surfaces that can accept a small amount of material loss.
| Method | Best surface or situation | Working time | Main benefit | Main limitation |
|---|---|---|---|---|
| Plastic scraping | Raised spot on finished wood | 2-10 minutes | No chemical attack | May not remove a flat residue |
| Acetone swab | Small deposit on a tested finish | 5-15 minutes | Fast softening | Can damage lacquer, shellac, paint, or plastic |
| Commercial debonder | Thick cured buildup | 10-25 minutes | Controlled gel or liquid action | Higher cost and product-specific compatibility |
| Mineral oil | Delicate surface needing a mild first attempt | 30-60 minutes | Low solvent stress | Usually loosens edges rather than dissolving glue |
| Sanding | Raw, unfinished wood | 10-30 minutes | Removes residue and staining | Can create a visible depression |
The comparison table gives a practical order, not an absolute guarantee. A fresh polyurethane coating may tolerate a brief acetone test, while an old or thin lacquer coating may fail within seconds. Finish age, formulation, and previous repairs matter.
How to Remove Super Glue From Wood Step by Step
Step 1: Let the Glue Cure Completely
Allow a smeared or raised deposit to harden before attempting detailed removal. A thin cyanoacrylate film may become hard within minutes, while a thick mound can remain soft underneath for several hours; full strength commonly develops over about 24 hours.
You will know the glue is ready when a plastic edge produces a dry shaving or chips the surface instead of dragging a gummy trail. Do not use a hair dryer or heat gun to accelerate curing because heat can soften finishes, move glue deeper into pores, and discolor some coatings.
Common mistake: wiping a half-cured spot.
Correction: stop spreading it, remove only loose excess, and wait until the remaining deposit is rigid.
Step 2: Remove the Raised Bulk Mechanically
Hold a plastic scraper almost parallel to the wood and push toward the center of the spot. A 10-20-degree approach angle supplies enough leverage to lift a ridge without digging into a finish.
For a stubborn mound on a smooth, hard coating, a fresh razor can work, but the blade should remain nearly flat and should never be forced across the grain. Use masking tape around the repair area when the surrounding finish is more valuable than the glue residue.
You will know the step worked when the raised profile is gone and only a thin film or discolored outline remains. Stop scraping once the tool begins contacting the wood or finish continuously.
Common mistake: using a screwdriver, chisel, or steep razor angle.
Correction: replace it with a plastic scraper and remove thinner layers.
Step 3: Test the Finish Before Applying Solvent
Choose a hidden location, such as the underside or rear edge, and place one small drop of the intended solvent there. Wait 2-5 minutes, wipe it dry, and inspect the color, gloss, tackiness, and texture under angled light.
A solvent test is successful only when the test area remains unchanged after drying. A dull halo, softened surface, transferred color, or sticky feel means the solvent is incompatible or the exposure is too long.
| Test result | Interpretation | Action |
|---|---|---|
| No color or gloss change after 5 minutes | Short exposure may be tolerated | Use a controlled swab application |
| Surface becomes tacky | Coating is softening | Stop and use dry scraping |
| Gloss turns cloudy | Finish is being attacked | Stop solvent use and allow it to dry |
| Color transfers to swab | Paint, stain, or shellac is dissolving | Do not continue |
| Veneer edge swells | Liquid has reached substrate | Stop, blot, and dry immediately |
Step 4: Soften the Residue With Acetone or Debonder
For a successful acetone test, dampen a cotton swab rather than soaking the wood. Touch the swab to the glue for 10-20 seconds, lift it, and try rolling the softened residue toward the center with a plastic scraper. Repeat in short cycles instead of leaving a wet cloth over the area.
Acetone is a powerful solvent, but cured cyanoacrylate does not behave like a simple water-soluble adhesive. Acetone often softens, swells, or weakens the deposit enough for mechanical removal; it may not make a thick cured mass disappear.
Commercial cyanoacrylate debonders commonly use nitromethane or other specialized solvents. Follow the label’s dwell time, which is often 5-10 minutes, and use only the amount needed to cover the glue. A debonder is not automatically safe for varnish, paint, veneer, or antique finishes, so perform the same hidden-area test.
You will know the treatment worked when the glue turns chalky, rubbery, or easy to roll away rather than remaining glass-hard. Blot residue with a clean synthetic cloth and stop once the adhesive is gone.
Common mistake: flooding the spot to speed up removal.
Correction: use repeated 10-20-second applications and dry between cycles.
Step 5: Try Oil Only When Solvent Exposure Is Unacceptable
Mineral oil can help lift an edge when a delicate finish makes acetone too risky. Apply a thin film around the deposit, cover it with plastic film for 30-60 minutes, and test whether a plastic card can slide beneath the edge.
Oil does not reliably dissolve cured cyanoacrylate. Its benefit comes from lubrication and slow penetration at the boundary between adhesive and finish. Vegetable oils can leave odor, oxidation residue, or a greasy film, so mineral oil is usually easier to clean.
Do not assume oil is harmless on every antique or unfinished surface. Oil can darken porous wood and complicate later refinishing. Test it in a concealed area, then remove residue with a small amount of mild dish detergent on a barely damp cloth.
Step 6: Sand Raw Wood in Controlled Layers
Sand only after scraping has removed the raised glue. Start with 600-grit paper wrapped around a small sanding block, use light strokes with the grain, and inspect every 10-15 seconds.
If the adhesive remains, move briefly to 400-500 grit, then return to 600, 800, and 1,000-1,200 grit to reduce visible scratches. Keep the sanding block smaller than the taped repair boundary, and avoid pressing harder over the center because that creates a hollow.
You will know the step worked when the surface feels level under a fingertip and the residue disappears under both direct and angled light. Raw wood may still show a darker or lighter patch because cyanoacrylate can seal pores and alter stain absorption.
How Long and How Much Does Removal Take?
A small, accessible glue spot usually takes 5-20 minutes when the finish is intact. Thick buildup, glue in open grain, and repairs requiring refinishing can take 30-90 minutes and may need additional drying time.
| Scenario | Materials cost | Active work | Possible extra work |
|---|---|---|---|
| Small spot on polyurethane | $1-$7 | 5-15 minutes | Local polish if sheen changes |
| Thick deposit on tested finish | $5-$15 | 15-30 minutes | Multiple debonder applications |
| Raw wood with staining | $5-$10 | 15-30 minutes | Restaining or clear coating |
| Veneer or MDF edge | $1-$8 | 10-25 minutes | Veneer repair if swollen |
| Antique or shellac surface | $0-$15 initially | 10-30 minutes | Professional finish matching |
Typical figures vary by glue thickness, finish chemistry, and access. The actual cost rises sharply when the surrounding coating must be stripped and refinished, so a $3 adhesive stain can become a furniture-repair project if solvent testing is skipped.
What Should You Avoid?
Several popular home remedies create more damage than they remove. Vinegar contains water and mild acetic acid, neither of which reliably dissolves cured cyanoacrylate; prolonged moisture can swell wood fibers or veneer edges.
Rubbing alcohol may affect some uncured adhesive and can damage shellac, but it is not a dependable remover for a thick cured deposit. Nail-polish remover may contain acetone, ethyl acetate, oils, or fragrance, so its behavior is less predictable than labeled pure acetone.
WD-40 can lubricate a scraper but leaves an oily residue and does not reliably break down the adhesive. Toothpaste is a mild abrasive, not a cyanoacrylate solvent, and can produce a polished halo around the spot.
| Attempt | Likely result | Main risk | Better choice |
|---|---|---|---|
| Vinegar soak | Little effect on cured glue | Swelling and staining | Dry scraping |
| Rubbing alcohol | Variable, usually weak | Shellac damage | Tested debonder |
| Nail-polish remover | May soften glue | Unknown additives and finish attack | Pure acetone spot test |
| WD-40 | Lubricated surface | Oily residue | Mineral oil only as a controlled trial |
| Heat gun | Softened finish or glue movement | Scorching and spreading | Patience and short solvent cycles |
| Steel wool | Abraded surrounding finish | Scratches and gray particles | Plastic scraper and fine abrasive |
How Do You Fix Common Removal Failures?
The glue leaves a white haze
White haze, sometimes called cyanoacrylate bloom, forms when vapor or fine adhesive deposits around the curing area. Do not immediately sand the whole area. Clean the surface with a compatible mild cleaner, inspect under angled light, and remove only the raised material.
If the haze has altered the clear coat, polishing may restore gloss but cannot replace dissolved finish. A small amount of compatible furniture polish may improve appearance, while shellac, lacquer, or polyurethane damage may require a spot repair.
The finish becomes dull or sticky
Stop solvent use immediately and allow the area to dry in ventilation. Do not rub aggressively while the coating is soft because friction can spread the damage beyond the original spot.
After complete drying, test a compatible polish in another hidden area. If the coating remains soft, shows a bare patch, or transfers color, the correct repair is finish matching rather than additional solvent.
The glue is inside a crack or joint
Do not force acetone into a structural joint. Solvent can weaken nearby adhesive, discolor end grain, or migrate beneath a veneer.
Remove accessible material with a dental pick or plastic shim, then consider whether the joint needs to remain bonded. If the glue is part of a repair, removing it may destabilize the object and should be handled by a furniture restorer.
Veneer or MDF swells
Blot liquid immediately and keep the piece level while it dries. Do not clamp a swollen veneer flat while it is wet, because trapped moisture can create a larger bubble.
Once dry, a professional may reattach or replace the veneer. Sanding through a veneer face can happen in seconds, so do not treat thin veneer like solid hardwood.
Variations for Common Situations
Removing super glue from a finished table
Use a plastic scraper first, then test acetone beneath the tabletop. Keep the solvent confined to the adhesive with a cotton swab, and protect the surrounding finish with painter’s tape if sanding becomes necessary.
A table with polyurethane is more forgiving than one with lacquer or shellac, but visual inspection alone cannot identify the coating reliably. Always test.
Removing super glue from unfinished wood
Scrape the raised deposit, then sand locally with a block and progressively finer paper. If the glue has penetrated deeply, complete removal may require sanding a broader area and reapplying stain or finish so the repair blends.
Do not soak raw wood with acetone. Solvent can carry dissolved adhesive farther into the grain and produce a larger stained region.
Removing super glue from laminate
Treat laminate as a thin plastic surface over a wood-based core. Use a plastic scraper and minimal solvent only after testing a hidden edge, because acetone can soften or discolor some decorative layers and can attack exposed seams.
Never flood an edge or seam. Liquid entering the substrate can cause swelling or delamination.
Removing glue from an antique or valuable object
Use dry mechanical lifting first and avoid improvised solvent experiments. Shellac, wax, historic varnish, and previous restoration layers can respond differently even on adjacent areas.
If the object has monetary, historical, or sentimental value, stop after the bulk is removed and consult a furniture conservator. A small remaining spot is usually less damaging than a stripped original finish.
Practitioner Rules That Prevent Bigger Repairs
- Treat the finish as the fragile component. The adhesive spot is usually small, but a solvent halo can become several centimeters wide and require color matching.
- Work from the outside boundary inward. Center-directed scraping prevents softened glue from being dragged across clean finish.
- Use exposure cycles, not solvent baths. Ten brief applications are easier to control than one ten-minute soak.
- Judge success after drying. A temporarily glossy or cloudy area can change appearance as solvent evaporates, so inspect only after the surface is fully dry.
- Preserve surrounding texture. A perfectly flat spot in a hand-finished or aged surface may look more conspicuous than a tiny remaining adhesive mark.
FAQ
Will acetone remove super glue from wood completely?
Acetone can soften and weaken cyanoacrylate, allowing scraping to remove it, but complete dissolution is not guaranteed for thick cured deposits. Acetone can also damage lacquer, shellac, paint, and some synthetic finishes. Use a damp swab, short exposure cycles, and a hidden-area compatibility test.
Can I remove super glue from wood without sanding?
Yes, a raised deposit on a finished surface can often be removed with a plastic scraper, mineral oil, or a tested commercial debonder. Sanding becomes more likely when glue has penetrated raw grain, sealed pores, or left a visible stain that sits below the surface.
Is nail-polish remover safe for wooden furniture?
Nail-polish remover is not reliably safe because formulations vary. Some contain acetone, while others contain ethyl acetate, oils, fragrances, or water. Any of these ingredients can affect a finish differently. Use labeled pure acetone only after testing, and apply it with a precision swab.
Can baking soda remove dried cyanoacrylate?
Baking soda does not reliably remove cured cyanoacrylate from wood. Baking soda can accelerate cyanoacrylate curing and create a hard, abrasive composite, so rubbing it into the adhesive may make the spot more difficult to remove and increase surface scratching.
How do I remove super glue from a wooden floor?
For a finished floor, scrape the raised glue with plastic, test a tiny amount of acetone near a wall or under furniture, and work in short cycles. Avoid flooding seams because liquid can enter between boards. Raw floorboards may require localized sanding followed by matching finish.
Should I use a razor blade on a wooden surface?
A razor can remove a raised deposit from hard, smooth finish when held nearly flat, but it is easy to gouge wood or cut a coating. A plastic razor or nylon scraper is the safer default. Use metal only when the surface is stable, the blade is fresh, and the operator can maintain a shallow angle.
The Bottom Line
To remove super glue from wood, let the cyanoacrylate cure, scrape away the raised bulk, identify the finish, and test every solvent in a hidden location. Use short acetone or debonder applications on compatible finished surfaces, oil only as a mild edge-loosening option, and localized sanding for raw wood. The safest method is the one that removes the adhesive while preserving the surrounding finish.