To remove adhesive from fabric, first identify the glue and fiber, then scrape away excess material, soften the residue with the safest compatible treatment, blot from the reverse side, and wash according to the care label. Most fresh sticker residue takes 10-30 minutes; cured super glue or heat-set stains may require repeated treatment or professional cleaning.
Key Facts
Freezing hardens hot glue and many pressure-sensitive adhesives, making surface material easier to lift.
Acetone can dissolve cyanoacrylate super glue but can damage acetate, triacetate, modacrylic, and some dyes.
A tumble dryer can permanently set remaining adhesive, so air-dry the garment until inspection is complete.
Dish soap removes oily adhesive removers, but it does not reliably dissolve cured super glue.
Solvent should usually be applied from the back of the stain onto white absorbent towels.
A hidden-area test must check both color transfer and fiber damage before treatment.
What Kind of Adhesive Is on the Fabric?
The adhesive type determines the first treatment because water-based glue, hot-melt glue, tape residue, and cyanoacrylate respond to different physical and chemical actions. A washable school glue needs hydration and surfactants, while super glue needs a solvent such as acetone under strict fiber restrictions.
| Adhesive type | Typical appearance | First treatment | Typical time |
|---|---|---|---|
| School or craft glue | White, translucent, hard film | Warm water and detergent | 15-30 minutes |
| Sticker or tape residue | Clear, amber, or greasy tack | Scrape, alcohol, or citrus remover | 5-20 minutes |
| Hot-melt glue | Thick raised bead or brittle lump | Freeze, chip, then blot residue | 10-25 minutes |
| Super glue | Clear, glassy, rigid patch | Acetone only on compatible fibers | 5-20 minutes |
| Fabric glue | Flexible or rubbery film | Care-label wash, alcohol test | 20-40 minutes |
| Contact adhesive | Yellow or amber rubbery layer | Professional solvent assessment | 30-60 minutes |
Look at the stain before wetting it. A raised bead usually permits mechanical removal, whereas a flat shiny patch has penetrated the weave and needs controlled blotting.
If the adhesive is unknown, do not begin with acetone. Use the progressive sequence of scrape, detergent, alcohol, and only then a stronger compatible solvent.
What Should You Check Before Removing Adhesive?
Check the fabric care label, fiber content, dye stability, and adhesive location before applying any liquid. The safest removal method for cotton may ruin acetate, damage a printed design, or create a larger ring on upholstery.
Fabric compatibility
| Fabric or surface | Generally safer starting method | Avoid first | Main risk |
|---|---|---|---|
| Cotton or linen | Scrape, detergent, 70-91% isopropyl alcohol | Uncontrolled acetone | Dye bleeding |
| Polyester | Scrape, detergent, isopropyl alcohol | High heat on residue | Shiny heat mark |
| Nylon | Cold scraping, detergent, cautious alcohol | Strong heat and prolonged solvents | Surface distortion |
| Silk | Dry scraping and professional cleaning | Water saturation, acetone, alcohol | Water rings and dye loss |
| Wool | Cold scraping and specialist cleaner | Alkaline detergent and heat | Felting and shrinkage |
| Acetate or triacetate | Dry scraping and professional cleaning | Acetone and nail-polish remover | Fiber dissolution |
| Canvas or denim | Scraping, detergent, spot-tested alcohol | Aggressive brushing | Abrasion and color loss |
Perform a hidden-area test
- Put one drop of the planned product on an inside seam.
- Wait the full intended contact time, usually 2-5 minutes.
- Blot with white paper towel and inspect for dye transfer.
- Check whether the fabric becomes sticky, rough, lighter, or distorted.
A failed spot test means the product is unsuitable. Do not assume dilution will make a damaging solvent safe, because the fabric may still soften or the dye may still dissolve.
What Tools and Materials Do You Need?
A basic adhesive-removal kit costs approximately $5-$20 when household items are already available. Gather a plastic bag, ice, a blunt scraper, white paper towels, cotton swabs, liquid dish soap, laundry detergent, and one compatible solvent.
| Item | Useful quantity | Typical price | Purpose |
|---|---|---|---|
| Ice and resealable bag | 1 bag, 250-500 g ice | $0-$2 | Harden raised adhesive |
| Plastic card or dull spoon | 1 | $0-$3 | Lift softened or frozen glue |
| White paper towels | 10-20 sheets | $1-$4 | Absorb dissolved adhesive |
| Liquid dish soap | 1-2 teaspoons | $2-$5 | Emulsify oils and residue |
| Isopropyl alcohol | 5-15 mL per attempt | $3-$8 | Treat many tape residues |
| Acetone | 2-10 mL per attempt | $3-$8 | Dissolve compatible super glue |
| Laundry detergent | 1-2 teaspoons pretreatment | $5-$12 | Remove remaining film |
Work near ventilation, keep acetone and alcohol away from flames, and use nitrile gloves if repeated solvent contact is necessary. Do not mix solvents, bleach, ammonia, or other cleaning chemicals.
How to Remove Adhesive From Fabric
Use a six-step process that begins with dry removal and ends with a no-heat inspection. A small fresh residue usually takes 10-30 minutes, while a dried or previously dried stain may take two or three treatment cycles.
Step 1: Identify the fabric and adhesive
Read the care label and classify the residue as water-based glue, tape residue, hot glue, super glue, or an unknown adhesive. Remove loose dirt around the area so particles do not scratch the fabric during scraping.
Success checkpoint: You can name the fiber and choose a compatible first treatment.
Common mistake: Treating an unknown stain with acetone before checking for acetate or triacetate.
Step 2: Remove the dry bulk
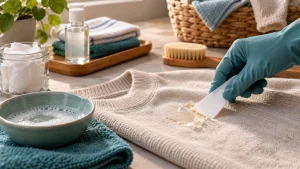
Place the garment flat. For a raised adhesive, put ice in a plastic bag and hold it against the residue for 10-15 minutes; for a larger washable item, freezing it for about 1 hour can make the glue brittle.
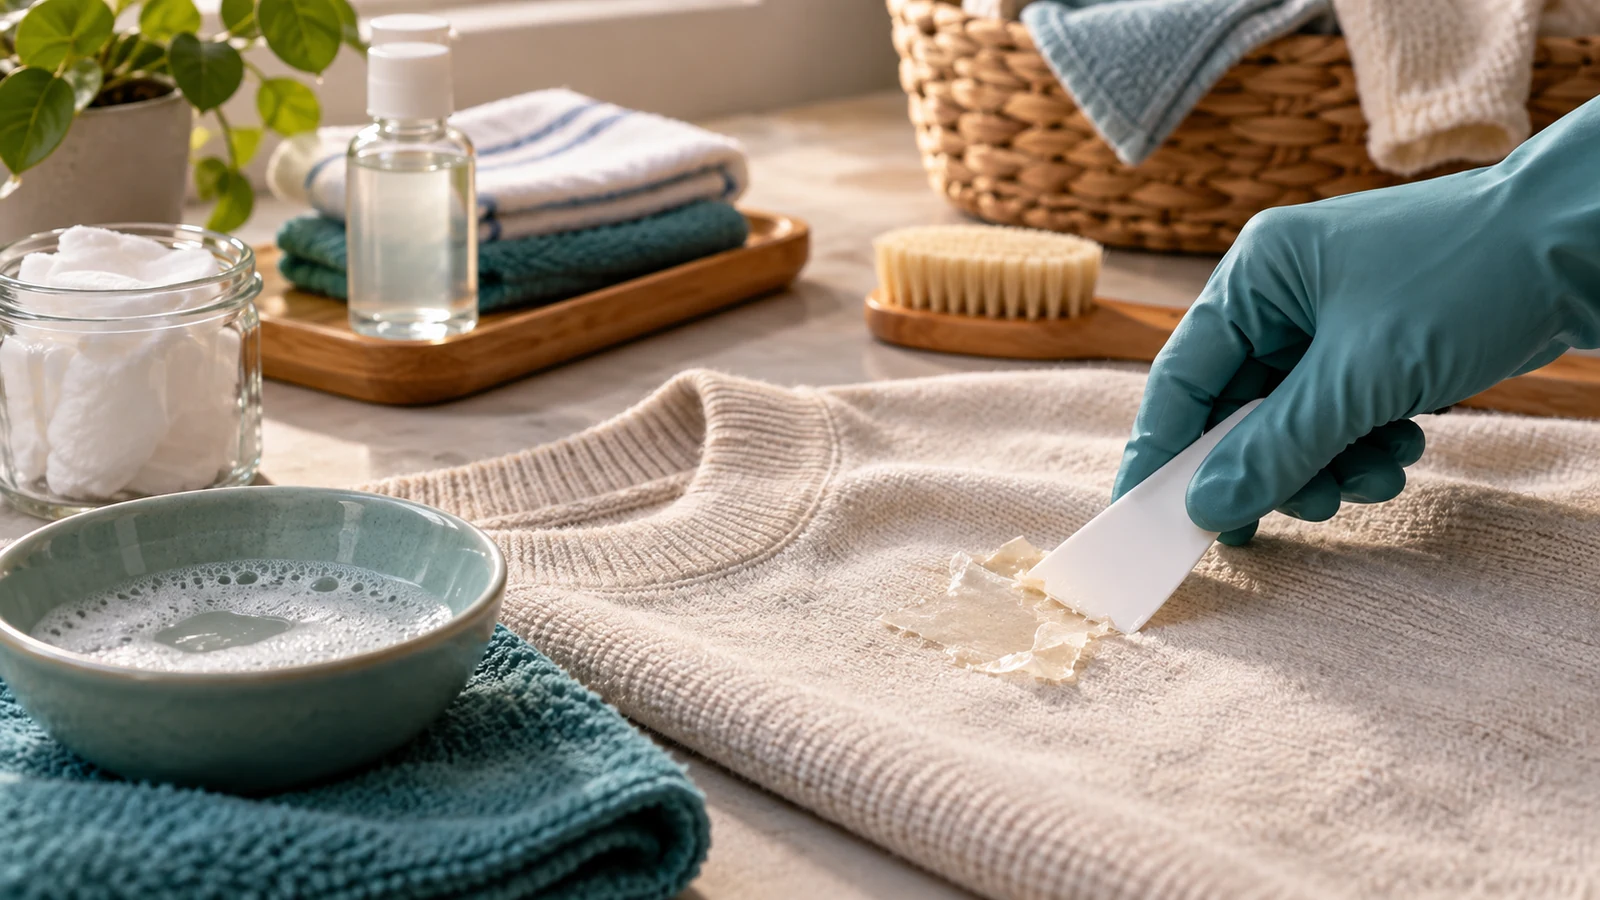
Lift the hardened material with a plastic card, dull spoon, or blunt butter knife. Scrape inward toward the center with short strokes. Stop if the fabric begins to snag or the adhesive becomes liquid.
Success checkpoint: The raised layer is gone and only a thin film remains.
Common mistake: Using a sharp blade, which can cut yarns and leave a permanent weak spot.
Step 3: Apply detergent to washable residue
Place a clean towel under the stain. Apply about 1 teaspoon of liquid dish soap or heavy-duty laundry detergent to a palm-sized mark, then gently press the fabric against itself or use a soft toothbrush for 30-60 seconds.
Leave the detergent for 10-15 minutes. Rinse from the back with warm water if the care label permits. Detergent is especially useful for school glue, oily removers, and fresh tape residue.
Success checkpoint: The surface feels less tacky and no longer transfers to a dry paper towel.
Common mistake: Scrubbing a wet adhesive outward, which spreads the stain into a larger halo.
Step 4: Choose and test a solvent
Select isopropyl alcohol for many pressure-sensitive residues and some hot-glue films. Select acetone only for compatible fibers and confirmed cyanoacrylate. Use a commercial citrus or petroleum-based adhesive remover only when the label permits and a later degreasing wash is possible.
Test the product on an inside seam. For printed garments, test the print and the surrounding fabric separately because ink and textile dye can react differently.
Success checkpoint: The hidden area shows no color transfer, softness, stickiness, or gloss change.
Common mistake: Assuming “natural” citrus or vegetable oil is automatically fabric-safe. Both can create an oil stain.
Step 5: Blot from the reverse side
Put the fabric stain-side down on several layers of white paper towel. Dampen a cotton swab or small white cloth with the tested solvent and apply it to the back of the stain.
Press rather than rub. Replace the paper towel as soon as adhesive transfers onto it, usually every 1-3 minutes. Continue for 5-10 minutes, stopping when a fresh towel remains clean and the fabric loses its tack.
Success checkpoint: Adhesive moves into the towel instead of spreading across the fabric.
Common mistake: Pouring solvent directly onto the front, which can enlarge the wet boundary and carry dye through the weave.
Step 6: Wash, inspect, and air-dry
Rinse or wash the item using the warmest temperature permitted by the care label. Use the normal detergent dose, and add an extra rinse if solvent odor remains.
Inspect the area in bright light while the fabric is damp and again when dry. Air-dry completely. Do not use a tumble dryer until the adhesive, odor, stiffness, and discoloration are gone.
Success checkpoint: The fabric lies flat, feels normal, and leaves no sticky transfer on a clean fingertip.
Common mistake: Drying after the first wash because the mark appears faint while wet.
Which Method Fits Each Adhesive?
The best removal method depends on whether the adhesive is water-soluble, thermoplastic, pressure-sensitive, or solvent-resistant. Freezing is the safest first move for raised hot glue, detergent is best for water-based glue, and acetone is reserved for compatible fabrics with cyanoacrylate.
| Adhesive | Preferred sequence | Do not use first | Expected result |
|---|---|---|---|
| School glue | Warm water, detergent, rinse | Acetone | Film softens and rinses away |
| Sticker residue | Scrape, alcohol, detergent | Iron | Tack decreases without heat-setting |
| Hot glue | Freeze, chip, alcohol blot | Direct high heat on fabric | Bead fractures, film lifts |
| Super glue | Scrape, acetone spot test, blot | Water alone | Rigid patch softens or flakes |
| Fabric glue | Scrape, label-safe detergent, alcohol test | Boiling water | Flexible residue gradually reduces |
| Contact adhesive | Scrape, professional assessment | Random household solvent | Limited home success |
How do you remove sticker or tape residue?
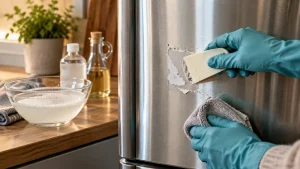
Remove sticker residue by scraping the surface, blotting with tested isopropyl alcohol, and degreasing the fabric with dish soap before washing. For a fresh residue, apply alcohol to the reverse side for 1-3 minutes, move the towel frequently, and repeat once if the fabric remains tacky.
A citrus adhesive remover can work on sturdy cotton, denim, and canvas, but petroleum distillates may leave an oil ring. Vegetable oil has the same limitation and should be followed by dish soap before laundering.
How should you remove super glue?
Remove super glue from cotton or other acetone-compatible fabric by scraping away brittle excess, testing acetone on a hidden seam, and blotting from the reverse side for 2-5 minutes at a time. Never use acetone on acetate, triacetate, modacrylic, or an untested synthetic blend.
Cured cyanoacrylate may not disappear completely because the glue can bind around individual fibers. A professional cleaner is safer for silk, wool, dark tailored garments, expensive upholstery, and any item marked dry-clean only.
How should you remove hot glue?
Freeze hot glue for 10-15 minutes, chip off the hardened bead, and treat the thin remaining film with a spot-tested solvent or detergent. Direct heat can soften hot glue, but an iron may press the adhesive deeper into the weave and create a wider stain.
A low-temperature hair dryer is appropriate only when the fabric and adhesive are known to tolerate heat, and the softened glue must be lifted immediately with paper towel. Never drag an iron across the residue.
How should you remove water-based glue?
Soak a washable fabric from the reverse side in warm water for 10-20 minutes, apply liquid detergent, and gently work the fibers together. Dried school glue may need two cycles because the outer film hydrates before the inner layer releases.
Avoid forceful brushing on knits. Mechanical abrasion can permanently raise fibers even after the glue has dissolved.
When Is Heat Safe for Adhesive Removal?
Heat is safe mainly for loosening a known thermoplastic adhesive when the care label permits it, but cold treatment is usually safer for clothing. Heat can set chemical adhesives, spread melted glue, damage synthetics, and create a glossy press mark.
| Heat or cold method | Suitable use | Setting | Main limitation |
|---|---|---|---|
| Ice bag | Raised hot glue and tape residue | 10-15 minutes | Does not dissolve thin films |
| Freezer | Small washable garment | About 1 hour | Moisture and odor afterward |
| Hair dryer | Tested hot glue on sturdy cotton | Low, 30-60 seconds | Can spread softened glue |
| Iron through paper | Only tested wax-like thermoplastic | Low setting, 5-10 seconds | Can press glue into fibers |
| Hot wash | Label-approved water-based residue | 40-60°C | Can set some synthetic adhesives |
| Tumble dryer | Final drying only | After inspection | Permanently sets remaining residue |
The paper-and-iron method is sometimes used for waxy craft glue, but it is not a general adhesive treatment. Do not iron super glue, tape residue, or an unidentified stain.
What Changes With Delicate or Specialty Fabric?
Delicate fabrics require lower mechanical force and fewer liquid treatments because silk, wool, acetate, suede, and dry-clean-only garments can suffer permanent rings, shrinkage, or fiber damage. For these materials, remove only loose bulk at home and take the item to a cleaner with the adhesive identified.
Printed clothing needs a separate test on the inked area. Alcohol may leave the textile intact while dissolving screen-print binder or transferring the graphic.
Upholstery should not be saturated. Apply a small amount to a cloth rather than the cushion, work from the perimeter toward the center, and dry with airflow to prevent a tide mark.
What If the Adhesive Has Already Been Washed or Dried?
A washed adhesive stain usually needs repeated solvent or detergent treatment, while a tumble-dried stain may be partially heat-set and more difficult to remove. Do not increase solvent quantity first; increase contact time in short, tested cycles and replace absorbent towels often.
| Situation | Recommended response | Typical extra time | Likely outcome |
|---|---|---|---|
| Fresh, still tacky residue | Scrape and blot immediately | 5-15 minutes | High removal potential |
| Washed once, not dried | Detergent or compatible solvent | 15-30 minutes | Often recoverable |
| Dried in a dryer | Freeze or scrape, then test solvent | 30-60 minutes | Partial removal possible |
| Solvent caused oil ring | Dish soap pretreatment and wash | 20-40 minutes | Usually removes secondary stain |
| Dye already faded | Stop chemical treatment | 0 minutes | Color repair may be needed |
| Fiber melted or dissolved | Professional evaluation | 1-3 days | Structural repair may be impossible |
A dryer-set mark can become a permanent change in texture even when the visible color improves. The practical goal may shift from complete removal to reducing tack, stiffness, and contrast.
Common Mistakes and How to Fix Them
| Mistake | Why it fails | Recovery action |
|---|---|---|
| Rubbing wet adhesive | Spreads glue through the weave | Blot from the reverse side |
| Applying acetone blindly | Damages acetate and some dyes | Rinse, stop, and assess fiber |
| Ironing unknown residue | Sets or spreads adhesive | Cool, freeze, then scrape |
| Using too much oil | Creates a second stain | Apply dish soap before washing |
| Skipping the paper towel | Dissolved glue redeposits | Use fresh towels every 1-3 minutes |
| Drying too early | Heat fixes remaining film | Repeat treatment before drying |
What if the solvent makes the adhesive gooey?
A gooey smear means the solvent has softened the adhesive but the towel is not absorbing it quickly enough. Apply a small fresh amount to re-liquefy the film, press with clean paper towels, and move to a new towel section after every few presses.
Do not add several different solvents. Mixed products can enlarge the stain and make the fabric response impossible to predict.
What if the fabric turns white?
A white patch may indicate dye loss, dried solvent residue, fiber roughening, or the adhesive itself becoming opaque. Rinse the area with cool water, stop treatment, and compare the affected side with the hidden-area test.
If the fiber is intact but the dye is gone, a textile dye professional or color-matched fabric marker may reduce contrast. Cleaning cannot restore chemically removed color.
What if an oil ring remains?
Treat a remaining oil ring while the fabric is dry. Apply liquid dish soap to the entire ring and slightly beyond its edge, wait 15-20 minutes, rinse from the back, and launder at the highest permitted temperature.
Partial treatment can leave a visible boundary, so cover the complete oily area rather than only the darkest center.
Time, Cost, and Material Use
Most household adhesive treatments cost $0-$20 and take 10-60 minutes, excluding washing and drying. Professional cleaning commonly costs about $10-$40 for a small garment treatment, with higher prices for upholstery, silk, tailored clothing, or extensive solvent work.
| Treatment route | Household cost | Active time | Best fit |
|---|---|---|---|
| Ice and scraper | $0-$3 | 10-20 minutes | Raised hot glue |
| Detergent and warm water | $0-$5 | 15-30 minutes | School glue |
| Isopropyl alcohol | $3-$8 | 5-20 minutes | Tape residue |
| Citrus remover plus degreasing | $5-$15 | 15-35 minutes | Stubborn sticker film |
| Acetone spot treatment | $3-$8 | 5-20 minutes | Compatible super glue |
| Professional cleaner | $10-$40 typical | 1-3 days | Delicates and valuable items |
Practitioner rule: one controlled treatment cycle is safer than a large dose. Excess solvent increases the wet area, dye movement, odor, and chance of a secondary ring without necessarily improving adhesive transfer.
FAQ
Can baking soda remove adhesive from clothing?
Baking soda can provide mild abrasive action and absorb some oil, but it does not dissolve most cured adhesives. Use detergent, alcohol, or a compatible adhesive remover instead, and avoid rubbing baking soda into silk, wool, knits, or printed fabric.
Does vinegar remove glue from fabric?
Vinegar may help with some water-based residues, but it is not a dependable solvent for tape adhesive or cyanoacrylate. Do not combine vinegar with bleach, and do not saturate delicate fabric because moisture can create rings or distort the fibers.
Can rubbing alcohol bleach clothes?
Isopropyl alcohol does not automatically bleach fabric, but it can dissolve some dyes, inks, coatings, and finishes. A hidden-area test is required, especially on dark cotton, printed clothing, nylon, and garments with an unknown dye system.
How do you remove adhesive without leaving a mark?
Use the smallest tested amount, place the stain over white absorbent towels, blot from the reverse side, and degrease before washing. Avoid circular rubbing and stop using solvent once the towel shows no further transfer.
Should adhesive-stained clothing be dry-cleaned?
Dry-clean the garment when the label requires it or when the fabric is silk, wool, acetate, tailored, expensive, or structurally delicate. Tell the cleaner the adhesive type and whether acetone, alcohol, oil, or a commercial remover has already been applied.
The Bottom Line
To remove adhesive from fabric, scrape away the bulk, match the treatment to the glue and fiber, spot-test every solvent, blot from the reverse side, and air-dry before inspection. Use freezing for raised hot glue, detergent for water-based glue, alcohol for many sticker residues, and acetone only for compatible fabrics with confirmed super glue.