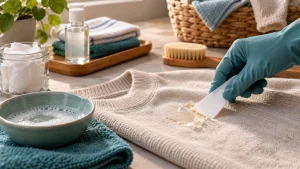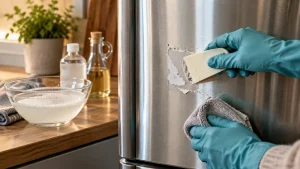
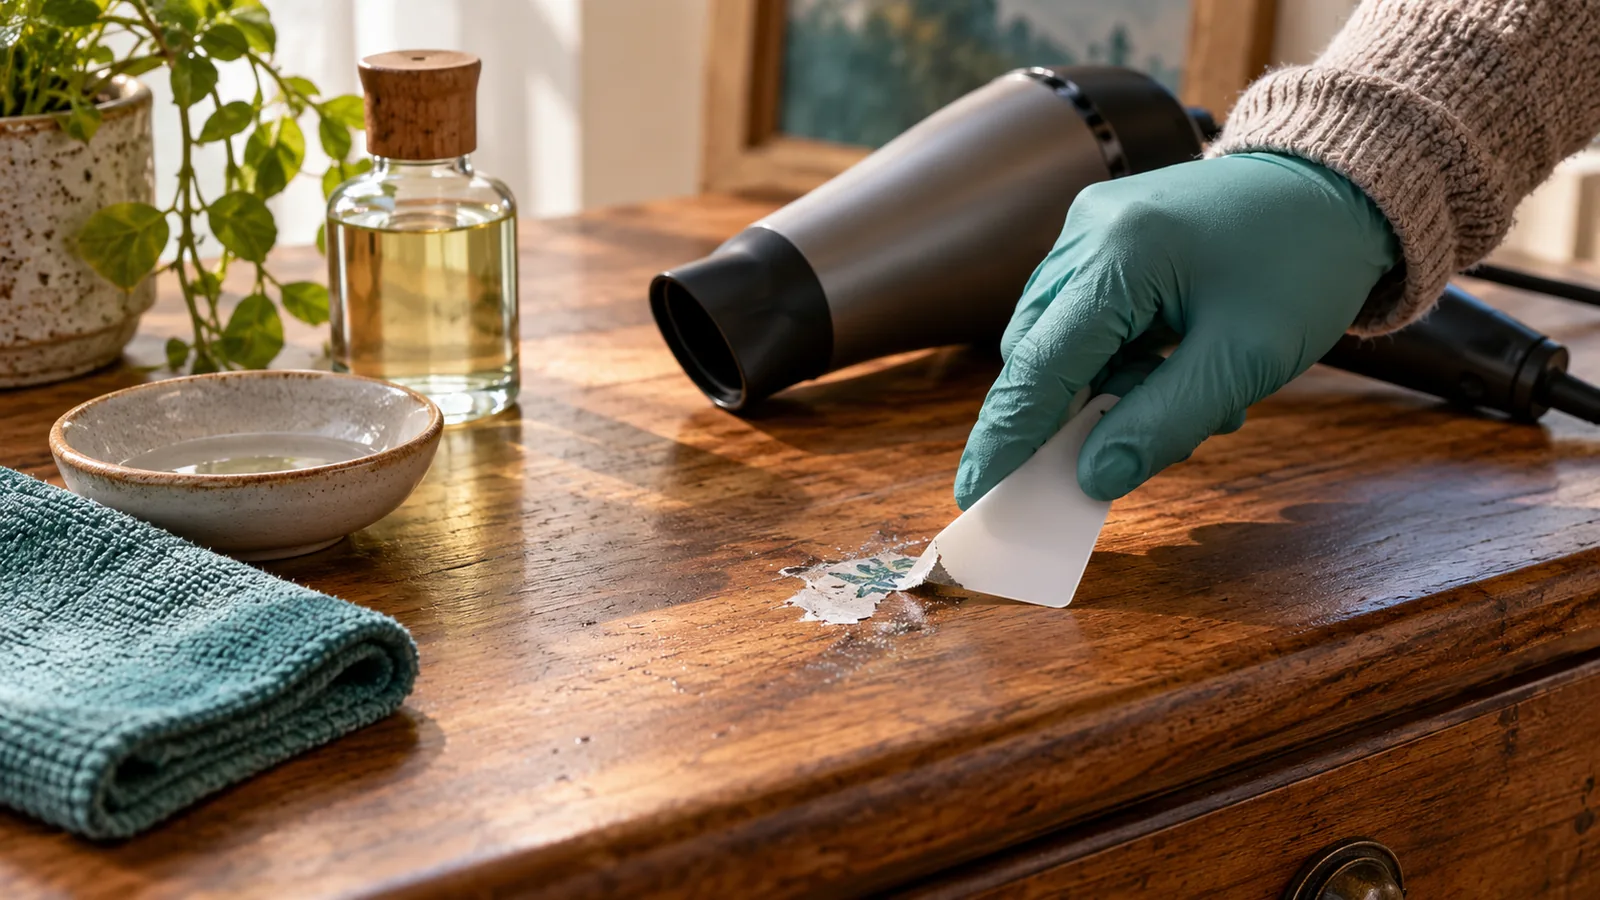
To remove sticker residue from wood, warm the adhesive with a hair dryer, lift it with a plastic scraper, then use a small amount of mineral oil or finish-compatible solvent if needed. The safest method depends on whether the wood is sealed, painted, waxed, veneered, or unfinished, so test every chemical first.
Key Facts at a Glance
- A hair dryer is the lowest-risk first method for most finished wood surfaces.
- Mineral oil and citrus adhesive removers work best on sealed polyurethane-coated wood, not absorbent raw timber.
- Acetone can damage lacquer, shellac, paint, and many synthetic finishes within seconds.
- Plastic cards, plastic razor scrapers, and fingernails are safer than metal blades.
- Typical removal time is 10-30 minutes for one or two stickers.
- Allow treated wood to dry for 2-4 hours before applying wax, polish, or a new finish.
Before You Start: Identify the Wood Finish
The finish determines which remover is safe. Glossy modern furniture often has polyurethane, lacquer, or laminate over wood, while antique furniture may have shellac, wax, oil, or a fragile restored coating that reacts badly to alcohol and citrus products.
Check the surface under strong side lighting. A continuous glossy film usually indicates a sealed finish; visible pores, changing color, and a dry touch suggest unfinished or oil-finished wood. If the surface is painted, treat the paint layer as the finish, because a solvent can remove color before it reaches the adhesive.
| Surface or finish | Likely behavior | First method | Avoid initially |
|---|---|---|---|
| Polyurethane | Nonporous, moderately chemical-resistant | Hair dryer, mineral oil | Acetone, prolonged alcohol |
| Lacquer | Solvent-sensitive, may turn cloudy | Hair dryer, plastic scraper | Acetone, alcohol, citrus soak |
| Shellac | Dissolves or softens with alcohol | Hair dryer, dry lifting | Isopropyl alcohol, acetone |
| Painted wood | Paint may soften or transfer | Low heat, careful lifting | Strong solvents, abrasive pads |
| Waxed or oiled wood | Absorbs some liquids and may darken | Low heat, dry scraping | Water saturation, citrus soak |
| Unfinished wood | Porous and stain-prone | Dry heat, controlled scraping | Oil flooding, acetone, water paste |
| Veneer | Thin wood layer over a substrate | Low heat and light pressure | Heat gun, aggressive sanding |
| Laminate over wood | Plastic surface, not exposed wood | Mild cleaner after lifting | Acetone, sharp blades |
When the finish is unknown, test on the underside or inside edge with a cotton swab. Apply one drop, wait 60 seconds, and inspect immediately and again after 24 hours for whitening, gloss loss, color transfer, swelling, or tackiness.
Why Does Heat Help Remove Adhesive?
Heat softens pressure-sensitive adhesive by increasing molecular movement and reducing the glue’s shear strength. A hair dryer does not need to melt the adhesive; it only needs to make the residue flexible enough to roll away without forcing a scraper against the wood.
Pressure-sensitive adhesives contain polymer blends that remain tacky under ordinary conditions. Warm air changes their consistency, while oil or solvent changes how the polymer interacts with the surface. These mechanisms differ from water-based glue removal, because water usually does little to hardened label adhesive and can swell unfinished wood.
A practitioner rule is to soften a small area rather than heat the whole furniture panel. Local heating limits finish movement and lets you check the surface after every pass.
What Tools and Materials Do You Need?
Most single-sticker jobs require a hair dryer, a plastic scraper, microfiber cloths, and one finish-compatible cleaner. Typical household cost is $0-$10; a commercial adhesive remover, plastic razor scraper, and mineral spirits usually raise the total to $15-$35.
Before-Start Checklist
- Hair dryer with low or medium heat
- Plastic scraper, old loyalty card, or plastic razor
- Two to four clean microfiber cloths
- Cotton swabs for spot testing
- Mineral oil or vegetable oil for sealed wood
- Isopropyl alcohol only when the finish passes a test
- Mild dish soap and warm water for final cleaning
- Nitrile gloves and ventilation for solvent use
- Paper towel for blotting porous wood, not vigorous wiping
| Item | Typical amount | Typical cost | Purpose |
|---|---|---|---|
| Hair dryer | 1 unit, 800-1,800 W | $0 if owned | Softens adhesive |
| Plastic scraper | 1, 2-4 inches wide | $2-$8 | Lifts softened residue |
| Mineral oil | 1-2 teaspoons | $3-$8 | Loosens sealed-surface adhesive |
| Citrus remover | 1-2 teaspoons | $7-$15 | Handles thick aged residue |
| Isopropyl alcohol | 70%, 1-2 teaspoons | $2-$5 | Short-contact solvent test |
| Microfiber cloth | 2-4 cloths | $3-$10 | Removes glue and cleaner |
| Dish soap | 1 drop in 1 cup water | Under $1 | Removes oily film |
How to Remove Sticker Residue from Wood
Follow the steps in order. Stop as soon as the adhesive lifts, because repeated chemical exposure creates more risk than leaving a thin film for a second, more controlled pass.
Step 1: Remove Loose Paper Without Pulling Sideways
Lift one corner with a fingernail or plastic card and pull the label back over itself at a low angle. Do not yank upward, because a vertical pull can lift loose veneer, paint, or finish along with the paper.
If the label tears, remove the loose sections first and leave the bonded center in place. Scraping dry paper aggressively often creates a larger damaged area than the original sticker.
You will know it worked when: the label comes away in a sheet and the remaining surface feels tacky rather than covered with paper fibers.
Common mistake: pulling quickly from one corner. Slow, low-angle removal puts less upward force on the finish.
Step 2: Warm the Adhesive With a Hair Dryer
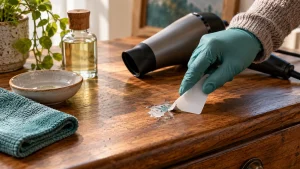
Set a hair dryer to low or medium heat and hold it about 6 inches from the residue. Keep the airflow moving for 30-60 seconds, then test one edge with a plastic scraper held at roughly 15-30 degrees.
Roll the softened glue toward the center rather than spreading it across clean wood. Use short heating cycles of 10-15 seconds on veneer, antique furniture, and painted surfaces.
You will know it worked when: the residue forms soft strings or rolls into a gummy bead under light scraper pressure.
Common mistake: holding the dryer in one position. Stop immediately if the finish becomes unusually glossy, cloudy, soft, or hot to the touch.
| Wood situation | Heat setting | Working distance | Maximum first cycle |
|---|---|---|---|
| Polyurethane furniture | Low-medium | 6 inches | 60 seconds |
| Painted cabinet | Low | 8 inches | 30 seconds |
| Veneer | Low | 8 inches | 15 seconds |
| Antique shellac finish | Low | 10 inches | 15 seconds |
| Unfinished wood | Low-medium | 6 inches | 45 seconds |
| Laminate surface | Medium | 6 inches | 60 seconds |
A heat gun is less forgiving than a hair dryer. If used at all, select the lowest setting, keep it at least 8-12 inches away, and move continuously; a hair dryer is the better choice for household furniture.
Step 3: Lift the Softened Glue With Plastic
Place the edge of a plastic scraper nearly flat against the surface and push with the wood grain. Use your other hand to stabilize the furniture so the scraper does not slip into a corner or edge.
Wipe the scraper after each pass. A dirty scraper can redeposit adhesive, and circular rubbing can spread the residue beyond the original sticker footprint.
You will know it worked when: the surface loses its drag and the scraper collects a narrow ribbon of adhesive.
Common mistake: replacing a plastic scraper with a razor blade. Metal can cut polyurethane, scratch lacquer, and leave a visible line even when the wood underneath remains intact.
Step 4: Apply Oil to Sealed Wood
For polyurethane or another confirmed sealed finish, place 3-6 drops of mineral oil on a cloth or cotton swab and cover only the residue. Let it sit for 5-10 minutes, then wipe with the grain and lift the softened film with plastic.
Vegetable oil and baby oil can work, but both may leave an odor or a persistent greasy layer. Mineral oil is easier to control. Commercial citrus removers can be stronger, so use the smallest possible amount and follow the product label.
You will know it worked when: the adhesive wipes away as a translucent smear instead of sticking in hard dots.
Common mistake: pouring oil directly onto furniture. Excess oil can migrate into joints, veneer edges, and porous areas.
Afterward, mix one drop of dish soap into one cup of warm water. Dampen, do not soak, a clean cloth, wipe the treated area, then wipe once with a water-only cloth and dry immediately.
Step 5: Use a Solvent Only After Testing
For residue that survives heat and oil, test 70% isopropyl alcohol on an inconspicuous area. If the finish remains unchanged after 60 seconds and a 24-hour check, dampen a cotton swab and touch only the adhesive for 10-20 seconds at a time.
Do not flood the surface. Alcohol can dissolve shellac and soften some lacquers, while acetone can attack lacquer, paint, plastics, and many clear coats almost immediately.
Mineral spirits may help with stubborn adhesive on a confirmed solvent-resistant finish, but it requires ventilation, gloves, and careful label instructions. Acetone belongs mainly in controlled refinishing work on genuinely unfinished wood, and even there it can spread dissolved adhesive into the grain.
You will know it worked when: the glue becomes wipeable without a change in gloss or color around it.
Common mistake: assuming “raw wood” means solvent-proof. Porous timber can absorb solvent and carry dissolved adhesive deeper into the grain.
Step 6: Clean, Dry, and Inspect the Surface
Remove cleaner residue with a barely damp cloth appropriate for the finish. Dry the area immediately with a clean microfiber cloth, then inspect it from several angles under natural or white light.
Allow the wood to dry for at least 2-4 hours before applying furniture wax, polish, oil, or a new protective coating. Products applied over trapped solvent or moisture can create clouding, uneven sheen, or poor adhesion.
Do not automatically condition every surface. A polyurethane finish usually needs no oil or wax after cleaning, and adding polish may create a slick film that attracts dust.
Which Removal Method Is Safest?
Heat is usually the safest first choice, mineral oil is the most practical chemical option for sealed polyurethane, and short-contact alcohol is reserved for finishes that pass a spot test. No single remover is safe for every wood surface.
| Method | Typical dwell or use time | Best surface | Main risk | Typical effectiveness |
|---|---|---|---|---|
| Hair dryer | 30-60 seconds | Most finished wood | Finish overheating | Moderate-high |
| Mineral oil | 5-10 minutes | Sealed polyurethane | Greasy film or darkening | Moderate |
| Citrus remover | 5-15 minutes | Sealed, durable finishes | Finish dulling or oil residue | High |
| 70% alcohol | 10-20 seconds per pass | Tested solvent-resistant finish | Shellac or lacquer damage | High |
| Mineral spirits | 1-3 minutes | Tested durable coating | Odor and finish softening | High |
| Baking soda paste | 30-60 seconds | Durable matte surfaces | Fine scratches and residue | Low-moderate |
| Acetone | Seconds only | Carefully controlled raw wood | Severe finish damage | Very high |
Baking soda is not a universal safe abrasive. A paste can remove a thin film from a durable matte surface, but its particles may dull glossy polyurethane or painted furniture. Use it only after heat and controlled chemical methods have failed.
What Changes for Unfinished, Painted, or Antique Wood?
Unfinished wood needs the least liquid, painted wood needs the least abrasion, and antique wood needs the least experimentation. These surfaces have different failure modes, so copying a sealed-furniture method can cause permanent marks.
Unfinished Wood
Start with low heat and a plastic scraper. If a faint film remains, use a very small amount of mineral spirits only after testing, then blot rather than rub. Do not saturate the grain with oil, water, alcohol, or acetone.
If adhesive has penetrated the surface, light sanding with 320-grit paper in the direction of the grain may be necessary. Sand only the affected area, feather the edges, and expect a color difference if the wood has aged or oxidized.
Painted Wood
Use a hair dryer on low, then a plastic card. Avoid alcohol, acetone, abrasive pads, and aggressive citrus products unless the paint has passed a hidden-area test.
If the sticker pulled away paint, adhesive removal is no longer the whole repair. The area may need touch-up paint, feather sanding, primer, and a compatible topcoat.
Veneer
Veneer can delaminate when exposed to excessive heat or moisture. Use short, low-heat cycles and almost no downward scraper pressure. Never pry under a raised veneer edge; stabilize it and consult a furniture restorer if the sticker has lifted the veneer.
Antique or Waxed Furniture
Use a dry plastic scraper first. Test heat and any cleaner on an underside edge, because shellac, wax, and historic coatings can respond unpredictably. A conservator is preferable for valuable furniture, signed pieces, or surfaces with flaking finish.
How Much Time and Money Should You Expect?
A single fresh sticker usually takes 10-15 minutes and costs nothing if a hair dryer and plastic card are available. Dried tape residue, multiple labels, or porous wood typically takes 20-60 minutes and may require $10-$35 in supplies.
| Project type | Typical time | Typical added materials | Typical cost |
|---|---|---|---|
| Fresh label on polyurethane | 10-15 minutes | Hair dryer, cloth | $0-$5 |
| Aged price tag on sealed wood | 15-30 minutes | Mineral oil or citrus remover | $5-$15 |
| Tape residue across 1 square foot | 25-45 minutes | Scraper, remover, cloths | $10-$25 |
| Raw wood with absorbed adhesive | 30-60 minutes | Scraper, solvent, sandpaper | $10-$35 |
| Painted cabinet repair | 20-45 minutes | Heat, scraper, touch-up paint | $5-$25 |
| Antique furniture assessment | 30 minutes or more | Conservator evaluation | $50-$200 or more |
These are typical retail and labor ranges, not fixed prices. Regional costs, product size, furniture value, and finish damage can change the total substantially.
Common Mistakes and How to Fix Them
The Adhesive Spreads Into a Larger Smear
Stop rubbing and warm the area again for 10-15 seconds. Use a clean scraper edge to gather the smear toward the center, then switch to a fresh cloth and a tested finish-compatible cleaner.
The Surface Turns Cloudy
Stop all solvent use immediately. Wipe with a clean, barely damp cloth only if the finish is water-safe, then allow the area to dry. Cloudiness may be temporary solvent blush, but persistent whitening can indicate dissolved lacquer, shellac damage, or moisture trapped in the coating.
The Wood Looks Darker After Oil
Remove surface oil with a tiny amount of diluted dish soap on a damp cloth, then dry. If unfinished wood has absorbed the oil, the darkening may remain until the area is cleaned, sanded, or refinished.
The Sticker Leaves Paper Fibers
Reapply low heat and lift with a plastic scraper. Do not wet paper fibers immediately, because moisture can push them into porous grain and make the patch harder to remove.
The Finish Feels Sticky After Cleaning
Residue may be adhesive, cleaner, or partially softened finish. Stop adding products, let the area dry completely, and compare it with an untouched section. If tackiness persists for 24 hours, professional finish repair is safer than further solvent testing.
Sanding Leaves a Pale or Shiny Patch
The sanding removed or altered the surrounding finish. Feather the edges with appropriate fine paper and refinish the entire small section rather than repeatedly sanding the center.
FAQ
Can WD-40 remove sticker residue from wood?
WD-40 can loosen adhesive on some sealed surfaces because its petroleum-based ingredients penetrate sticky residue. Test it first, apply a few drops to a cloth rather than the furniture, and remove the oily film with a compatible cleaner. Avoid it on unfinished, waxed, or absorbent wood.
Is vinegar safe for removing adhesive from wood?
Vinegar is usually a weak choice for sticker residue because its water content does little to dissolve many pressure-sensitive adhesives. It can also introduce moisture into unfinished wood and may disturb some mineral or wax finishes. Heat and controlled oil are generally more predictable.
Can a Magic Eraser remove sticker residue?
A Magic Eraser can remove residue through abrasive action, but it may dull glossy polyurethane, remove paint sheen, or create a visible patch. Use it only on a tested durable surface and with minimal pressure after chemical and heat methods have failed.
How do you remove sticker residue from wood without damaging the finish?
Use a hair dryer first, keep the airflow moving, and scrape with plastic at a shallow angle. If residue remains, test mineral oil on sealed wood or a short-contact solvent on a confirmed compatible finish. Stop when gloss, color, or texture changes.
Should you sand sticker residue off wood?
Sanding should be a last resort, especially on veneer, painted furniture, and finished tables. Sanding can remove the protective coating and create a lighter or duller patch. Use 320-grit paper only on unfinished wood or a surface already scheduled for refinishing.
What should you do if the wood finish is unknown?
Treat the finish as sensitive. Remove paper with low heat, test every liquid on a hidden area, wait 24 hours for delayed changes, and use the mildest method that works. Valuable antique or damaged furniture should be assessed before solvent application.
The Bottom Line
To remove sticker residue from wood, begin with a moving hair dryer and a plastic scraper, then use mineral oil on confirmed sealed wood or a tested short-contact solvent for stubborn residue. Limit liquid on unfinished timber, avoid metal blades and acetone on finished furniture, and let the surface dry before conditioning it. The safest how to remove sticker residue from wood method is the least aggressive method that removes the adhesive without changing the finish.