Contact cement usually fails because one or both coated surfaces were joined while wet, left beyond the adhesive’s open time, contaminated, under-pressed, or incompatible with the material. Contact cement must dry until tacky but non-transferable on both surfaces, then receive firm, even pressure immediately after mating.
Key Facts at a Glance
- Contact cement bonds two separately coated surfaces; coating only one side commonly produces a weak bond.
- Solvent-based contact cement often becomes bond-ready in 10-20 minutes, while water-based products commonly need 30-60 minutes.
- A bond-ready film feels tacky but does not transfer adhesive to a clean knuckle or fingertip.
- Raw MDF, end grain, plywood edges, and other porous substrates may require a sealing coat plus a second adhesive coat.
- A J-roller or hard block applies more reliable pressure than hand smoothing, especially over laminate.
- The product label controls drying time because temperature, humidity, coat thickness, and substrate change evaporation speed.
Why Is Contact Cement Not Sticking?
Contact cement is not sticking because the adhesive film has not reached the correct state, the surfaces are contaminated, the materials are incompatible, or the completed joint received insufficient pressure. The most common failure is mating two wet films, which traps solvent between nonporous surfaces and leaves a soft, weak layer.
Contact cement differs from PVA wood glue. PVA remains wet while the parts are assembled and normally needs clamping; contact cement is designed to dry first and bond when two tacky films meet. The adhesive does not gain strength by being squeezed while visibly wet.
A second frequent cause is uneven coverage. A thin film can dry too quickly on one area, while a thick puddle remains soft elsewhere. On absorbent wood products, the first coat may disappear into the substrate instead of leaving a continuous adhesive film.
What does a failed contact-cement bond look like?
The peel pattern often identifies the cause. A clean, rubbery sheet peeling from one surface suggests poor surface preparation or insufficient pressure. Gooey adhesive between the parts indicates premature assembly or excessive application. Adhesive remaining on one side but not the other often means the opposite surface was under-coated.
| Failure appearance | Most likely cause | Corrective action |
|---|---|---|
| Wet, stringy adhesive | Joined before drying | Separate, remove residue, recoat |
| Clean peel from laminate | Dust, oil, or low pressure | Clean and abrade compatible surfaces |
| Bare spots on MDF | Substrate absorbed first coat | Seal, dry, apply second coat |
| Edge lifts first | Thin edge coverage or moisture | Recoat edge and roll firmly |
| Brittle, non-tacky film | Open time exceeded | Follow label reactivation or recoat |
| Blistered laminate | Trapped solvent or air | Remove, allow evaporation, rebond |
How Does Contact Cement Form a Bond?
Contact cement forms a bond when solvent or water evaporates from two applied adhesive films, leaving rubber or polymer layers that join through intimate contact and pressure. The adhesive does not primarily cure because the pieces remain clamped; the two prepared films must touch across nearly the entire bonding area.
Solvent-based products commonly contain rubber or synthetic elastomers dissolved in volatile solvents. Water-based products disperse adhesive polymers in water and usually dry more slowly. Neither category should be judged by a universal clock because coat thickness, airflow, humidity, and substrate absorption change the result.
The adhesive film should be continuous, dry enough not to transfer, and still sufficiently tacky to create immediate contact. A surface that looks wet is not ready. A film that is completely dull, hard, and non-tacky may have exceeded its open time.
How long should contact cement dry?
Solvent-based contact cement commonly needs 10-20 minutes before bonding, while water-based contact cement often needs 30-60 minutes or longer. These are typical ranges, not guarantees. The reliable test is a clean-knuckle touch combined with the specific manufacturer’s label instructions.
| Condition | Typical effect on solvent-based cement | Typical effect on water-based cement |
|---|---|---|
| 65-75°F, moderate humidity | 10-20 minutes | 30-60 minutes |
| Below 60°F | Slower evaporation | Much slower evaporation |
| Above 70% humidity | Possible condensation and delay | Extended water evaporation |
| Thick application | Soft center under dry skin | Soft film and longer wait |
| Nonporous surfaces | Solvent remains trapped easily | Water remains trapped easily |
| Strong cross-ventilation | Faster evaporation | Faster evaporation, within safety limits |
A product can feel dry on top while remaining soft below. That result usually comes from a heavy coat, poor airflow, or two nonporous materials that prevent evaporation. Thin, even coats are safer than trying to obtain extra strength from a thick layer.
How Should You Prepare Surfaces?
Surface preparation requires clean, dry, stable materials with appropriate texture and no wax, oil, loose fibers, or sanding dust. Remove contamination first, then abrade only materials that the adhesive manufacturer permits, because some plastics and decorative laminates can be damaged by aggressive sanding or solvent cleaning.
Use a vacuum or clean, lint-free cloth after sanding. Do not assume a surface is clean because it looks clean: silicone polish, furniture wax, skin oil, and mold-release residue can remain nearly invisible.
Raw wood and MDF need special treatment. Apply a thin first coat, allow it to dry fully, and apply a second coat if the substrate still looks dull or shows dry patches. The goal is a continuous adhesive film, not a saturated board.
| Substrate | Preparation | Common risk |
|---|---|---|
| Decorative laminate | Clean, lightly abrade if approved | Scratching the face |
| MDF | Seal porous face or use two coats | Adhesive absorption |
| Plywood edge | Sand smooth, seal end grain | Edge starvation |
| Solid hardwood | Remove finish and dust | Oils in exotic species |
| Leather | Degrease carefully, roughen backside | Solvent staining |
| Metal | Degrease and remove oxidation | Oil film and rust |
| PVC or ABS | Verify compatibility first | Plasticizer migration |
| EPS foam | Use foam-safe water-based product | Solvent melting |
Which materials cause contact cement problems?
Contact cement can fail on flexible PVC, oily exotic wood, polyethylene, polypropylene, silicone, heavily waxed surfaces, and some foams. Polyethylene and polypropylene have low surface energy, so ordinary contact cement may peel even when the surface is clean; a specialty primer or a different adhesive may be necessary.
Solvent-based cement can dissolve polystyrene foam and attack certain plastics. Water-based cement is safer for many foams, but “water-based” does not automatically mean compatible. Test a hidden area and consult the technical data sheet.
How Much Pressure Does Contact Cement Need?
Contact cement needs firm, distributed pressure immediately after assembly, especially on laminate, veneer, and large sheet goods. A hand pass may miss low spots and trapped air; a J-roller, laminate roller, or hard block produces more consistent contact across the joint.
Roll from the center toward the edges and overlap each pass. Apply extra attention to perimeter edges, corners, and narrow strips because those areas often receive less pressure and experience more peel stress.
| Tool | Typical use | Practical method |
|---|---|---|
| J-roller | Laminate and veneer | Center outward, multiple passes |
| Hard rubber roller | Broad flat panels | Firm overlapping strokes |
| Hardwood block | Narrow edges | Press along the full edge |
| Caul and clamps | Local repairs | Protect surface, clamp evenly |
| Hand pressure | Small flexible parts | Use only for small areas |
Pressure cannot compensate for wet adhesive, missing adhesive, or contamination. Rolling a wet film harder may spread the failure rather than strengthen the bond.
Why Does Contact Cement Peel After Bonding?
Contact cement peels after bonding when edge coverage is weak, the substrate flexes, moisture enters the joint, or the adhesive never formed a complete film. Laminate edges are especially vulnerable because peeling concentrates force at a narrow line instead of distributing it through the panel.
A joint can feel strong in the center while remaining defective at the edge. Inspect the perimeter before the project is put into service, and press down any questionable area while the adhesive remains within its permitted correction window.
Humidity can also cause “blushing,” where rapid solvent evaporation cools the adhesive and allows moisture to condense on or within the film. Work in a dry, ventilated environment, but avoid directing cold, damp air across the joint.
What temperature and humidity are suitable?
A typical working range is 65-75°F with moderate humidity, although the product label has priority. Avoid bonding cold materials, damp wood, or surfaces below the adhesive manufacturer’s minimum temperature because condensation and slow evaporation can prevent a stable film.
| Environment | Bonding risk | Better practice |
|---|---|---|
| Below 60°F | Slow drying and poor tack | Warm materials and workspace |
| Above 80°F | Rapid skinning and short open time | Use smaller working areas |
| Above 70% relative humidity | Condensation and delayed drying | Reduce humidity and ventilate |
| Damp wood | Moisture barrier | Measure or acclimate wood |
| Direct outdoor sun | Uneven drying | Shade the workpiece |
| Poor ventilation | Solvent retention | Provide safe cross-ventilation |
Which Type of Contact Cement Should You Use?
Solvent-based contact cement generally offers faster drying and stronger water resistance, while water-based contact cement reduces odor and flammability but usually needs more drying time. The correct choice depends on substrate compatibility, ventilation, moisture exposure, and required initial tack.
| Attribute | Solvent-based | Water-based |
|---|---|---|
| Typical bond-ready time | 10-20 minutes | 30-60 minutes |
| Odor | Strong | Lower |
| Flammability | Often flammable | Usually nonflammable when wet |
| Foam compatibility | Often poor | Often better |
| Water resistance | Often higher | Product-dependent |
| Indoor ventilation | Required | Still required |
| Best common use | Laminate, veneer, trim | Foam-safe crafts, lower-odor work |
Solvent-based products are not automatically stronger in every application. A compatible water-based adhesive applied to a properly prepared surface can outperform a solvent product that attacks the substrate or remains trapped in a thick coat.
Is contact cement safe to use indoors?
Contact cement should be used indoors only with the ventilation, ignition control, personal protective equipment, and exposure precautions stated on its label and safety data sheet. Solvent-based formulations can produce flammable vapors, so eliminate flames, sparks, pilot lights, and unsuitable electrical ignition sources.
Use chemical-resistant gloves and eye protection, and never use an unknown solvent to clean skin. Water-based products reduce some hazards but still require label-compliant ventilation and waste handling.
How Do You Apply Contact Cement Correctly?
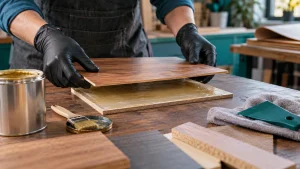
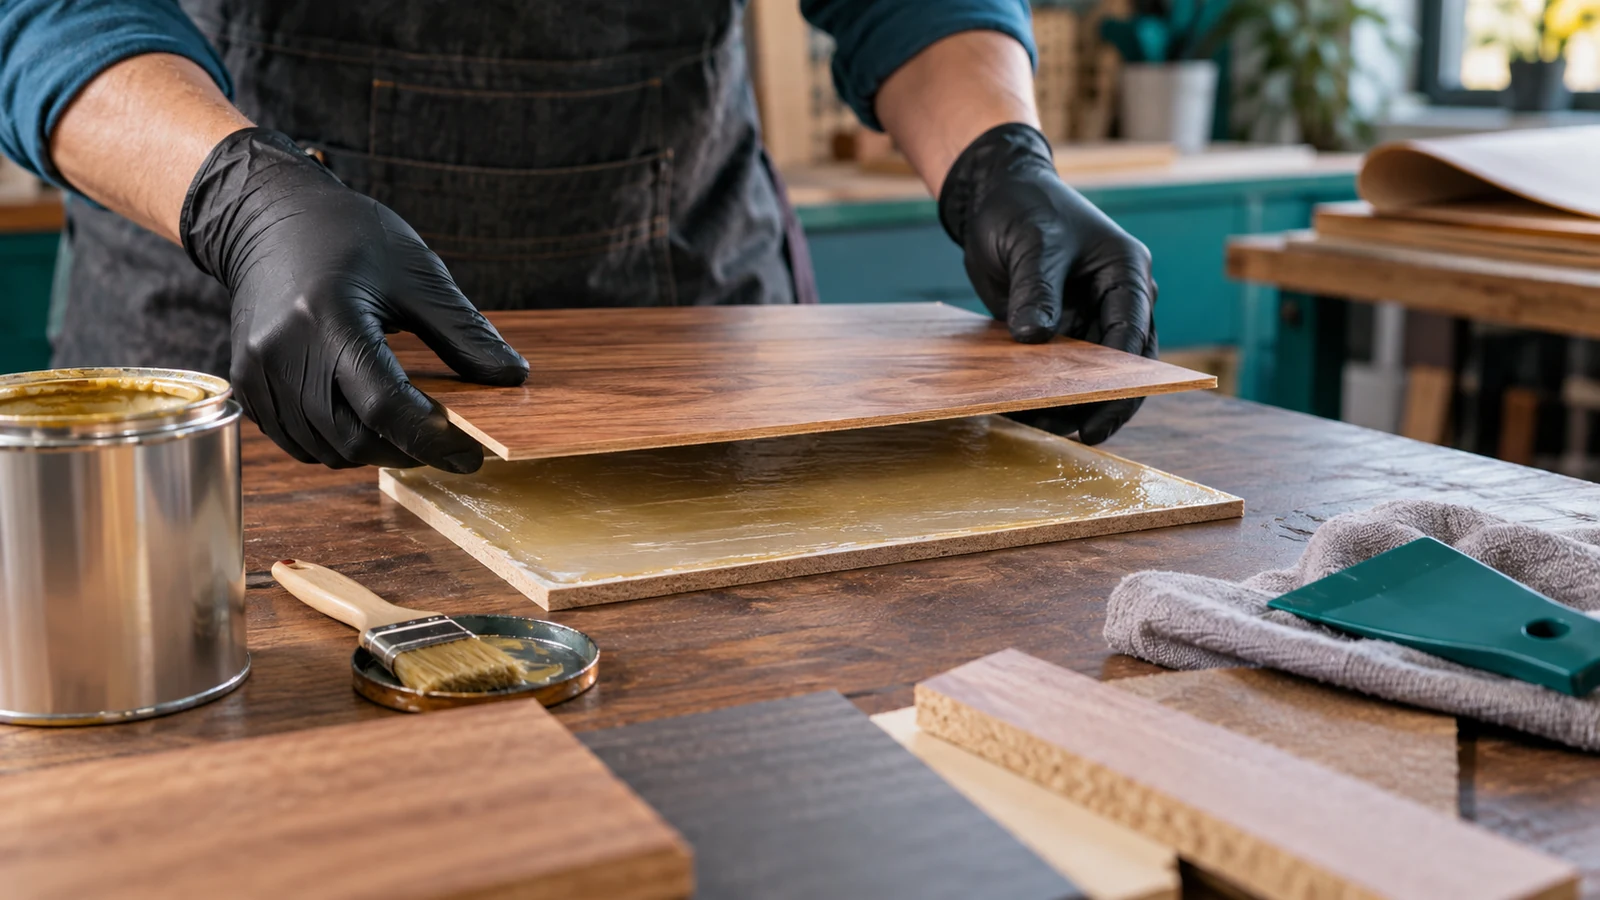
Correct application follows six actions: prepare both surfaces, apply even coats, allow complete drying, align without sliding, press from the center outward, and respect the cure period. A typical small laminate project takes 30-90 minutes of active work, while final handling strength commonly develops over 24-72 hours.
- Dry-fit the parts. Confirm alignment before opening the adhesive. Contact cement normally cannot be repositioned after full contact.
- Prepare both surfaces. Remove dust, oil, moisture, wax, and loose material. Lightly abrade only where appropriate.
- Apply an even coat. Cover both faces, including edges. Avoid puddles and missed corners.
- Seal porous areas. Add a second coat to MDF, end grain, and absorbent plywood after the first coat dries.
- Wait for the correct film. Join only when the adhesive is tacky without transferring to a clean knuckle.
- Align with spacers. Use clean dowels or a slip sheet to prevent premature contact while positioning large panels.
- Roll firmly. Start at the center and work outward, then repeat around edges and corners.
- Allow curing. Avoid peeling, washing, heavy flexing, or loading the joint until the label’s cure time passes.
The best alignment method for large laminate is to place several clean dowels across the base, position the laminate on top, withdraw the center dowel, and roll outward progressively. This prevents one corner from touching early and locking the panel out of position.
How Do You Repair a Failed Bond?
Repair a failed contact-cement bond by identifying whether the adhesive is wet, contaminated, over-dried, or missing from one surface. Separate the parts carefully, remove failed adhesive according to the product instructions, clean and dry both surfaces, and apply fresh adhesive rather than pressing a defective film back together.
| Failure condition | Can pressing fix it? | Repair method |
|---|---|---|
| Adhesive still gooey | No | Separate and allow safe cleanup |
| Dusty surface | No | Clean, dry, lightly abrade if allowed |
| Thin or missing coat | No | Recoat the affected surface |
| Film over-dried | Usually no | Follow label reactivation method |
| Small edge lift | Sometimes | Recoat edge and apply local pressure |
| Substrate incompatible | No | Change adhesive or substrate |
Do not flood the old joint with fresh solvent unless the manufacturer specifically permits reactivation. Solvent can swell finishes, stain porous materials, distort plastics, or spread contamination beneath a larger area.
Can old contact cement be removed?
Old contact cement can sometimes be removed by mechanical scraping, sanding, or a manufacturer-approved adhesive remover, but the safest method depends on the substrate. Test any remover in a hidden area because laminate finishes, plastics, paint, and leather respond differently to solvents.
Remove loose rubbery residue, then create a clean, stable bonding surface. If the substrate remains oily, swollen, or soft, replacement is usually more reliable than repeated adhesive applications.
Which Alternatives Work Better?
PVA wood glue is better for porous wood-to-wood joints that can be clamped, epoxy is better for gap filling and dissimilar rigid materials, and construction adhesive is better for some building substrates. Contact cement remains preferable for thin laminate and veneer when immediate, distributed adhesion is required.
| Adhesive | Typical open time | Clamping or bracing | Best application |
|---|---|---|---|
| Contact cement | 10-60 minutes drying | Pressure, not prolonged clamping | Laminate and veneer |
| PVA wood glue | 5-10 minutes assembly | 30-60 minutes clamping | Wood-to-wood joints |
| Two-part epoxy | 5-60 minutes, product-dependent | Positioning or light clamping | Gaps and dissimilar materials |
| Polyurethane glue | 10-20 minutes | 1-2 hours clamping | Moisture-tolerant wood joints |
| Construction adhesive | Product-dependent | Bracing often required | Building materials |
Contact cement is not a universal structural adhesive. It is a poor choice for load-bearing joints, thick gaps, continually submerged assemblies, or surfaces that require repositioning after contact.
What Expert Rules Prevent Most Failures?
Three practitioner rules prevent most contact-cement failures. First, trust the film condition rather than the clock. Second, treat porous edges separately from sealed faces. Third, test a small sample whenever the substrate, finish, or adhesive brand changes.
An expert also distinguishes initial tack from final durability. A joint may grab immediately yet fail later because moisture, heat, peel stress, or plasticizer migration attacks the interface. For cabinets, countertops, and vehicle trim, inspect the operating environment before selecting the adhesive.
Use smaller adhesive sections on large workpieces when the open time is short. Large panels expose mistakes quickly because one early contact point can prevent accurate alignment across the remaining surface.
FAQ
Can you reactivate contact cement after it dries?
Some products allow reactivation with heat or a manufacturer-approved solvent, but the procedure is product-specific and can damage finishes or create hazardous vapors. If the film is hard, dusty, contaminated, or outside the stated open time, removing it and applying fresh adhesive is usually more dependable.
Why is my contact cement sticky but not bonding?
Sticky contact cement may lack adequate pressure, contain surface contamination, have been applied too thinly, or be incompatible with the substrate. If the adhesive transfers heavily to a knuckle, it is still wet; if it feels dry and non-tacky, it may have exceeded its open time.
Can contact cement bond metal to wood?
Contact cement can bond some clean, lightly abraded metal surfaces to wood, provided the product label permits that combination. Degrease the metal, remove oxidation, prepare the wood, and apply pressure across the full area. Epoxy may be better where the joint carries a structural load or contains gaps.
Does contact cement need to be applied to both surfaces?
Yes, contact cement normally requires application to both mating surfaces. Coating only one side reduces the amount of adhesive available at the interface and can leave the joint weak, especially on porous wood, MDF, leather, and rough substrates.
Can you clamp contact cement overnight?
Clamping is not a substitute for correct drying and pressure. After the two dry films are joined and rolled, light clamping may help a local repair, but excessive clamping can squeeze adhesive from the joint or distort thin laminate. Follow the product label.
How long does contact cement last after bonding?
Many contact-cement joints reach practical handling strength quickly but continue developing resistance for 24-72 hours. Heat, moisture, peel stress, substrate movement, and adhesive compatibility determine service life more than the first few minutes of initial grab.
The Bottom Line
Why is contact cement not sticking? The usual answer is incorrect film timing, poor preparation, inadequate pressure, excessive humidity, or an incompatible substrate. Coat both surfaces evenly, seal porous materials, wait until the films are tacky without transferring, align with spacers, and roll firmly from the center outward. Fresh adhesive on clean, dry, compatible surfaces is the most reliable fix.