How to Mix Epoxy Resin: Proper Mixing Techniques
Mixing Epoxy Resin
Understanding Epoxy Components
Epoxy resin consists of two primary components: the liquid resin and the liquid hardener. When mixed together, these components undergo a chemical reaction known as a polyaddition reaction, resulting in a hard, plastic-like material. This transformation creates a durable and versatile substance widely used in various home renovation projects.
| Component | Description |
|---|---|
| Resin | The base component, usually a clear or colored liquid. |
| Hardener | The component that triggers the curing process, often a clear liquid. |
Understanding these components is crucial before diving into the how to mix epoxy resin process. Each component plays a vital role in the curing process, leading to the formation of a solid, durable material.
Importance of Accurate Mixing
Accurate mixing of epoxy resin and hardener is essential for several reasons:
-
Proper Curing: The resin and hardener must be mixed in the correct ratio to ensure a complete chemical reaction. Incorrect ratios can result in incomplete curing, leaving the epoxy sticky or soft.
-
Durability: Accurate mixing ensures that the epoxy resin achieves its maximum strength and durability. This is particularly important for applications requiring long-lasting performance.
-
Aesthetic Results: Proper mixing helps achieve a clear and bubble-free finish, which is crucial for aesthetics in projects like how to epoxy resin a table top.
| Mixing Ratio | Result |
|---|---|
| 1:1 (Resin:Hardener) | Standard Ratio |
| 2:1 (Resin:Hardener) | Stronger Ratio |
| 3:1 (Resin:Hardener) | Extra Strength |
It’s vital to follow the manufacturer’s instructions for the specific epoxy resin you are using, as ratios can vary. Thorough mixing is critical to achieving the desired results; it ensures that the resin and hardener are evenly distributed throughout the mixture.
For safety, always work in a well-ventilated area to prevent the buildup of dangerous chemicals. Wearing appropriate personal protective equipment, like gloves and a mask, is also crucial when handling these materials.
In summary, understanding the components of epoxy resin and the importance of accurate mixing will ensure your projects achieve the best results. For more in-depth information on epoxy resin projects, check out our article on how to use epoxy resin.
Measurement and Mixing Techniques
When working with epoxy resin, proper measurement and mixing techniques are essential to achieve the desired results. Here’s a detailed guide on how to mix epoxy resin effectively.
Measuring Epoxy Resin
Accuracy is key when measuring epoxy resin. Measuring by weight is the most precise method, though measuring by volume is more common. Pre-marked mixing cups for volume measurement are helpful tools. For accurate measurements, consider using an epoxy resin calculator like the one offered by MAS Epoxies.
| Method | Precision | Notes |
|---|---|---|
| Weight | High | Best for small batches |
| Volume | Moderate | Common in larger projects |
For those asking “how much epoxy resin do I need,” using an epoxy calculator can simplify the process.
Factors Affecting Mixing Time
Several factors influence the time required to mix epoxy resin. Viscosity, air temperature, resin temperature, and resin volume all play significant roles (MAS Epoxies). Viscosity affects bubble release and the penetration properties of the resin. The volume of resin also impacts mixing time; larger volumes require more mixing.
| Factor | Impact on Mixing Time |
|---|---|
| Viscosity | Higher viscosity = longer mixing |
| Air Temperature | Higher temperature = faster mixing |
| Resin Temperature | Ideal range at 70°F-80°F |
| Resin Volume | Larger volumes = longer mixing |
Ensure to mix slowly and thoroughly to avoid issues like soft or sticky resin.
Ideal Working Temperature
The ideal working temperature for epoxy resin is between 70°F and 80°F (MAS Epoxies). Temperature sensitivity affects the resin’s thickness and the speed at which it cures. Deviations from this temperature range can lead to inconsistent results.
| Temperature | Effect on Resin |
|---|---|
| Below 70°F | Slower curing, thicker resin |
| 70°F – 80°F | Optimal curing and viscosity |
| Above 80°F | Faster curing, potential bubbling |
Maintaining the correct temperature ensures a smooth and even pour, avoiding common issues such as bubbles and improper curing. For more information on curing, refer to how to cure epoxy resin.
For additional tips and techniques, such as how to use epoxy resin, visit our guides on various epoxy resin projects. These resources can help you achieve the best results, whether you’re working on small crafts or large-scale renovations.
Techniques for Mixing Epoxy Resin
Achieving the right mixture for your epoxy resin project is essential for a smooth, strong finish. Below, explore the best techniques for mixing epoxy resin, ensuring your home renovation projects are both beautiful and durable.
Hand Mixing vs. Paddle Mixers
There are two primary methods for mixing epoxy resin: by hand and using paddle mixers.
Hand Mixing
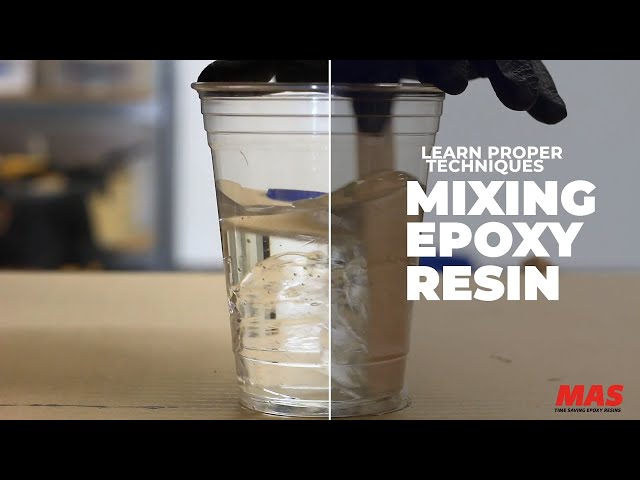
Hand mixing can be effective for small projects. Use a clear container so you can see the resin and ensure it is thoroughly mixed. Consistently scrape the sides and bottom of the container to ensure all components are evenly incorporated.
Paddle Mixers
For larger volumes, paddle mixers are more efficient. Helix-style paddle mixers are particularly recommended, as they reduce the incorporation of air into the mixture, preventing micro-bubbles.
| Mixing Method | Suitable For | Benefits | Drawbacks |
|---|---|---|---|
| Hand Mixing | Small projects | Simple, no special tools needed | Time-consuming, air bubbles may form |
| Paddle Mixers | Large volumes | Fast, reduces air bubbles | Requires purchase, more equipment cleanup |
Tips for Bubbling Prevention
Preventing bubbles in your epoxy resin is crucial for a smooth, clear finish. Here are some tips to keep your mixture bubble-free:
- Slow and Steady Mixing: Mix at a slow, consistent pace to avoid incorporating air.
- Helix-Style Paddle Mixers: These are designed to minimize air incorporation (The Epoxy Resin Store).
- Warm the Resin: Slightly warming the resin before mixing can reduce its viscosity, allowing bubbles to rise and escape more easily.
- Use a Heat Gun: After pouring your resin, pass a heat gun lightly over the surface to pop any remaining bubbles.
For further advice on dealing with common mixing issues, visit our guide on how to pour epoxy resin.
Mixing Guidelines for Best Results
To ensure the best results, follow these mixing guidelines:
- Measure Accurately: Use precise measurements for epoxy and hardener. Refer to our article on how much epoxy resin do I need for detailed instructions.
- Mix Thoroughly: Stir the mixture continuously for the time recommended by the manufacturer, usually 5-10 minutes, ensuring all parts combine.
- Scrape Sides and Bottom: Regularly scrape the sides and bottom of your container to ensure no unmixed resin remains.
- Use the Right Tools: For larger volumes, use helix-style paddle mixers to ensure a consistent mixture without air bubbles.
By adhering to these techniques and tips, you can achieve a flawless epoxy resin mixture, resulting in robust, visually appealing finishes for all your home renovation projects. For more detailed instructions on using epoxy resin, read our comprehensive guide on how to use epoxy resin.
Epoxy Resin Curing Process
Understanding the curing process of epoxy resin is crucial for achieving the best results in your projects. This section will explain the chemical reaction behind curing and how temperature impacts this process.
Chemical Reaction for Curing
Epoxy resin consists of two main components: the resin and the hardener. When these two components are mixed together, they undergo a chemical reaction known as curing. This reaction, a cross-linking process called polyaddition, transforms the liquid mixture into a solid, durable material.
The curing process of epoxy involves an exothermic reaction, meaning it releases heat as it cures. The reaction creates a polymer, which forms a cured epoxy plastic material characterized by its high durability and resistance.
Here’s a table summarizing the typical curing times for different types of epoxy resin:
| Type of Epoxy Resin | Curing Time |
|---|---|
| Industrial Coating Resin | 24-72 hours |
| Casting Resin | Up to 1 week |
Data sourced from ArtResin
Impact of Temperature on Curing
Temperature plays a significant role in the curing process of epoxy resin. Both ambient temperature and the temperature of the resin mixture can affect the speed and effectiveness of curing.
Ideal working temperatures typically range between 70-80°F (21-27°C). Within this range, the curing reaction is more controlled, and the mixture can achieve optimal strength and clarity. If the temperature is too low, the curing process will slow down, potentially leading to incomplete curing. On the other hand, high temperatures can accelerate the curing process, which might cause the resin to set too quickly and may introduce imperfections such as bubbles or uneven surfaces (Polyestershoppen).
| Temperature (°F) | Effect on Curing |
|---|---|
| < 60°F (15°C) | Slow curing, risk of incomplete cure |
| 70-80°F (21-27°C) | Optimal curing speed and quality |
| > 90°F (32°C) | Fast curing, potential imperfections |
For more detailed guidelines on curing epoxy resin and related topics, you can explore articles on how to cure epoxy resin and how long does it take for epoxy resin to dry.
Proper handling and understanding of the curing process ensure your epoxy resin projects will have the desired strength, durability, and finish. For additional information on epoxy resin safety and usage, consider visiting our sections on how to use epoxy resin and how to polish epoxy resin.
Best Practices for Epoxy Resin Projects
When working with epoxy resin, it’s essential to follow best practices to ensure safety and achieve optimal results. Here are some tips for making your epoxy resin projects successful.
Safety Precautions for Working with Epoxy
Safety should always be your top priority when handling epoxy resin. Here are some critical safety measures to follow:
- Wear Personal Protective Equipment (PPE): Use nitrile or vinyl gloves to protect your skin from irritation (Eye Candy Pigments). Adequate clothing, such as long sleeves and plastic aprons, can shield your skin and clothes from resin spills.
- Use Respiratory Masks: A respiratory mask with an organic vapor cartridge is crucial to protect against vapors and dust. In some cases, separate masks for vapors and dust may be necessary.
- Ensure Proper Ventilation: Work in a well-ventilated area to prevent the build-up of harmful chemicals emitted during the curing process. This helps avoid respiratory irritation (Eye Candy Pigments).
Choosing the Right Epoxy Resin Type
Selecting the appropriate epoxy resin for your project is key to success. Here are some factors to consider:
- Curing Time: Different resins offer varying curing times. For faster projects, choose a resin with a quick curing time. If you need more working time, opt for a slower-curing resin.
- Viscosity: The thickness of the resin matters based on your application. Thicker resins are great for projects where you need more control, while thinner resins work well for coating and laminating.
- UV Resistance: If your project will be exposed to sunlight, choose a UV-resistant resin to prevent yellowing and degradation.
- Safety: Some epoxy resins release fewer volatile organic compounds (VOCs). These low-VOC options are safer for indoor use (is epoxy resin toxic).
Here’s a table summarizing the different types of resins and their ideal uses:
| Epoxy Resin Type | Ideal For | Benefits |
|---|---|---|
| Fast-Curing Epoxy | Small projects | Quick setting time |
| Slow-Curing Epoxy | Large projects | Extended working time |
| High-Viscosity Epoxy | Molds and pours | Greater control over placement |
| Low-Viscosity Epoxy | Coatings and laminations | Smooth, even coverage |
| UV-Resistant Epoxy | Outdoor projects | Prevents yellowing and degradation |
Choosing the right epoxy resin type and following proper safety precautions will help you achieve the best results in your projects. For more tips, check out our articles on how to use epoxy resin and how to clean epoxy resin.
Enhancing Epoxy Resin Projects
Elevate your epoxy resin projects by mastering the art of adding color and avoiding common mistakes.
Adding Color with Pigments
Adding color to your epoxy resin can result in stunning visual effects. However, it’s crucial to use the right type of pigments to ensure a smooth finish. Mixing paints and acrylics with epoxy is not recommended, as they can clump and leave an unsightly film. Instead, opt for Mica powders, concentrate/solvent-based pigments, or Glow powders.
For best results, avoid exceeding 5% pigment concentration of the total mixture. This preserves the integrity of the epoxy resin and ensures even coloring.
| Pigment Type | Recommended Concentration |
|---|---|
| Mica Powder | Up to 5% |
| Solvent-Based Pigments | Up to 5% |
| Glow Powders | Up to 5% |
Experimenting with different colors can lead to truly unique projects. However, always test small amounts first.
Avoiding Common Mixing Errors
Mixing epoxy resin can be straightforward, but avoiding common errors is crucial for a perfect finish. Here are some tips to keep in mind:
- Accurate Measurement: Ensure you measure the resin and hardener accurately using the correct ratio. Improper ratios can lead to incomplete curing.
- Thorough Mixing: Mix the components thoroughly but gently to avoid trapping air bubbles. Scrape the sides and bottom of the mixing container to incorporate all materials.
- Ideal Temperature: Work in a controlled environment with an ideal temperature range of 70-75°F (21-24°C) to ensure optimal curing.
- Avoid Contamination: Use clean tools and containers to prevent contamination, which can affect the curing process and final appearance.
- Use Proper Additives: Stick to recommended additives such as Mica powders and concentrate pigments. Avoid using paints or acrylics as they can cause clumping and undesirable finishes (The Epoxy Resin Store).
By following these guidelines, you’ll enhance the quality of your epoxy resin projects. For more information, consider reading our guide on how to use epoxy resin and explore related topics like how to clean epoxy resin off tools.
Enhance your next project with confidence, color, and clarity!

