How to Sand and Polish Epoxy Resin: Step-by-Step Guide
Sanding Epoxy Resin
Importance of Proper Sanding
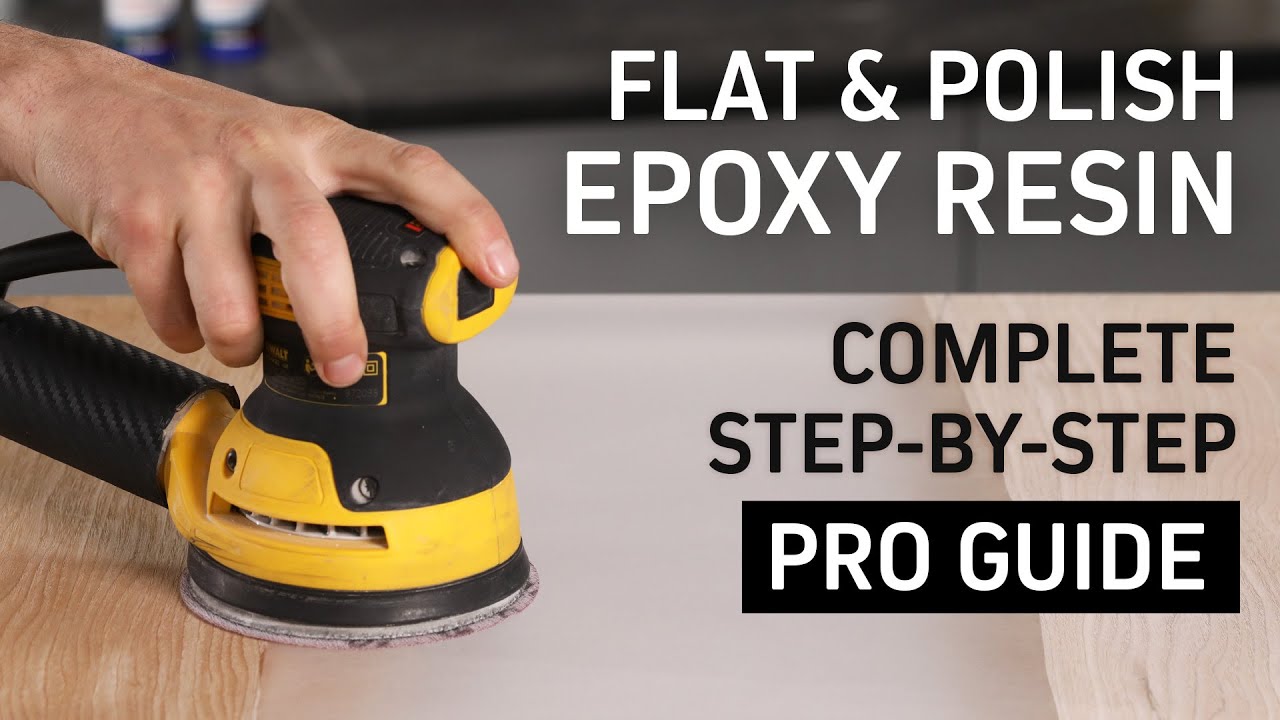
Sanding epoxy resin is essential for achieving a smooth, polished finish on your project. Whether you’re working on wall art, tables, or custom-made rings, you need to sand your epoxy surface after it has dried for at least 48 hours. Proper sanding helps to smooth out any rough spots, correct mistakes, and prepare the surface for polishing, ensuring a flawless finish.
Sanding an epoxy floor is also critical for promoting optimal adhesion and long-term durability of the epoxy resin. This preparation step ensures an even and textured surface that can withstand heavy foot traffic, impacts, and chemical spills, maintaining a glossy and seamless appearance (Couch Design). By paying attention to the sanding process, you are setting the foundation for a top-tier epoxy project.
Selecting the Right Sandpaper Grit
Choosing the correct sandpaper grit is pivotal for sanding epoxy resin. The curing stage of the epoxy is essential for developing its durability and desired finish (Couch Design). Properly cured resin becomes a hard material, requiring the right sandpaper to achieve a smooth surface.
The appropriate sandpaper grit for epoxy resin can range from 60 grit for coarse sanding to 2000 grit for a finishing pass. Here’s a quick guide to help you choose the right grit for each stage:
| Sandpaper Grit | Usage |
|---|---|
| 60 – 100 | Coarse sanding to remove large imperfections |
| 120 – 180 | Medium sanding for smoothing out minor imperfections |
| 220 – 400 | Fine sanding to prepare for polishing |
| 600 – 2000 | Very fine sanding for a finishing pass |
Different projects may require different grits based on the desired outcome. For example, a high-gloss finish will require finer grits for the final sanding stages. Always begin with a coarser grit and gradually move to finer grits to achieve the best results. For more insights on working with epoxy resin, you might want to read how to use epoxy resin and how to polish epoxy resin.
By properly sanding your epoxy resin project, you lay the groundwork for a beautifully polished surface. Ensure you have a clear understanding of the tools and techniques required for this stage to achieve professional-quality results.
Sanding Techniques
Achieving a smooth epoxy resin surface requires gentle and deliberate sanding techniques. Understanding the differences between wet sanding and dry sanding is essential.
Wet Sanding Process
Wet sanding is generally recommended for epoxy resin due to its ability to reduce dust and secondary surface scratching. By using water as a lubricant, the sandpaper lasts longer, and the work environment stays cleaner (Empire Abrasives). Here’s how to perform wet sanding:
- Start with lower grit: Use 400-grit sandpaper to begin.
- Use ample water: Submerge or continuously spray water on the surface.
- Sand in circular motions: Focus on uniform coverage, applying even pressure.
- Progress through grits: Move up to finer grits such as 600, 800, and eventually 1200.
| Grit Size | Usage |
|---|---|
| 400 | Initial rough sanding |
| 600 | Intermediate smoothing |
| 800 | Fine detailing |
| 1200 | Preparing for polish |
For more details on the optimal use of grits, read our article on how to sand and polish epoxy resin.
Sanding Large vs. Small Objects
The approach to sanding can differ based on the size of your epoxy resin project:
Large Objects
For large surfaces like table tops:
- Use Electric Sanders: Orbit or palm sanders can help maintain consistency.
- Pressure Management: Even pressure prevents dips and waves.
Small Objects
For small items like jewelry:
- Hand Sanding: Manually using sandpaper gives better control.
- Finer Grits: Use sheets ranging from 400 to 1000 grit for high gloss finishes (Empire Abrasives).
For more insights on crafting with epoxy, check out how to epoxy resin a table top.
Wet Sanding vs. Dry Sanding
Two common methods for sanding epoxy resin are detailed below:
Wet Sanding
- Less Dust: Keeps the surface and sandpaper cleaner.
- Longer Sandpaper Life: Water as a lubricant prevents clogging.
- Smoother Finish: Reduces secondary scratches and enhances smoothness (Empire Abrasives).
Dry Sanding
- Convenience: No need for water setup.
- More Dust: Creates significant dust, requiring proper ventilation.
- Possible Clogging: Sandpaper may clog faster, shortening its lifespan (UltraClear Epoxy).
To make an informed choice between wet and dry sanding, consider the project’s specific needs and the cleanup process. For further guidance, our article on how to clean epoxy resin may be helpful.
Understanding these sanding techniques ensures a smooth and polished epoxy resin finish, ready for further polishing steps.
Sanding Considerations
When working on an epoxy resin project, several factors need to be considered to achieve the best results. This section will delve into the tools needed, the importance of the curing stage, and maintenance tips for your epoxy design.
Tools for Epoxy Floor Design
Proper preparation is key for a successful epoxy floor design project. Begin with a meticulous cleaning process to remove any dirt, debris, or contaminants that could compromise the adhesion of the epoxy resin (Couch Design). Address any cracks or imperfections in the existing floor. Sanding the surface is critical in this preparatory phase. It ensures an even and textured floor, promoting optimal adhesion and durability of the epoxy resin.
Here’s a list of tools you’ll need:
- Sandpaper (various grits): For an even surface.
- Power sander: For efficient sanding of larger areas.
- Vacuum cleaner: To remove all dust particles after sanding.
- Mop and cleaning agents: To ensure a completely clean surface.
For recommendations on polishers and other tools, refer to what are some good polishers for epoxy resin.
Curing Stage Importance
The curing stage is vital in the epoxy floor design process. It involves mixing the epoxy resin and hardener in specific ratios to initiate the curing process. This stage is crucial for forming a resilient and durable coating. Proper curing ensures that the epoxy floor can withstand heavy foot traffic, impacts, and chemical spills, while maintaining a glossy, seamless appearance.
To learn more about curing, check out how to cure epoxy resin and how long does it take for epoxy resin to dry.
Maintenance for Epoxy Design
Maintaining your epoxy design is crucial for its longevity and pristine quality. Regular cleaning routines should be established, avoiding harsh chemicals to maintain the glossy finish. Additionally, any damage should be repaired immediately to prevent further deterioration.
Here are some essential maintenance tips:
| Maintenance Task | Frequency |
|---|---|
| Cleaning with mild detergent | Weekly |
| Inspecting for damages | Monthly |
| Reapplying protective coatings | Every 2-3 years |
| Addressing cracks or chips | As needed |
Adhering to these maintenance tips will ensure the durability and long-term beauty of your epoxy floor. For more information on specific care routines, visit how to clean epoxy resin.
By understanding the importance of proper tools, the curing stage, and maintenance, you can ensure your epoxy project is successful. With the right approach, your epoxy floor or design will remain in excellent condition, offering long-lasting beauty and functionality.
Sanding Techniques for Epoxy Resin Projects
When embarking on your epoxy resin project, understanding the right sanding techniques is essential for achieving a smooth and polished finish. Let’s dive into the time-consuming nature of sanding, the differences between dry and wet sanding, and the optimal sanding process.
Time-Consuming Nature of Sanding
Sanding epoxy resin is a labor-intensive process that requires patience and meticulous attention to detail. This step is necessary to smooth out rough surfaces resulting from working with epoxy (UltraClear Epoxy). Proper sanding helps repair damage, correct mistakes, and prepare the surface for polishing.
| Step | Grit Range | Purpose |
|---|---|---|
| Initial Sanding | 80-120 grit | Remove major imperfections |
| Intermediate Sanding | 220-400 grit | Smooth transitions |
| Fine Sanding | 800-1200 grit | Prepare for polishing |
Dry vs. Wet Sanding Methods
There are two primary methods for sanding epoxy resin: dry sanding and wet sanding. Knowing the difference between the two can help you decide which method is best suited for your project.
Dry Sanding
Dry sanding is effective for smoothing rough surface imperfections. However, it creates a lot of dust, making it crucial to work in a well-ventilated area and wear protective gear.
- Pros: Effective for initial rough sanding
- Cons: Generates significant dust
Wet Sanding
Wet sanding involves moistening the surface to absorb dust, significantly reducing airborne particles. This method is particularly useful for fine-grit sanding and keeps the workspace cleaner.
- Pros: Less dust, smoother finish
- Cons: Requires more cleanup
Optimal Sanding Process
To achieve the best results, follow a methodical approach to sanding. The ‘Right-to-Left, Top-to-Bottom’ technique ensures complete coverage and effective smoothing of the surface (UltraClear Epoxy).
- Start with Coarse Grit (80-120 grit):
- Begin by removing major imperfections.
- Transition to Intermediate Grit (220-400 grit):
- Smooth out transitions and level the surface.
- Finish with Fine Grit (800-1200 grit):
- Prepare the surface for polishing, ensuring it’s smooth to the touch.
Before proceeding to polishing, make sure to consult our detailed guide on how to polish epoxy resin to achieve a mirror finish. For additional tips on epoxy resin projects, including how to clean epoxy resin and how much epoxy resin you need, be sure to explore our other resources.
Polishing Epoxy Resin
Polishing epoxy resin is a critical step to enhance aesthetics and achieve a high gloss, mirror-like finish. Whether you’re working on a small jewelry piece or a large countertop, proper preparation and the right tools are essential.
Preparing for Polishing
Before you begin polishing, ensure your epoxy resin piece is fully cured. Check out how to properly cure epoxy resin if you’re not sure. Sand the surface to remove any imperfections and achieve an even base. This involves a thorough sanding process with various grits of sandpaper, starting with coarse and progressing to fine.
| Sandpaper Grit | Use |
|---|---|
| 120-220 | Initial smoothing |
| 320-400 | Refining the surface |
| 600-1000 | Final sanding |
If you’re unsure about the sanding process, you can refer to our detailed section on sanding epoxy resin.
Tools and Materials Needed
To polish epoxy resin effectively, you’ll need the right tools and materials. These items will help you achieve a shiny, glass-like finish.
| Tool/Material | Purpose |
|---|---|
| Polishing Paste | Smoothens and shines the surface |
| Water Feed | Keeps the resin cool and removes debris |
| Linen/Cotton Cloth | For hand polishing |
| Buffer/Drill with Polishing Pads | For larger projects |
| Microfiber Cloth | Final buffing |
Polishing epoxy resin can be done by hand for intricate control, especially on small objects. Utilize a colorless polishing paste and a linen or cotton cloth to perform circular movements with light pressure. Regularly remove any residue left by the polishing paste to control the degree of brilliance.
For larger projects, an electric buffer equipped with dedicated polishing pads offers efficiency. Use sponges, discs, or polishing balls as recommended by the manufacturer, based on the object’s shape and size.
To proceed more effectively:
- Apply a Polishing Paste – Spread the paste evenly across the surface.
- Use a Quality Buffer – Ensure it has the appropriate pad.
- Perform Light Circular Motions – Avoid applying too much pressure to prevent burning the resin.
- Frequent Inspections – Regularly check the progress to maintain control and achieve the desired shine.
For safety and optimal results, consult our guide on how to polish epoxy resin before starting.
For an ultra-gloss finish, a two-step method using a cutting compound followed by an ultra-gloss polishing compound is recommended. Finish by cleaning and buffing the surface with a microfiber cloth to achieve a shiny, glass-like appearance.
Polishing Techniques
Polishing epoxy resin is an essential step in achieving a flawless and shiny finish for your projects. In this section, we’ll provide a step-by-step guide for polishing epoxy resin, tips for achieving a mirror finish, and important safety precautions to keep in mind.
Step-by-Step Polishing Guide
Polishing your epoxy resin project involves several steps and specific materials to ensure a smooth and shiny surface. Follow these steps to achieve optimal results:
- Clean the Sanded Surface: Ensure that the surface is clean and free of dust or debris.
- Apply Polishing Compound: Use a polishing compound that is suitable for plastics and metals. Apply a small amount onto a soft cloth.
- Work in Circular Motions: Rub the polishing compound into the epoxy surface using circular motions. Apply consistent pressure and make sure to cover the entire surface evenly.
- Buff the Surface: Continue to buff the surface until the desired shine is achieved. You may need to reapply the polishing compound and repeat the process if necessary.
- Final Clean: Wipe the surface with a clean cloth to remove any residue from the polishing compound.
Achieving a Mirror Finish on Epoxy Resin
For those looking to achieve a mirror-like finish on their epoxy resin projects, consider the following tips:
- Use a Buffer Tool: A buffer tool can help achieve an exceptionally shiny finish. However, be cautious of overheating. Monitor the surface temperature and allow it to cool down between sessions.
- Gradual Polishing: Start with coarse polishing compounds and move to finer ones. This gradual process will remove scratches and bring out a high gloss.
- Consistent Pressure: Apply even pressure throughout the polishing process to ensure a uniform finish (CHILL EPOXY™).
Safety Precautions for Polishing
When polishing epoxy resin, it’s important to follow safety measures to protect yourself and ensure the longevity of your project:
- Wear Protective Gear: Use safety goggles, gloves, and a dust mask when polishing to protect yourself from debris and chemical exposure.
- Work in a Ventilated Area: Ensure that your workspace is well-ventilated to avoid inhaling fumes from the polishing compound.
- Monitor Heat: Polishing can generate heat. Regularly check the temperature of the epoxy surface to avoid overheating and warping.
- Allow Cooling Periods: Let the epoxy surface cool down between polishing sessions to prevent damage.
For more detailed information, check out our article on how to polish epoxy resin. If you’re new to working with epoxy, you may also find our guides on how to use epoxy resin and how to clean epoxy resin useful.

