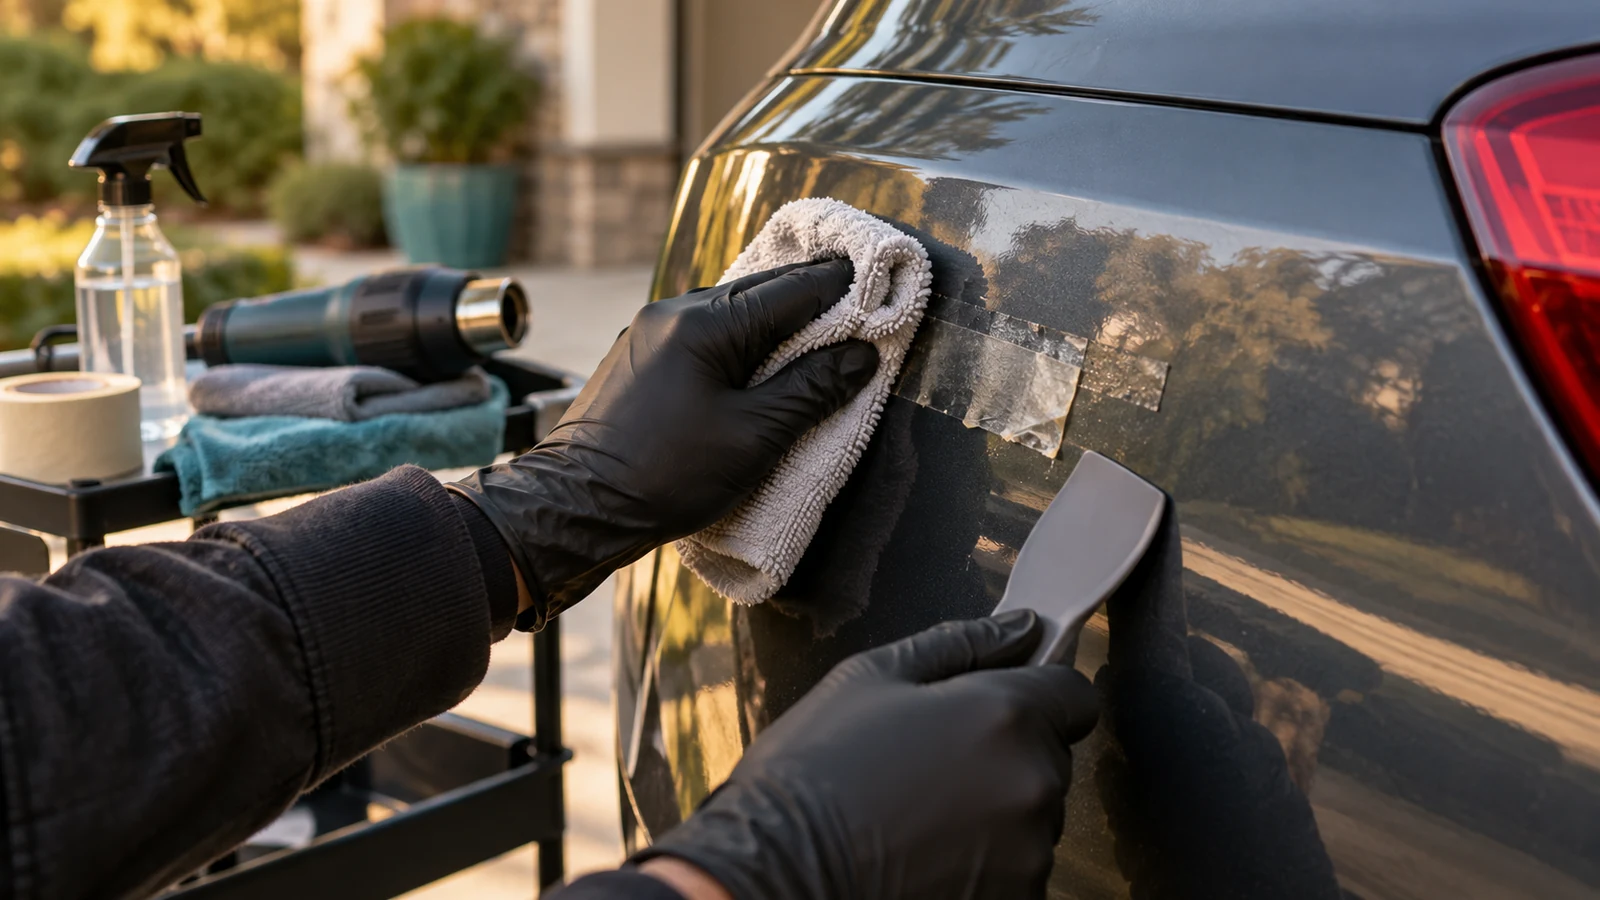
To remove tape residue from car paint, wash and dry the panel, soften the adhesive with a hair dryer or approved automotive adhesive remover, then wipe gently with a clean microfiber towel. Use 70%-91% isopropyl alcohol for fresh residue and a dedicated remover for hardened glue. Avoid blades, abrasive pads, acetone, and paint thinner.
Key Facts at a Glance
A clean microfiber towel and automotive adhesive remover are the safest general-purpose combination for cured tape glue.
Fresh residue commonly takes 5-10 minutes; baked-on duct-tape adhesive may take 30-45 minutes.
Let remover dwell for about 30-60 seconds, but never allow it to dry on the paint.
Keep a heat gun moving and keep the panel below approximately 140°F (60°C).
IPA works best on fresh, thin residue and often needs several passes on old rubber-based adhesive.
After solvent use, wash the panel and replace any wax or sealant removed during cleaning.
What Is Tape Residue on Automotive Paint?
Tape residue is adhesive transferred from masking tape, duct tape, packing tape, double-sided tape, decals, or protective film. The tape carrier may peel away while pressure-sensitive adhesive remains attached to the clear coat, where sunlight, heat, and oxidation can make the residue harder and more brittle.
Automotive clear coat is a cross-linked polyurethane layer, but its chemical resistance is not unlimited. A solvent that loosens adhesive can also soften plastic trim, stain porous moldings, or remove wax and sealant, so the correct method depends on both the glue and the surface.
Is the residue glue or damaged paint?
Tape residue is usually shiny, tacky, stringy, or capable of rolling into small pellets under light wiping. Damaged clear coat appears cloudy, peeling, cracked, rough, or permanently dull after the adhesive has been removed and the panel has been washed.
A useful test is to place a damp microfiber towel over a small spot for 30 seconds, then wipe lightly. If the surface becomes smooth while the colored paint remains intact, adhesive was the main problem. If the defect remains underneath clean paint, stop increasing solvent strength and inspect the finish.
Which Removal Method Should You Use?
The best method depends on residue age, adhesive thickness, panel temperature, and finish type. Start with the least aggressive option that can reasonably dissolve the glue, then escalate only when the previous method has been wiped away and evaluated.
| Residue condition | First choice | Typical working time | Main risk |
|---|---|---|---|
| Fresh masking-tape film | 70%-91% IPA | 5-10 minutes | Repeated wiping can create marring |
| Thin packing-tape glue | Automotive adhesive remover | 10-15 minutes | Solvent drying on paint |
| Thick duct-tape adhesive | Heat plus adhesive remover | 20-45 minutes | Excess heat or solvent exposure |
| Large flat adhesive area | Low-speed eraser wheel | 10-30 minutes | Friction heat and paint burn |
| Residue on matte paint | Finish-approved cleaner | 10-20 minutes | Gloss spots from polishing |
| Glue on plastic trim | Trim-safe remover | 10-25 minutes | Whitening or swelling of plastic |
Dedicated automotive adhesive removers generally provide the best balance for cured residue because they are formulated for vehicle surfaces. Products such as 3M Specialty Adhesive Remover and Goo Gone Automotive are examples, but the product label remains authoritative for painted surfaces, plastics, coatings, and dwell time.
Is isopropyl alcohol safe for car paint?
Isopropyl alcohol is usually suitable for short, controlled applications on cured automotive paint, especially at 70%-91% concentration. IPA is inexpensive and evaporates cleanly, but it is a weak choice for thick, sun-baked, rubbery, or tar-like adhesive.
Use IPA on a folded microfiber towel rather than pouring it directly onto the panel. Wipe a small section, rotate to a clean towel face, and repeat. IPA can strip wax or reduce the performance of some sealants, so plan to reapply protection afterward.
Is a citrus adhesive remover better than IPA?
A citrus or hydrocarbon-based automotive adhesive remover is usually more effective than IPA against old pressure-sensitive adhesive. The trade-off is an oily film, stronger odor, and greater need to wash the panel afterward.
| Product category | Best residue | Typical price | Cleanup needed | Avoid or test first on |
|---|---|---|---|---|
| 70%-91% IPA | Fresh thin film | $3-$8 | Usually soap and water | Uncured paint and delicate coatings |
| Automotive adhesive remover | Cured tape glue | $8-$20 | Car soap recommended | Matte finishes and plastic trim |
| Citrus cleaner | Thick rubber adhesive | $7-$15 | Soap and water required | Unpainted porous surfaces |
| Tar and adhesive remover | Tar-like deposits | $10-$25 | Degreasing wash | Fresh repairs and sensitive wraps |
| Eraser wheel | Broad flat residue | $12-$25 | Wash and inspect | Edges, body lines, plastic, weak paint |
Before You Start
A door-sized adhesive patch normally requires 15-30 minutes, moderate care, and approximately $8-$25 in materials. Work in shade on a cool panel, because direct sun accelerates solvent evaporation and raises the risk of uneven wiping.
| Item | Recommended quantity or specification | Purpose |
|---|---|---|
| Car shampoo | 1-2 teaspoons in 2 gallons of water | Removes grit before wiping |
| Microfiber towels | 4-6 clean, low-pile towels | Separates dirty and clean wiping stages |
| Automotive adhesive remover | 2-4 ounces for one door-sized area | Dissolves cured glue |
| Isopropyl alcohol | 2-4 ounces at 70%-91% | Handles fresh or final residue |
| Nitrile gloves | 1 pair | Limits skin exposure |
| Hair dryer | Low or medium setting | Softens adhesive safely |
| Infrared thermometer | Optional, $15-$35 | Monitors panel temperature |
| Car wax or sealant | 1-2 teaspoons | Restores local protection |
Do not begin on a panel with loose dirt, road grit, or dried salt. Do not work over a fresh repaint unless the body shop confirms that the coating has cured sufficiently. Many repair facilities require several weeks before normal solvent cleaning, and the shop that applied the paint can provide the correct interval.
How to Remove Tape Residue From Car Paint
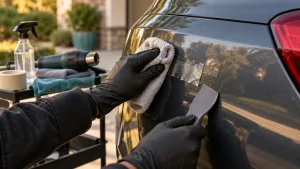
The safest sequence is wash, soften, dissolve, wipe, inspect, wash again, and protect. The most important factor is low friction: solvent should do most of the work, while the towel merely lifts softened adhesive.
Step 1: Wash and dry the panel
Mix automotive shampoo with water according to the label, wash the affected panel with a clean mitt, rinse thoroughly, and dry with a clean microfiber towel. Do not scrub the glue aggressively during the wash.
You will know the panel is ready when no visible dust or grit remains around the residue. The common mistake is wiping a dirty surface, because abrasive particles trapped in adhesive can drag across the clear coat and create fine swirls.
Step 2: Test the finish and remover
Apply a small amount of the chosen remover to an inconspicuous painted area, such as the lower inside edge of a door. Leave it for the label’s stated time, wipe it away, and inspect for color transfer, clouding, gloss change, or trim staining.
You will know the product is suitable when the test area remains uniform and the adhesive softens. A common mistake is testing only the glue while ignoring nearby rubber, textured plastic, vinyl graphics, ceramic coatings, or matte paint.
Step 3: Soften attached tape with gentle heat
If the tape backing remains, warm it with a hair dryer from approximately 6-8 inches away using low or medium heat. Keep the airflow moving and peel the tape back over itself at roughly a 45-degree angle rather than pulling it upward.
A hair dryer is preferable to a heat gun for most beginners because it produces less concentrated heat. If using a heat gun, use the lowest practical setting, keep it moving, and monitor the panel. A practical upper limit is approximately 140°F (60°C), although a cooler working temperature is safer.
You will know the tape is ready when it lifts smoothly and leaves less adhesive behind. The common mistake is heating one spot until the paint feels hot; localized overheating can soften clear coat, distort plastic, or reveal weak repaint adhesion.
Step 4: Apply automotive adhesive remover
Dampen a folded microfiber towel with adhesive remover, or apply a small amount to the residue according to the product label. For a door-sized patch, begin with approximately 1-2 teaspoons rather than flooding the panel.
Allow 30-60 seconds of dwell time while keeping the surface visibly wet. Do not let the solvent dry, run into panel gaps, or pool against weather stripping.
You will know the solvent is working when the glue becomes glossy, soft, stringy, or capable of rolling. The common mistake is immediately scrubbing a dry adhesive, which increases friction without giving the solvent time to penetrate.
Step 5: Roll and lift the softened glue
Wipe with light pressure in one direction, using a clean section of microfiber after every few passes. If the adhesive rolls into small balls, lift those balls away rather than spreading them across the panel.
For vertical panels, work from the top downward and use a second towel to catch runoff. Reapply remover to stubborn spots, wait another 30-60 seconds, and repeat instead of increasing pressure.
You will know the section is clean when the towel glides without tackiness and no glossy adhesive film remains under angled light. The common mistake is using one saturated towel for the entire panel, which redistributes glue and dirt.
Step 6: Remove the solvent film
Wash the panel with car shampoo and clean water, then dry it with a fresh towel. A final wipe with diluted IPA may remove remaining oily residue, but test first if the vehicle has a ceramic coating or delicate aftermarket finish.
You will know the solvent is gone when water sheets or beads consistently across the cleaned area and the surface has no greasy feel. The common mistake is applying wax over residual solvent, which can cause uneven bonding and streaking.
Step 7: Inspect and restore protection
Inspect the paint in direct but diffuse light. If the surface is smooth and only slightly dull, apply a compatible wax, sealant, or coating-maintenance product to the treated area according to its instructions.
Adhesive remover can remove local wax or sealant even when it does not damage clear coat. Do not polish automatically. Polishing removes a small amount of clear coat and is unnecessary when the paint is already smooth.
What If the Residue Is Old or Baked On?
Old adhesive requires repeated short cycles, not one aggressive treatment. Warm the panel moderately, apply an automotive remover for 30-60 seconds, wipe with low pressure, and repeat for 3-6 cycles before considering mechanical assistance.
Baked residue often has a hard surface and a softer layer underneath. Scraping the hard top layer with a blade can scratch the clear coat, while allowing solvent to dwell under a controlled towel can soften the adhesive from the edges inward.
For a large flat panel, a rubber adhesive eraser wheel can reduce labor, but it requires a variable-speed drill, light pressure, and constant movement. Use the lowest effective speed, avoid body lines and edges, and stop every 10-15 seconds to check surface temperature and residue removal.
| Mechanical condition | Suggested action | Stop point |
|---|---|---|
| Thin remaining film | Hand wipe with remover | Towel glides smoothly |
| Thick soft rolls | Reapply solvent | Glue no longer strings |
| Hard central patch | Warm, then repeat solvent | Surface begins to dull |
| Large flat expanse | Eraser wheel at low speed | Wheel or paint becomes hot |
| Residue near edge | Hand method only | Edge begins to lift |
| Clear coat already peeling | Stop and seek repair | Any additional flaking |
An eraser wheel is not a magic eraser. It is a friction tool. Holding it stationary can generate enough heat to smear rubber onto paint or damage a thin clear coat, particularly on repainted panels.
What Methods Should You Avoid?
Avoid metal razor blades, green kitchen pads, steel wool, dry abrasive scrubbing, acetone, lacquer thinner, and general paint thinner on automotive clear coat. These methods can scratch, soften, stain, or dull the finish faster than the adhesive can be removed.
| Method | Why people try it | Primary failure | Safer substitute |
|---|---|---|---|
| Razor blade | Cuts thick glue quickly | Deep linear scratches | Heat and solvent cycles |
| Green scrub pad | Removes stubborn film | Permanent scouring marks | Soft microfiber towel |
| Steel wool | Removes hardened spots | Rust-colored abrasion and marring | Automotive adhesive remover |
| Acetone | Dissolves many adhesives | Clear-coat or trim damage | Label-approved remover |
| Lacquer thinner | Strong solvent action | Paint softening and gloss loss | Automotive tar remover |
| Magic Eraser | Feels gentle when wet | Fine abrasive haze | Clean microfiber |
| Dry hard scrubbing | Requires no products | Swirls and adhesive spreading | Lubricated wiping |
WD-40 can loosen some adhesive, but it leaves a persistent oily film and is not the first choice for clear-coat cleaning. Vinegar usually has little effect on cured pressure-sensitive adhesive. A clay bar may remove a thin contaminant film after the glue is mostly gone, but it is a poor primary tool for thick tape residue.
Variations for Different Surfaces
How do you remove residue from plastic trim?
Use a trim-labeled adhesive remover and test an unseen area first. Textured black plastic can absorb solvent, turn gray, or develop a shiny patch that cannot be corrected by normal washing.
Keep the product on a towel rather than flooding the trim. Wipe across the texture lightly, then rinse with mild soap. Do not use an eraser wheel on plastic trim.
Can you remove tape residue from matte paint?
Matte paint requires a finish-approved cleaner and gentle hand wiping because polishing or aggressive rubbing can create a permanent glossy spot. Do not use abrasive compounds, clay, or an eraser wheel unless the vehicle manufacturer specifically approves that process.
Test the cleaner on a hidden section. A matte finish does not provide the same correction options as gloss clear coat, so prevention of friction marks matters more than speed.
Can you remove residue from a ceramic-coated car?
Usually, yes, but the solvent may reduce the coating’s surface behavior or remove a sacrificial topper. Use a coating-compatible cleaner, limit dwell time, and avoid assuming that renewed water beading proves the coating is fully intact.
If the tape was applied over a recently installed coating, contact the installer before using solvent. Some coating systems have specific maintenance chemicals and curing restrictions.
What about a fresh paint repair?
Do not use solvent on a fresh repair unless the body shop approves it. Newly refinished paint can remain vulnerable to chemicals, pressure, and trapped solvent even when it feels dry, and the correct cure time varies by paint system, bake cycle, temperature, and humidity.
A professional painter can also determine whether tape pulled up weak adhesion. If paint comes away with the tape, further home removal can enlarge the repair.
Common Problems and Recovery
| Problem | Likely cause | Immediate recovery | Do not do |
|---|---|---|---|
| Glue spreads into a film | Too much pressure or saturated towel | Switch to a dry clean towel face | Continue with the same towel |
| Paint looks hazy | Abrasive wiping or solvent sensitivity | Wash, dry, and inspect after cooling | Add stronger solvent immediately |
| Residue remains tacky | Insufficient dwell time | Repeat 30-60 second cycles | Scrub harder |
| Trim turns white | Solvent reaction | Rinse promptly and stop | Reapply product |
| Tape removes paint | Poor substrate adhesion | Stop and photograph the damage | Peel remaining tape quickly |
| Water no longer beads | Protection was stripped | Apply compatible protection later | Assume clear coat failed |
| Glue returns after cleaning | Adhesive remains in pores or edges | Inspect panel gaps and repeat locally | Flood seams with solvent |
A dull appearance after adhesive removal does not automatically mean clear-coat damage. Solvent residue, removed wax, and fine towel marring can all change gloss temporarily. Wash first, allow the panel to cool, and inspect before choosing polish or professional correction.
How Much Time and Money Does Removal Take?
A small fresh residue spot may cost less than $5 if you already own car soap and microfiber towels. A complete beginner setup with remover, towels, gloves, and protection typically costs $15-$40, while adding an infrared thermometer and eraser wheel raises the tool cost.
| Job size and condition | Typical time | Typical material cost | Recommended method |
|---|---|---|---|
| 2-inch fresh spot | 5-10 minutes | $1-$5 | IPA and microfiber |
| Door-sized masking residue | 10-20 minutes | $8-$20 | Automotive remover |
| Door-sized baked duct tape | 30-45 minutes | $10-$25 | Heat and repeated remover cycles |
| Hood-sized thin transfer | 20-35 minutes | $10-$25 | Remover and multiple towels |
| Large commercial decal glue | 45-120 minutes | $20-$60 | Heat, remover, possible professional help |
| Paint-lifting or peeling area | Variable | $100 or more professionally | Stop and obtain repair estimate |
These are typical consumer ranges, not guaranteed labor times. Cold panels, high humidity, old acrylic adhesive, heavy oxidation, and previous repainting can lengthen the process.
When Should You Stop and Call a Professional?
Stop when the paint lifts, the clear coat peels, the panel becomes cloudy after washing, the residue covers a fresh repair, or the glue lies beneath a vinyl graphic. Professional help is also sensible when a large roof, hood, or commercial decal area requires mechanical removal.
A detailer can remove remaining adhesive and correct light marring, but a body shop is the appropriate destination for peeling clear coat, missing color, solvent damage, or paint-transfer failure. No adhesive remover can restore coating that tape has physically detached.
FAQ
Will tape residue damage car paint if left alone?
Tape residue can become harder to remove as sunlight, heat, and oxidation change the adhesive, but residue does not automatically damage clear coat. The greater risk comes from prolonged contamination, staining, aggressive removal, or tape pulling weak paint from a previous repair.
Can dish soap remove tape glue from a car?
Dish soap may remove oily residue after adhesive has been dissolved, but it usually does not dissolve cured tape glue effectively. Use automotive shampoo for routine washing, then use a paint-labeled adhesive remover for the remaining polymer film.
Does a clay bar remove tape residue?
A clay bar is designed for bonded surface contaminants such as overspray and industrial fallout, not thick adhesive. Clay can drag across sticky glue, become contaminated, and create marring. Remove the bulk of the adhesive chemically before considering clay for a thin final film.
How do you remove duct-tape glue from a car door?
Wash the door, warm the glue gently, apply automotive adhesive remover for 30-60 seconds, and wipe with fresh microfiber sections. Repeat several light cycles rather than scrubbing. Baked duct-tape residue commonly takes 30-45 minutes.
Can tape residue be removed in cold weather?
Cold weather makes pressure-sensitive adhesive harder and less responsive to solvents. Move the vehicle into a shaded, ventilated area above approximately 60°F (16°C), or warm the panel gently with a hair dryer while keeping the surface below the safe temperature limit.
Why does tape leave a shadow after the glue is gone?
A tape shadow can result from paint oxidation, uneven ultraviolet exposure, removed wax, or a difference between protected and exposed paint. Wash and protect the area first. If the color difference remains on a smooth surface, a professional may need to assess polishing or repainting.
The Bottom Line
The safest way to remove tape residue from car paint is to wash the panel, soften attached tape with controlled low heat, dissolve the adhesive with an automotive remover, and wipe with clean microfiber towels using minimal pressure. Use IPA for fresh residue, repeat short solvent cycles for baked glue, avoid abrasive tools and harsh thinners, then wash and restore local protection.