How to Pour Epoxy Resin: Best Practices
Preparing Your Workspace
Before diving into how to pour epoxy resin, it’s crucial to set up your workspace properly. This involves ensuring you have the right safety gear and ventilation in place.
Safety Gear for Handling Epoxy Resin
Handling epoxy resin requires proper safety gear to protect yourself from potential hazards. Here’s a checklist of essential safety items:
- Disposable Nitrile Gloves: These gloves protect your hands from chemical exposure and skin irritation. Vinyl gloves can also be used.
- Safety Goggles: To shield your eyes from potential splashes and harmful fumes. Regular prescription glasses or sunglasses aren’t sufficient.
- Respirator Mask: A respirator with an organic vapor cartridge safeguards your lungs from inhaling hazardous fumes Eye Candy Pigments.
- Long-Sleeved Top and Apron: These provide an additional layer of skin protection against spills.
- Dispose of Waste Properly: Never eat or drink while working with resin and ensure you dispose of any unused resin responsibly to prevent environmental harm Steve McDonald Crafts.
Proper Workspace Ventilation
Creating a safe workspace also involves ensuring adequate ventilation. This will help prevent the buildup of epoxy resin vapors, which can irritate the respiratory system.
- Open Windows and Doors: This promotes airflow and helps dissipate fumes quickly.
- Use Fans: Position fans to direct vapors out of the room. This keeps the air moving and prevents the accumulation of harmful fumes.
- Respirator Masks: Even with proper ventilation, wearing a mask ensures you’re doubly protected against inhaling any residual fumes Instructables.
By prioritizing safety gear and ensuring proper ventilation, you create a secure environment for your epoxy resin projects. For more on handling epoxy resin, see our guide on how to use epoxy resin.
Safety Gear Checklist
| Safety Item | Purpose |
|---|---|
| Nitrile Gloves | Protects hands from chemicals and skin irritation |
| Safety Goggles | Shields eyes from splashes and fumes |
| Respirator Mask | Protects lungs from inhaling hazardous fumes |
| Long-Sleeved Top | Adds an additional layer of skin protection |
| Apron | Protects clothes and skin from spills |
For further information on safety when working with epoxy resin, visit our article on is epoxy resin toxic.
Measuring and Mixing Epoxy Resin
Accurate measurement and thorough mixing of epoxy resin are fundamental steps in achieving a successful pour. Understanding the importance of precise ratios and selecting the right type of epoxy resin can significantly impact the quality and durability of your project.
Importance of Accurate Ratios
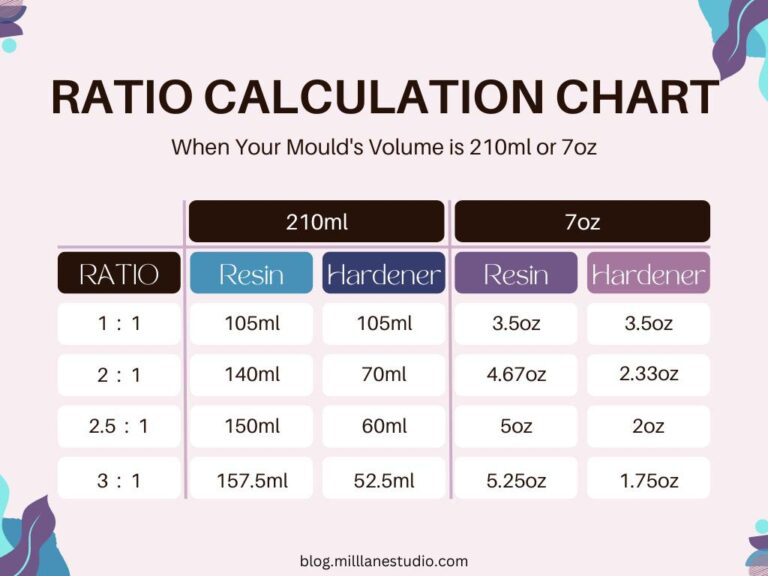
When measuring and mixing epoxy resin, it is critical to maintain accurate ratios between the resin and hardener. Incorrect ratios can lead to improper curing, resulting in a weak and brittle finish. Accurate measurement ensures that the epoxy cures correctly and achieves its intended physical properties (Swell Composites).
| Measurement Tool | Accuracy Level |
|---|---|
| Digital Scale | High |
| Measuring Cups | Moderate |
| Mixing by Eye | Low |
For best results, always use a digital scale for precise measurements. Follow the manufacturer’s recommended ratios and refer to our detailed guide on how to mix epoxy resin for step-by-step instructions.
Choosing the Right Type of Epoxy Resin
Selecting the appropriate type of epoxy resin for your project is essential for achieving the desired finish and performance. Different epoxy resins are formulated for specific applications, such as tinted finishes, molded projects, and high-gloss surfaces. Here’s a brief overview of the most commonly used types:
| Type of Resin | Best For | Characteristics |
|---|---|---|
| Pigment Paste | Tinted Finishes | High color concentration, vibrant results |
| Casting Resin | Molded Projects | Low viscosity, ideal for deep pours |
| High Viscosity Resin | Glossy Surfaces | Thick consistency, high gloss |
Knowing which type to use can make a significant difference in the outcome of your project (Just Resin). If you’re working on a specific project, such as a tabletop, check out our guide on how to epoxy resin a table top for tailored advice.
For more information on epoxy resin projects and their specific requirements, explore our comprehensive list of articles, including how to use epoxy resin and what is epoxy resin made of.
Surface Preparation for Best Results
Proper surface preparation is essential to achieve the best results when you are learning how to pour epoxy resin. This section covers everything you need to know about surface cleaning and sanding, as well as achieving good adhesion.
Surface Cleaning and Sanding Tips
Before pouring epoxy resin, cleaning and sanding the surface ensures optimal adherence and a polished finish. Below are important steps to prepare your surface:
Cleaning
- Remove Dust and Debris: Clear any dust, dirt, or larger debris from the surface. Use a vacuum or a damp cloth.
- De-greasing: Clean the surface with a grease remover or isopropyl alcohol to eliminate any oils or grease. This step is vital for ensuring that the epoxy adheres well to the surface.
- Drying: Make sure the surface is fully dry. Moisture can impede resin bonding.
Sanding
- Sand the Surface: Sand the surface to create a rough texture for better adhesion. Use sandpaper in the range of 80-120 grit for initial sanding.
- Wipe Down: After sanding, wipe off the sanding dust using a clean, dry cloth or vacuum to avoid any particulates mixing with the resin.
| Step | Task | Tools Needed |
|---|---|---|
| 1 | Remove Dust | Vacuum, Damp Cloth |
| 2 | De-grease | Grease Remover, Isopropyl Alcohol |
| 3 | Dry Surface | Dry Cloth |
| 4 | Sanding | 80-120 Grit Sandpaper |
| 5 | Wipe Down | Clean Cloth, Vacuum |
Surface preparation isn’t just about cleaning. It’s about ensuring that your epoxy project looks stellar while adhering strongly. For more tips, discover our detailed guide on how to clean epoxy resin.
Achieving Good Adhesion with Proper Surface Preparation
Achieving good adhesion in epoxy projects is crucial for a professional finish (Swell Composites). Here are some advanced tips to cultivate strong adherence:
-
Pore Sealing: Seal porous materials like wood before pouring epoxy. Use a thin brush-on or spray sealant. This prevents bubbles by trapping air that might otherwise escape into the resin.
-
Temperature Control: Maintain an optimal temperature in your workspace to ensure the proper curing of the epoxy. Warmer temperatures can make the epoxy set quicker, while cooler temperatures can extend the curing time. Adjust temperature accordingly.
| Surface Type | Preparation Step | Tools Needed |
|---|---|---|
| Wood | Seal Pores | Thin Brush, Spray Sealant |
| Metal | Sanding | 80-120 Grit Sandpaper |
| Glass | De-greasing and Sanding | Isopropyl Alcohol, Sandpaper |
- Secondary Bonding: Ensure that bonding surfaces are clean, dry, and lightly sanded to create “keys” for the epoxy to adhere properly. This is essential for secondary (mechanical) adhesion.
Following these advanced preparation steps can make a world of difference in your epoxy projects. For more insights, check our guide on how to use epoxy resin.
By meticulously preparing your surface, you lay the foundation for a flawless epoxy resin pour. Invest time in these preparation steps for superior adhesion and a polished, long-lasting finish.
Tips for Working with Different Temperatures
When working with epoxy resin, temperature plays a crucial role in the successful application and curing of your project. Understanding how to adapt to varying temperatures ensures a smooth, clear, and durable finish.
Adapting to Warmer Temperatures
Warmer temperatures can accelerate the curing process of epoxy resin, leading to potential challenges. To pour resin effectively in warmer conditions (between 75-85°F), consider the following guidelines:
- Use a Slower Hardener: A slower hardener will extend the curing time, allowing you more working time with the epoxy mixture (Swell Composites).
- Mix Smaller Batches: Working in smaller batches ensures that the epoxy does not cure too quickly, giving you ample time to apply it properly.
- Increase Surface Area: Pour the epoxy mixture into a container with a greater surface area to help cool it down and extend the open time.
Maintaining a consistent and slightly warmer temperature ensures that the epoxy resin maintains a crystal-clear appearance and a honey-like consistency, making it easier to pour and spread (ArtResin).
Adjusting for Cooler Temperatures
Cooler temperatures can cause epoxy resin to thicken, making it difficult to work with and potentially cloudy. To ensure optimal results in cooler conditions, follow these best practices:
- Use a Faster Hardener: A faster hardener helps the epoxy cure efficiently even in lower temperatures (Swell Composites).
- Supplemental Heat: Use heaters or heat lamps to raise the temperature of the workspace and the epoxy itself to above the hardener’s minimum recommended application temperature.
- Ideal pour temperature: 75-85°F (24-30°C)
- Minimum application temperature: above hardener’s recommended range
The table below gives a quick reference for adapting to different temperatures when working with epoxy resin:
| Temperature | Recommendations |
|---|---|
| Warmer (75-85°F) | – Slower hardener – Mix smaller batches – Increase surface area |
| Cooler (below 75°F) | – Faster hardener – Use supplemental heat – Maintain minimum application temperature |
Properly adapting to different temperature conditions enhances the quality of your epoxy resin projects. For more information on epoxy resin, including what is epoxy resin and how to mix epoxy resin, explore our related articles.
Pouring Epoxy Resin
Pouring Techniques and Approaches
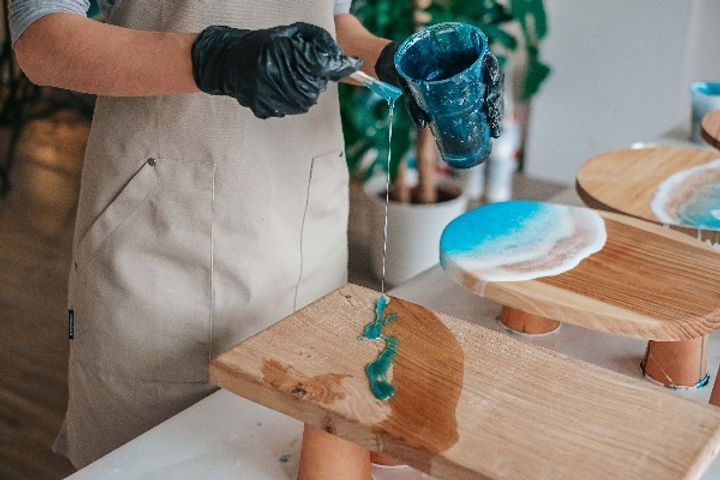
When learning how to pour epoxy resin, mastering various pouring techniques and approaches is crucial. Here are some essential practices to ensure the best coverage and finish for your epoxy resin project:
-
Thin Pours: Pouring thin layers of epoxy resin is ideal for surface coatings and small projects. This method allows better control, reduces bubble formation, and promotes even curing. Each pour should be kept below 1/8 inch to avoid overheating and incomplete curing.
-
Flood Coats: For larger surfaces like tabletops and countertops, use a flood coat to create a thick, durable finish. A flood coat typically ranges from 1/8 inch to 1/4 inch. Ensure the surface is level before pouring to achieve a smooth, glass-like finish.
-
Self-Leveling: Pouring self-leveling epoxy resin is a straightforward approach. Start by pouring the resin in the center of the project and let it naturally flow outward, using a spreader or notched trowel to distribute it evenly.
Handling Large Pours and Form Building
For substantial projects such as river tables, large countertops, or resin art pieces, managing large pours and constructing suitable forms is necessary.
Building Forms
-
Constructing a Mold: Use materials like melamine or MDF to build your mold. The form must be sturdy and precisely sized to contain the epoxy resin. Ensure all seams are sealed with caulk to prevent leaks.
-
Sealing and Taping: To prevent the epoxy from sticking to the mold, line it with sheathing tape or plastic sheeting. This creates a non-stick barrier, making it easier to remove the project once cured.
-
Leveling the Mold: Proper leveling is critical. An unlevel form will cause uneven resin distribution and curing. Use a spirit level to check and adjust the mold until it is perfectly level.
Pouring Large Batches
-
Multi-layer Pours: For deep castings, pour in multiple layers to reduce heat buildup and ensure complete curing. Each layer should be allowed to gel before adding the next, typically after 12 to 24 hours.
-
Handling High Volume: Mix larger quantities as needed but avoid mixing in extremely large volumes at once, as this can cause rapid exothermic reactions and excess heat. Pouring in controlled batches ensures proper curing.
-
Form Support: Provide adequate support for the form, especially for heavier pours. Ensuring the form can withstand the weight and pressure of the epoxy resin is crucial to maintaining shape and preventing leaks.
| Pour Type | Max. Thickness | Curing Time |
|---|---|---|
| Thin Pours | < 1/8 inch | 12-24 hours |
| Flood Coats | 1/8 to 1/4 inch | 24-48 hours |
| Deep Castings | Multi-layer | Layer-dependent (12-24 hours per layer) |
Mastering these pouring techniques and approaches guarantees smoother, more consistent results. Following proper form-building methods and handling large pours efficiently ensures your project turns out exactly as planned. For additional information on curing times and resin-specific practices, check out our guides on how to cure epoxy resin and how to mix epoxy resin.
Finishing Touches and Curing
Once you’ve carefully poured your epoxy resin, the finishing touches and curing process become critical steps to ensure a flawless end product. It involves removing bubbles and achieving a glassy finish, followed by a proper drying and curing process.
Removing Bubbles and Achieving a Glassy Finish
To get that perfectly smooth and glassy surface, you need to address any air bubbles that may have formed during the pouring process. One effective way to remove bubbles is by using a propane torch or a heat gun. When you pass the torch over the surface of the resin, it heats the epoxy, thinning it out and allowing air bubbles to escape (Instructables).
| Method | Tool | Effectiveness |
|---|---|---|
| Heat Gun | Heat gun | Moderate |
| Propane Torch | Propane torch | High |
Using a propane torch is generally more effective than a heat gun because it quickly heats the resin, making it easier for bubbles to escape. Make sure to move the torch steadily across the resin, covering all edges and corners to ensure even heating and bubble release.
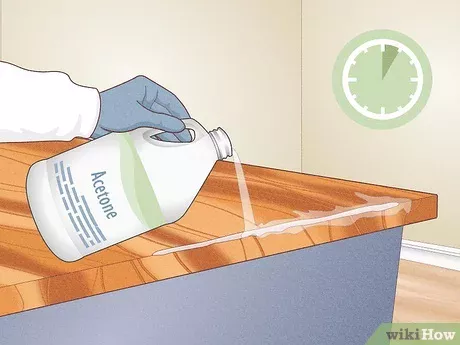
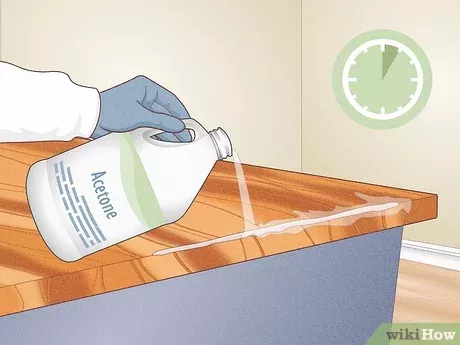
If bubbles persist even after the epoxy has hardened, you can remove surface-level bubbles by sanding and using acetone. For deeper bubbles, you might need to sand and recoat the entire surface to achieve a completely smooth finish (Best Bar Top Epoxy).
Drying Times and Curing Process
Understanding the drying and curing process of epoxy resin is crucial for achieving a durable finish. The initial drying time for epoxy resin can vary, but it typically reaches a solid state within 24-48 hours. However, full curing, which ensures maximum strength and durability, can take up to two weeks (UltraClear Epoxy).
| Stage | Timeframe | Description |
|---|---|---|
| Initial Drying | 24-48 hours | Resin hardens to a touch-safe state |
| Full Curing | Up to 2 weeks | Resin reaches maximum strength and durability |
During the curing process, it’s essential to maintain an adequate temperature range. Ideal curing temperatures are between 70°F and 85°F (21°C and 29°C). Avoid any significant fluctuations in temperature to ensure the epoxy resin cures uniformly.
For more details on how to handle epoxy resin and achieve the best results, check out our guide on how to use epoxy resin and learn about how long it takes for epoxy resin to dry.
By meticulously following these steps, you can ensure that your epoxy resin project turns out smooth, resilient, and aesthetically pleasing. For those looking to perfect their finishing techniques, our article on how to polish epoxy resin offers in-depth guidance on achieving that mirror-like finish.

