How to Use Epoxy Resin: Beginner’s Guide
Understanding Epoxy Resin
Before diving into using epoxy resin for your projects, it’s important to understand what epoxy resin is and its components. This knowledge will provide a solid foundation for your craft.
What is Epoxy Resin?
Epoxy resin is a liquid polymer that reacts when mixed to harden into permanent clear structures (OneGlyph). It’s a versatile substance used in various applications due to its transparent color, strong bonding ability, and chemical resistance (Hirosarts). Typically, it takes around 3 to 4 hours at room temperature to reach a touch-dry state, though this can vary with weather conditions.
For more detailed information, you can read our article on what is epoxy resin.
Components of Epoxy Resin
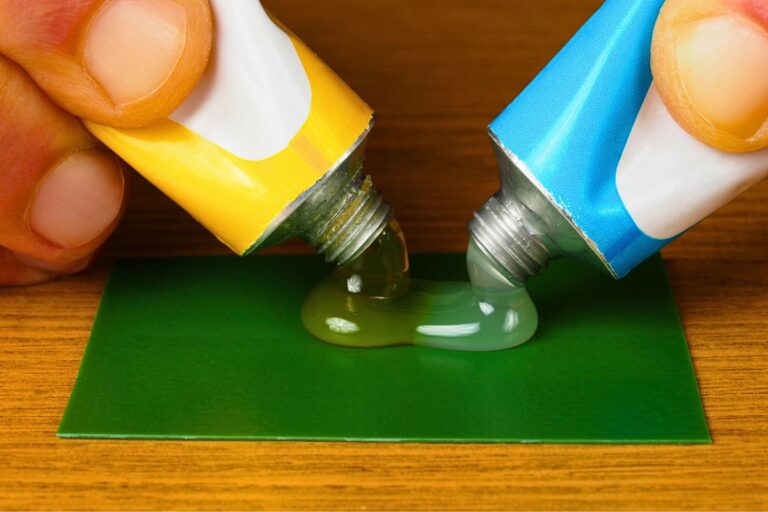
Epoxy resin comes in two parts: part A and part B. These are the fundamental components that, when mixed, initiate a chemical reaction leading to the curing and solidifying of the resin. Here’s a closer look at each component:
-
Resin Base (Part A): The resin base is the main component of the mixture. It is usually a thick, viscous liquid that starts the polymerization process when combined with the curing agent.
-
Curing Agent (Part B): The curing agent, also known as a hardener, is crucial for the resin to cure properly. When mixed with the resin base, it triggers a chemical reaction that causes the resin to harden and achieve its durable properties.
To get the proportions right, it’s important to follow the manufacturer’s instructions. Generally, the resin and hardener are mixed in specific ratios to ensure the best results.
| Component | Typical Ratio | Function |
|---|---|---|
| Resin Base (Part A) | 1 part | Initiates polymerization |
| Curing Agent (Part B) | 1 part | Triggers curing and hardening |
For more guidance on mixing epoxy resin, refer to our page on how to mix epoxy resin. Understanding these components will help you get started on your epoxy resin journey, whether you’re using it for artistic projects or durable furniture making.
For more about the diverse applications of epoxy resin and how to use it effectively, check out our related guides and tutorials:
Basics of Using Epoxy Resin
Mixing Epoxy Resin
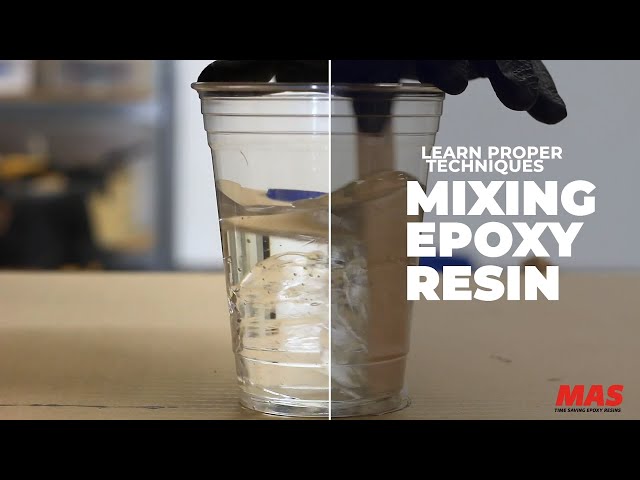
Epoxy resin comes in two parts: part A (resin) and part B (hardener). When mixed, these components initiate a chemical reaction that leads to curing and solidifying the resin (OneGlyph). Proper mixing is crucial to ensure a successful project.
-
Mixing Technique: Use a metallic mixing spatula or stirrer to thoroughly combine the resin and hardener. Scrape the sides and bottom of the mixing container to ensure all materials are blended. For small quantities (200ml or less), mix for at least 3-4 minutes. For larger quantities, mix for 8-10 minutes.
-
Mixing Ratio: Adhering to the correct mixing ratio in volume or weight of epoxy resin and hardener is essential. Incorrect ratios can lead to problems such as improper curing or bubble formation during curing. Always follow the manufacturer’s instructions for the best results (CHILL EPOXY™).
| Quantity (ml) | Mixing Time (minutes) |
|---|---|
| ≤ 200ml | 3-4 |
| > 200ml | 8-10 |
For detailed steps on mixing, you can refer to our guide on how to mix epoxy resin.
Essential Tools for Working with Epoxy
When working with epoxy resin, having the right tools ensures a smooth and safe process. Here are the essentials:
-
Basic Tools:
- Molds: Frequently used to shape the resin into desired forms.
- Resin and Hardener: The core components.
- Mixing Cups: Preferably graduated cups for measuring.
- Stirring Sticks: Used for thorough mixing.
- Pigments/Inks: For adding color to the resin (Happily Ever After, Etc.).
-
Protective Gear:
- Gloves: Made from nitrile or butyl rubber to protect your hands.
- Eye and Face Protection: Goggles or a face shield.
- Respirator: Equipped with an organic vapor cartridge to guard against epoxy fumes.
To explore more about resin crafts, including adding color, visit our guide on how to add color pigment to epoxy resin.
Having these tools and following the guidelines can help you achieve the best results in your epoxy resin projects. Check out our related articles on how to pour epoxy resin and how to clean epoxy resin off tools for further guidance.
Safety Precautions with Epoxy Resin
When working with epoxy resin, prioritizing safety is crucial. Epoxy resin contains chemicals that can be harmful if not handled correctly. This section covers essential protective gear and workspace safety tips to ensure a safe crafting experience.
Protective Gear for Handling Epoxy
Using the right protective equipment can protect your skin, eyes, and lungs from the potential hazards of epoxy resin. Here are some key items to consider:
- Disposable Nitrile Gloves: Protect your hands from direct contact with the resin. Latex gloves can deteriorate when exposed to chemicals, so nitrile gloves are preferred.
- Safety Goggles: Shield your eyes from any splashes that may occur while mixing or applying epoxy resin.
- Respirator Mask: Prevent inhalation of harmful fumes by wearing a respirator mask with organic vapor cartridges.
“It is essential to wear disposable nitrile gloves, safety goggles, and a respirator mask when working with resin to protect the skin, eyes, and lungs from potential harm caused by chemicals and fumes.”
(Steve McDonald Crafts)
Additionally, wear a long-sleeved top, or an overall/apron to protect your skin from resin contact. Always keep children and pets away from the resin workspace. Do not eat or drink while working with resin to avoid accidental ingestion.
Workspace Ventilation and Safety
Creating a safe workspace is essential when handling epoxy resin. Proper ventilation and cleanliness can significantly reduce the risks associated with resin fumes and spills.
Ventilation
Ensure that your workspace is well-ventilated. This can be achieved by working in an area with ample airflow or using ventilation systems such as exhaust fans or open windows. Well-ventilated spaces help dissipate resin fumes, reducing the risk of inhalation.
| Workspace Ventilation Suggestions | Benefits |
|---|---|
| Open Windows | Improves airflow, reduces fume concentration |
| Exhaust Fan | Actively removes fumes from the workspace |
| Air Purifier | Filters out harmful particles and improves air quality |
Safety Measures
- Clean Workspace: Keep your work area clean and organized to avoid accidental spills and resin contamination.
- First-Aid Kit: Have a first-aid kit nearby for any emergencies.
- Fire Safety: Since certain epoxy resins can be flammable, have a fire extinguisher readily available. Check out our article is epoxy resin flammable for more information.
- Disposal: Properly dispose of unused or leftover resin according to local regulations. Improper disposal can be hazardous to the environment.
“Proper disposal of unused or leftover resin is critical when working with epoxy resin.”
(Steve McDonald Crafts)
By following these safety precautions, you can safely enjoy working with epoxy resin and create beautiful projects. For more details on using epoxy resin, visit our section on what is epoxy resin and how to mix epoxy resin.
Advanced Techniques with Epoxy
Creating Resin Cells
Creating cells in epoxy resin artwork involves a fascinating interplay of pigments and techniques. Understanding the mixing order of pigments based on their densities is key. Denser pigments will naturally sink to the bottom, creating cells when lighter pigments are layered above (OneGlyph).
To achieve this effect:
- Choose your pigments: Select pigments of different densities.
- Mix pigments separately: Use a metal spatula for mixing instead of a wooden stick. Metal tools are more hygienic and prevent moisture absorption.
- Layer pigments: Pour the denser pigment first and follow with the lighter pigment layers.
- Torching method: Apply heat using a torch. This forces pigments to form cells but beware of alcohol or oil-based mixatives that can catch fire.
Troubleshooting Epoxy Resin Projects
Epoxy resin projects can present a number of challenges. Knowing how to address these issues ensures a successful outcome. Here are some common problems and solutions:
- Improper Curing:
- Problem: Resin remains tacky or soft.
- Solution: Ensure the correct mixing ratio of resin to hardener by volume or weight (CHILL EPOXY™). Follow the manufacturer’s instructions carefully.
- Bubbles in Resin:
- Problem: Bubbles appear in the cured resin.
- Solution: Mix gently with a metal spatula instead of a wooden stir stick to avoid introducing air. Allow the mixture to sit and release bubbles before pouring.
- Yellowing Over Time:
- Problem: Resin yellowing compromises aesthetics and durability.
- Solution: Ensure thorough mixing of resin and hardener to avoid incomplete curing which leaves weak spots prone to UV damage (CHILL EPOXY™).
- Inhibited Curing:
- Problem: Resin does not cure properly due to environmental factors.
- Solution: Maintain an appropriate temperature and humidity level in your workspace. Optimal conditions are crucial for proper resin curing.
- Surface Contamination:
- Problem: Debris or dust in the resin.
- Solution: Work in a clean, dust-free environment. Cover your project while curing to protect it from airborne particles.
For more about how to effectively use this material, see our guide on how to mix epoxy resin and learn how to pour epoxy resin. If you need to adjust or fix your project, check how to remove epoxy resin.
A table highlighting common problems and their solutions:
| Issue | Cause | Solution |
|---|---|---|
| Tacky Resin | Incorrect ratio of resin to hardener | Follow exact mixing instructions |
| Bubbles | Aggressive stirring | Mix gently and use a metal spatula |
| Yellowing | Incomplete curing | Thorough mixing of components |
| Inhibited Curing | Poor environmental conditions | Maintain optimal curing conditions |
| Surface Debris | Dust and particles | Work in a clean area and cover project |
By mastering these advanced techniques and troubleshooting common issues, you’ll enhance your epoxy resin projects and achieve beautiful, professional-quality results. Keep experimenting and remember to prioritize safety and precision in your work.
Epoxy Resin Applications
Artistic Uses for Epoxy Resin
Epoxy resin is perfect for various art techniques, offering a range of possibilities for creativity. When you mix epoxy resin with colorants like pigments, alcohol inks, acrylic paint, oil paint, and mica powder, it becomes a versatile medium for numerous artistic endeavors. Here are some popular artistic uses for epoxy resin:
- Sealing Artwork: Create a glossy and protective finish over your paintings and prints.
- Casting: Make jewelry, coasters, and other small objects by pouring the resin into molds.
- Pour/Fluid Art: Combine and pour different resin mixtures to create mesmerizing abstract designs.
For more details on incorporating color into your resin, check out our guide on how to add color pigment to epoxy resin.
Epoxy Resin for Furniture Projects
Epoxy resin is also an excellent choice for durable and aesthetic furniture projects. Its robust properties make it resistant to scratches, dents, and chips, ensuring the longevity and strength of your furniture pieces (Hirosarts). Some common uses include:
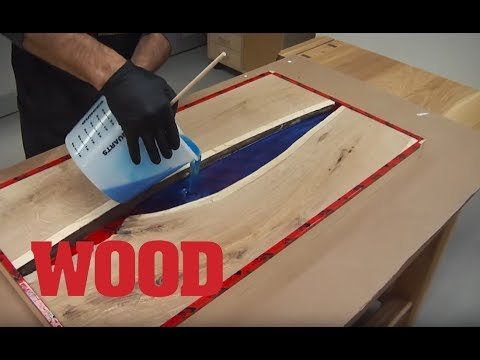
- Tabletops: Create stunning and unique tabletops with river tables becoming increasingly popular.
- Countertops: Use epoxy resin to cover countertops, offering a smooth and durable finish.
- Decorative Items: Enhance furniture with decorative inlays or coatings.
For a step-by-step guide on applying epoxy resin to furniture, visit our article on how to epoxy resin a table top.
| Application | Key Features |
|---|---|
| Sealing Artwork | Protects and adds a glossy finish |
| Casting | Creates small objects and jewelry |
| Pour Art | Enables abstract designs |
| Tabletop | Adds durability and aesthetic appeal |
| Countertop | Smooth and resilient surface |
Epoxy resin opens up numerous possibilities for both artistic and functional projects. Whether you’re creating beautiful art pieces or enhancing your furniture, epoxy resin is a versatile and valuable tool. For more on how to use epoxy resin, explore our related articles on curing times, safety precautions, and advanced techniques.
Curing and Drying Times
When working with epoxy resin, understanding curing and drying times is crucial for achieving the best results. Let’s dive into how to determine proper curing time and the factors that can affect how long it takes for epoxy resin to dry.
Determining Proper Curing Time
Epoxy resin curing times can vary based on the type of project and environmental conditions. Generally, for larger projects such as an epoxy resin table top or bar top, the drying time for the final flood coat of epoxy is about 72 hours, provided the recommended temperature range of 75°F to 80°F is maintained (Best Bar Top Epoxy). This period ensures the epoxy is 99% cured and strong enough to withstand typical use. However, epoxy resin will continue to harden over a full two-week period, reaching maximum strength and durability.
Here are the general drying/cure times for different types of epoxy resin:
| Epoxy Type | Initial Dry/Cure Time | Full Cure Time (weeks) |
|---|---|---|
| Table Top Epoxy | 72 hours | 2 weeks |
| Deep Pour Epoxy (Casting Resin) | 72 hours | 2 weeks |
| Marine Epoxy Resin | 1-4 days* | 2 weeks |
*Note: Marine epoxy curing time can vary based on temperature and type of hardener used. Fast hardeners cure quickly at lower temperatures (around 70°F), while slow hardeners allow for a longer cure at higher temperatures (near 80°F).
For more specific tips on curing epoxy resin, visit our article on how to cure epoxy resin.
Factors Affecting Drying Times
Several factors can influence the drying and curing times of epoxy resin, including:
-
Temperature: Epoxy resin cures faster at higher temperatures. For instance, a fast hardener can speed up the curing process at lower temperatures (70°F), while a slow hardener is better suited for higher temperatures (80°F).
-
Humidity: High humidity levels can slow down the curing process, leading to longer drying times and potentially affecting the finish. It is best to work in a controlled environment with low humidity.
-
Mixing Ratio: Correctly measuring and mixing the resin and hardener is essential. Any deviation can affect the curing time and the final result. Refer to our detailed guide on how to mix epoxy resin for more information.
-
Thickness of Application: Thicker pours of epoxy resin tend to have longer curing times compared to thin layers. For projects requiring deep pours, allow additional time for full curing.
-
Type of Epoxy Resin: Different formulations of epoxy resin have varying curing times. For example, table top epoxy has a predictable curing time of about 72 hours, while marine epoxy resin can vary significantly based on the hardener used.
To learn more about epoxy resin applications and techniques, you might find our articles on how long does it take for epoxy resin to dry and how to epoxy resin a table top helpful.
By understanding and managing these factors, you can ensure successful epoxy resin projects, whether for artistic creations or durable furniture pieces.

