How to Add Color Pigment to Epoxy Resin: Step-by-Step Guide
Coloring Epoxy Resin
Adding color pigment to epoxy resin can transform your projects into vibrant works of art. This guide will help you understand the types of pigments available and how to use them effectively.
Introduction to Epoxy Pigments
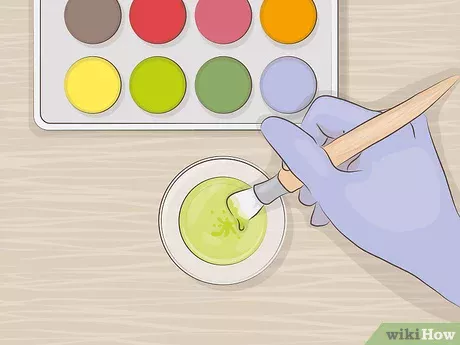
Epoxy-based pigments are specifically formulated for use with epoxy resin. They come in various forms, including powders and pastes, making it easy to achieve rich and saturated hues for your resin art projects. Pigments are small particles suspended in a liquid medium and are used to add color to epoxy. They can be made from natural or synthetic materials, offering a wide palette for customization (CHILL EPOXY).
Types of Colorants for Resin
There are several types of colorants you can use with epoxy resin. Each has distinct characteristics, making them suitable for different effects and applications:
| Colorant Type | Description | Pros | Cons |
|---|---|---|---|
| Liquid Pigments | Water-based colors often used for their versatility and ease of mixing | Easy to blend, precise coloring | May require more pigment for deep hues |
| Powder Pigments | Finely ground particles that provide shimmering effects and deep colors | Great for metallic and shimmer effects | Requires thorough mixing to avoid clumps |
| Paste Pigments | Highly concentrated colors that are easy to mix into resin | Intense, vivid colors, minimal air bubbles | Can be more expensive than other pigments |
Sources: Arts Shala
Liquid Pigments
Liquid pigment colors, typically water-based, offer versatility and can be mixed with various mediums such as acrylic paints, watercolors, or epoxy resins, providing ease of use and precise color blending for resin art. They are perfect for achieving a uniform color in your resin projects.
Powder Pigments
Powder pigments, such as mica powders, provide shimmering effects and are ideal for creating swirling patterns and metallic looks. They are highly effective in achieving a sparkling finish in your resin art.
Paste Pigments
Paste pigments are highly concentrated and offer vivid, intense colors. They are perfect for achieving deeply saturated hues with minimal product, making them cost-effective for large projects.
Understanding the different types of colorants and how they work with epoxy resin is crucial for successful coloring. Proper blending techniques and choosing the right quality pigments will ensure stunning results. For additional guidance on how to mix epoxy resin and blending techniques, check our detailed tutorials.
By mastering the art of coloring epoxy resin, you can create breathtaking pieces that showcase your creativity and skill. Explore our articles on how to use epoxy resin and how to polish epoxy resin for more tips and tricks.
Working with Liquid Pigments
Adding color to epoxy resin can transform your projects, making them vibrant and unique. Liquid pigments offer a versatile and user-friendly option for this purpose.
Versatility of Liquid Dyes
Liquid pigment colors, typically water-based, provide versatility and ease of use for resin art. These pigments can be mixed with various mediums such as acrylic paints, watercolors, or epoxy resins, allowing precise color blending (Arts Shala).
Key Benefits:
- Ease of Use: Liquid dyes blend seamlessly with resin.
- Vibrant Colors: Provides outstanding transparency and color depth.
- Swirling Effects: Enables creating intricate patterns and gradients.
Mixing Techniques for Liquid Pigments
When it comes to mixing liquid pigments with epoxy resin, the process is straightforward but requires careful attention to detail.
Step-by-Step Mixing Guide:
-
Preparation:
- Wear protective gear (gloves and apron).
- Ensure the workspace is clean and free of dust.
-
Measure Resin and Hardener:
- Measure the resin and hardener according to the manufacturer’s instructions.
- Mix thoroughly until uniform.
-
Add Pigment Gradually:
- Start with a small amount of dye. Liquid resin dyes are potent, so it’s essential to add small amounts gradually to achieve the desired color depth (Best Bar Top Epoxy).
- Stir slowly to avoid air bubbles.
-
Check Color Intensity:
- The color intensity is one-directional and irreversible, so add incrementally until the desired hue is reached (Best Bar Top Epoxy).
- Test on a small surface area.
Mixing Ratios:
| Pigment Type | Recommended Ratio to Resin |
|---|---|
| Alcohol Ink | 2-6% |
| Acrylic Paint | 5-10% |
Liquid pigments such as alcohol inks blend smoothly with resin, creating vibrant hues and swirled effects. Observing correct mixing ratios is crucial to avoid interfering with the resin curing process (Carved). High-quality alcohol ink offers excellent transparency and depth of color, making it perfect for striking resin art.
To get the best results from your epoxy resin projects, explore our other resources:
- Learn how to mix epoxy resin
- Discover how to polish epoxy resin
- Prevent yellowing by understanding how to use UV stabilizers in epoxy
By mastering the use of liquid pigments, you can elevate your epoxy resin creations and achieve stunning results.
Utilizing Powder Pigments
Adding color to your epoxy resin projects can significantly enhance their visual appeal. Powder pigments, such as mica powders and other powdered colorants, offer unique effects that can make your creations stand out. Here, we discuss how powder pigments can be used to achieve shimmering effects and swirling patterns in epoxy resin.
Shimmering Effects with Mica Powder
Mica powder pigments are a popular choice for achieving shimmering effects in epoxy resin. These pigments create a sparkling effect due to their natural mineral composition. When added to the resin, mica powder can range from subtle glimmers to intense bursts of color, depending on the amount used.
To achieve a shimmering effect:
- Measure the Pigment: Start by measuring your mica powder based on the desired intensity. Generally, a ratio of 1-2 teaspoons of mica powder per 8 ounces of resin is a good starting point.
- Mix Thoroughly: Stir the mica powder into the epoxy resin until fully blended. Ensure there are no clumps for an even shimmer.
- Adjust as Needed: You can add more powder for a darker, more intense shimmer. Remember, more powder makes the resin less translucent (Best Bar Top Epoxy).
| Amount of Mica Powder | Effect |
|---|---|
| 1 tsp/8 oz resin | Light shimmer |
| 2 tsp/8 oz resin | Moderate shimmer |
| 3 tsp/8 oz resin | Intense shimmer, less translucent |
Mica powders also come in a wide variety of colors, allowing you to mix and match for unique visual effects.
Swirling Patterns with Multiple Powders
Another exciting way to use powder pigments in epoxy resin is to create swirling patterns. This method involves using multiple pigments to achieve a marbled or swirling effect, which can add depth and complexity to your project.
Steps to achieve swirling patterns:
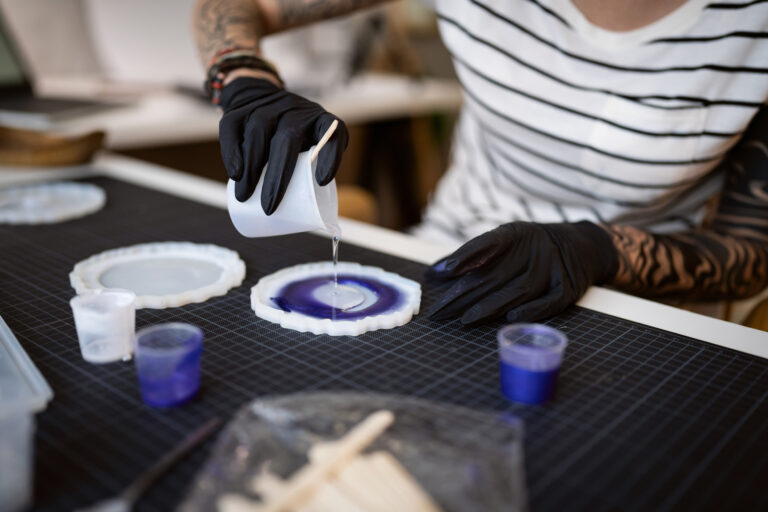
- Separate Resin Batches: Divide your mixed epoxy resin into separate containers, one for each color you plan to use.
- Add Pigments: Add different mica powders to each resin batch and mix thoroughly.
- Pour Simultaneously: Pour the pigmented resin batches into your mold or on your surface at the same time, allowing them to flow and blend naturally.
- Create Swirls: Use a stick or a similar tool to gently swirl the colors together, creating intricate patterns (Best Bar Top Epoxy).
For more ideas on advanced techniques, check out how to use epoxy resin.
| Technique | Effect |
|---|---|
| Simultaneous Pouring | Natural blending of colors |
| Gentle Swirling | Intricate, marbled patterns |
| Layering | Distinct lines and layers of color |
Using powder pigments like mica can transform your epoxy resin projects. Whether you prefer a shimmering finish or intricate swirling patterns, the right pigment and technique can make all the difference in your final product. If you’re interested in exploring more about epoxy resin, including polishing and curing details, visit our comprehensive guides on how to polish epoxy resin and how to cure epoxy resin.
Choosing the Right Colorants
Choosing the right colorants for your epoxy resin projects is crucial to achieving vibrant, long-lasting results. Here are some key factors to consider.
Importance of Quality Pigments
Using high-quality pigments is essential for creating visually appealing and durable finishes. Products like the ones offered by Pigmently, known for their excellence in powder pigments and resin dyes, are reliable sources. Lower-quality pigments may fade over time or cause issues during the curing process.
Quality pigments help ensure that the colors you achieve are vibrant, consistent, and resistant to yellowing. For more on preventing yellowing in resin, visit our section on using UV stabilizers.
Compatibility and Mixing Ratios
Different colorants have varied effects on epoxy resin’s curing time and final appearance. For example:
- Acrylic Paint: Can speed up hardening but must be used sparingly.
- Oil Paint: Provides rich colors but may take longer to cure.
- Watercolors: Easily blendable but less opaque.
- Mica Powders: Offer a shimmering effect but might need thorough mixing to avoid streaks.
- Unconventional Materials: Such as spices or chalk, should be tested in small batches to ensure the desired outcome (Carved).
It’s important to maintain proper mixing ratios to achieve consistent results and avoid complications. For example:
| Colorant | Typical Ratio (to Resin) |
|---|---|
| Acrylic Paint | 1-5% |
| Oil Paint | 1-2% |
| Watercolors | Varies |
| Mica Powders | 2-5% |
Overuse of liquid colorants can negatively impact the resin’s final result, leading to improper curing or a weakened final product. It’s always wise to do a test batch and adjust your ratios based on your specific needs.
Experimentation and attention to detail are key to mastering resin coloring. For more tips on blending techniques, see our section on blending techniques for resin.
To ensure compatibility and achieve the desired results, always refer to the manufacturer’s guidelines and test colorants on a small scale before committing to a larger project. For more information on working with epoxy resin, check out our comprehensive guides on how to mix epoxy resin and how to pour epoxy resin.
Preventing Yellowing in Resin
When working with epoxy resin, preventing yellowing is crucial for maintaining the clarity and aesthetics of your projects. Yellowing can be caused by several factors, including UV radiation, aging, heat, and the use of incorrect pigments.
Understanding Yellowing Causes
Epoxy resin can yellow over time due to various factors:
- UV Radiation: Exposure to sunlight and other sources of UV light can cause the resin components and hardener to oxidize, resulting in yellowing.
- Aging: As the resin ages, the chemical composition can change, leading to a yellowish tint.
- Heat Exposure: High temperatures during the curing process or environmental heat can accelerate yellowing.
- Incorrect Pigments: Using pigments not suitable for epoxy resin may cause discoloration.
Understanding these causes can help you take the necessary steps to prevent yellowing in your resin projects.
Using UV Stabilizers in Epoxy
One of the effective methods to prevent yellowing is by incorporating UV stabilizers and antioxidants. These additives can protect the epoxy resin from the adverse effects of UV radiation and prolong its color stability. HALS additives (Hindered Amine Light Stabilizers) are particularly beneficial as they scavenge free radicals, absorb UV radiation, and maintain the resin’s physical and optical properties over time (MRS.COLORBERRY).
| Additive | Function |
|---|---|
| UV Absorbers | Protect resin from UV radiation |
| HALS Additives | Scavenge free radicals, maintain stability |
| Antioxidants | Prevent oxidation |
To effectively use these additives:
- Choose High-Quality Resin: Opt for epoxy resins formulated with UV stabilizers and antioxidants.
- Control Heat During Curing: Follow recommended temperatures and processing times to avoid excessive heat.
- Use Suitable Pigments: Ensure you use high-quality pigments designed for epoxy resin to avoid discoloration.
For more detailed steps and tips, you can refer to our guide on how to use epoxy resin.
By understanding the causes of yellowing and using UV stabilizers and high-quality pigments, you can protect your epoxy resin projects from discoloration. For additional information on epoxy resin, check out our articles on how to clean epoxy resin, how to mix epoxy resin, and how to epoxy resin a table top.
Tips for Successful Coloring
Blending Techniques for Resin
Coloring epoxy resin opens up a world of creative possibilities. To achieve the best results, understanding effective blending techniques is essential.
- Gradual Addition: Start by adding a small amount of pigment to the resin. Gradually increase the amount until the desired hue is achieved. This cautious approach ensures you don’t oversaturate the mix.
- Thorough Mixing: Ensure the pigment is evenly distributed by thoroughly mixing. Use a stirring stick or an electric mixer to blend the pigment with the resin until it reaches a uniform color.
- Layering Colors: For intricate designs, layer different colors by pouring one color at a time and allowing it to settle before adding the next. This technique creates beautiful swirls and patterns.
- Secondary Colors: Mix primary colors (red, blue, yellow) to create secondary and tertiary hues (Arts Shala). This is especially useful for custom projects.
- Inclusion of Additives: Incorporate mica powders or glitter for shimmering effects. Ensure these are finely milled for a smooth blend (Carved).
Impact of Incorrect Pigment Usage
Using pigments incorrectly can lead to undesirable results. Here’s what to watch out for:
- Over-pigmentation: Adding too much pigment can interfere with the resin’s curing process. Excessive pigment may prevent the resin from hardening properly, leading to a tacky or brittle finish (Carved).
- Incompatible Pigments: Using pigments not designed for resin, like some food colorings or non-epoxy inks, can cause clumping and uneven color distribution. Always use high-quality pigments specifically meant for epoxy (CHILL EPOXY).
- Insufficient Mixing: Failing to mix pigment thoroughly can result in streaks or spots of concentrated color, which can affect the aesthetic of your project.
- Incorrect Ratios: Not adhering to recommended pigment-to-resin ratios can compromise the strength and durability of the cured resin. Refer to manufacturer guidelines for the ideal mix.
- Temperature Sensitivity: Some pigments may change color if exposed to extreme temperatures. Adjust your resin environment to maintain consistent ambient conditions for the best results.
Understanding these techniques and potential pitfalls can transform your resin projects. Whether you’re tackling issues like how to mix epoxy resin or what are some good polishers for epoxy resin, these tips will guide you to colorful success.

