How to Epoxy Resin a Table Top: Step-by-Step Process
Setting Up Your Workspace
Creating a safe and efficient workspace is key when learning how to epoxy resin a table top. This includes taking the necessary safety precautions and ensuring proper ventilation and temperature control.
Safety Precautions
-
Skin Protection: Epoxy resin can irritate bare skin. Always wear disposable safety gloves made from nitrile or vinyl to protect your hands. In case of spills, consider wearing a plastic apron to protect your skin and clothes. Learn more about how to get epoxy resin off hands if exposure occurs. (Eye Candy Pigments)
-
Respiratory Protection: Always wear a respiratory mask when working with epoxy resin to protect against inhaling harmful vapors and dust. Use masks with organic vapor cartridges for chemical vapors and dust filters when sanding cured resin. (Eye Candy Pigments)
-
Eye Protection: Safety goggles or glasses should be worn to protect your eyes from splashes and fumes. Regular prescription eyewear or sunglasses are not sufficient. Proper safety goggles should be worn over prescription glasses for adequate protection. (Eye Candy Pigments)
Ventilation and Temperature Control
-
Ventilation: Ensure your workspace is well-ventilated to avoid inhaling concentrated epoxy resin vapors, which can be harmful. Open windows and use fans to keep the air circulating and safe. For more on handling epoxy resin safely, see our article on is epoxy resin toxic. (Eye Candy Pigments)
-
Temperature Control: Maintaining the right room temperature is crucial when working with epoxy resin. If the temperature is too hot or too cold, the resin may not cure properly or could result in a cloudy finish. Each epoxy resin kit will have its own specific temperature requirements, so be sure to check the instructions. For more insights, refer to our guide on how to cure epoxy resin. (Best Bar Top Epoxy)
| Safety Gear | Purpose |
|---|---|
| Nitrile/ Vinyl Gloves | Protects skin from irritation |
| Respiratory Mask | Prevents inhalation of chemical vapors |
| Safety Goggles | Shields eyes from splashes and fumes |
By setting up your workspace with these safety measures and control methods, you can ensure a smooth and safe process when learning how to epoxy resin a table top.
Preparing the Table
Making an epoxy resin table top requires meticulous preparation. The foundation of a stunning table lies in the careful selection of wood and the precise preparation of its surface.
Wood Selection
The quality and appearance of your epoxy resin table hinge largely on the type of wood you choose. Investing in excellent quality wood not only enhances the aesthetic appeal but also ensures the durability of your table throughout the years. According to DIY Epoxy, wood should be at least 1.5 inches thick and possess a moisture content not exceeding 12%.
Recommended Wood Types for Epoxy Resin Tables:
- Walnut: Known for its rich color and grain patterns.
- Oak: Renowned for its durability and elegant texture.
- Maple: Preferred for its smooth surface and fine grain.
- Cherry: Chosen for its warm hues and smooth finish.
Ensuring that the wood slab is dry and properly cured is vital. Excessive moisture can interfere with the epoxy, leading to improper curing and unsatisfactory results.
Preparing the Wood Surface
Preparation of the wood surface is a critical step in the epoxy resin process. It involves ensuring the wood is clean, leveled, and free of any debris that may interfere with the resin application.
Step-by-Step Guide on Preparing the Wood Surface:
- Remove Bark:
- Using a chisel or bark removal tool, carefully remove any bark from the edges of the wood slab. This step ensures the resin adheres properly to the wood.
- Sand the Wood:
- Start with a coarse sandpaper (60-80 grit) and progress to a finer grit (120-220) to smooth out the surface. Sanding removes any imperfections and provides a clean slate for the epoxy resin.
- Fill Imperfections:
- If the wood has any cracks, knots, or holes, fill them with a clear epoxy resin. This helps achieve a smooth and uniform surface. For guidance on this process, check out our article on how to use epoxy resin on wood.
- Clean Thoroughly:
- Remove any dust and debris from the wood surface using a vacuum or a tack cloth. Cleanliness is essential to avoid contaminants that can impact the resin’s performance.
- Build a Mold:
- Construct a mold around the wood slab using melamine boards or sealed plywood. This mold will contain the epoxy resin and allow for an even pour.
- Seal the Wood Surface:
- Apply a thin layer of epoxy resin as a seal coat to prevent air bubbles and ensure better adhesion of the final pour. Learn more about proper epoxy methods in our article how to mix epoxy resin.
| Step | Description | Tools Needed |
|---|---|---|
| 1. Remove Bark | Remove bark from edges | Chisel, bark removal tool |
| 2. Sand the Wood | Smooth out the surface | Sandpaper (60-220 grit), sander |
| 3. Fill Imperfections | Fill cracks and holes with epoxy | Clear epoxy, applicator |
| 4. Clean Thoroughly | Eliminate dust and debris | Vacuum, tack cloth |
| 5. Build a Mold | Create a containment mold | Melamine boards, screws |
| 6. Seal the Wood Surface | Apply a thin epoxy layer | Clear epoxy, brush |
By taking these preparatory steps, you’ll ensure that your wood is in the best possible condition for the epoxy resin application. For more detailed instructions on resin work, you may refer to our article on how to pour epoxy resin.
Working with Epoxy Resin
Choosing the Right Epoxy
When selecting the right epoxy for your tabletop project, it’s important to understand the specific characteristics and benefits of epoxy resin. Epoxy resin is known for its durability and resistance to water, heat, abrasion, and impact. This makes it an ideal choice for crafting long-lasting and sturdy surfaces.
Epoxy resin is 100% food-safe and UV safe, ensuring your table top remains both functional and aesthetically pleasing. However, it’s worth noting that epoxy resin contains VOCs (Volatile Organic Compounds), is more expensive, cures quickly, and is not as malleable as polyester resin (The Vixen’s Den Studio). To make an informed decision, consider your specific needs and the conditions the table will be exposed to.
For more information about epoxy resin’s safety and properties, you might find these articles useful: is epoxy resin food safe, is epoxy resin toxic, and is epoxy resin heat-resistant.
Mixing the Resin Properly
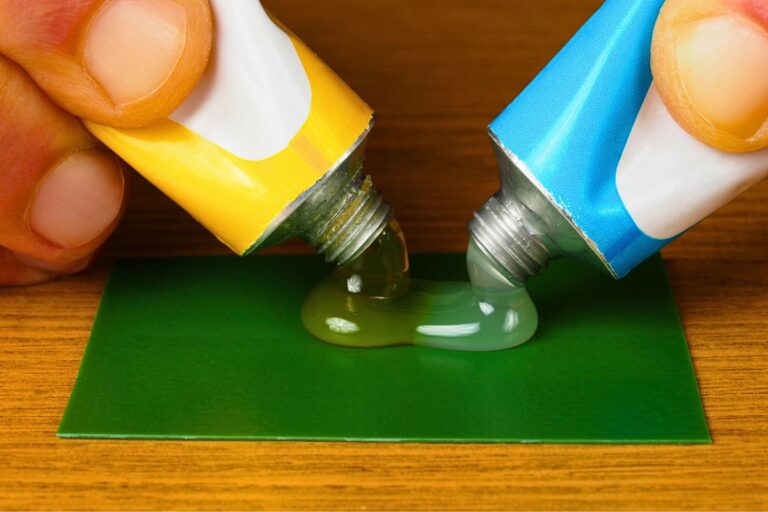
Proper mixing of epoxy resin is crucial to achieving a flawless finish. Epoxy resin typically requires a 50/50 ratio of resin and hardener to create the perfect mix (The Vixen’s Den Studio).
Here are the steps:
- Measure equal parts of resin and hardener.
- Slowly stir the mixture for at least 8 minutes to avoid creating excess bubbles.
| Mixing Time | Stirring Speed |
|---|---|
| 8 minutes | Slowly |
- Mixing the epoxy used for a river table should be done for at least 5 minutes to ensure it’s thoroughly combined. This prevents issues like improper hardening or overheating, which can cause the epoxy to break (Lancaster Live Edge).
For those wondering about the quantity of epoxy needed, it greatly depends on the size and design of your table. A typical project might need anywhere from 5 to 15 gallons of epoxy. For instance, a specific table utilized 10 gallons of epoxy.
To help you determine the right amount, visit our guide: how much epoxy resin do I need.
By following these guidelines and ensuring precise measurements and thorough mixing, you’ll be well on your way to mastering how to epoxy resin a table top. For more detailed steps, check out how to mix epoxy resin to guarantee your table top achieves a professional and durable finish.
Pouring and Finishing
Pouring the Epoxy
When it comes to how to epoxy resin a table top, proper pouring is paramount. Here’s a step-by-step guide to ensure a perfect pour:
-
Mixing the Epoxy: Start by mixing equal parts resin and hardener. Ensuring a 50/50 ratio is crucial for the epoxy to cure properly. Slowly stir the mixture for about 8 minutes. This will help minimize air bubbles in the mix (The Vixen’s Den Studio).
-
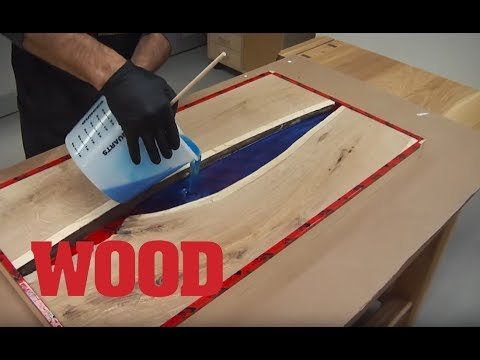
Pouring the Resin: Begin pouring the epoxy resin in the center of the table and then spread it towards the edges. Use a spreader or a squeegee to evenly distribute the resin. Make sure to cover the entire surface, including the edges.
-
Managing Air Bubbles: To remove bubbles, lightly blow over the surface with a heat gun or a torch. Be careful not to overheat a spot, as this can cause the resin to burn or yellow. For more tips on managing bubbles, refer to our section on dealing with air bubbles.
Finishing Touches
After you’ve successfully poured the epoxy, the final touches are essential to ensure a professional look:
-
Allowing the Resin to Cure: Let the epoxy resin cure undisturbed. This usually takes around 24-72 hours, depending on the product. For specific cure times, check your epoxy resin instructions or see our guide on how long does it take for epoxy resin to dry.
-
Sanding and Polishing: Once the resin has cured, you might want to sand the surface to achieve a smooth finish. Start with a coarse grit and gradually move to finer grits. After sanding, polish the surface to bring out the shine. For details on polishing, visit our article on how to polish epoxy resin.
-
Sealing and Protecting: Apply a protective seal to ensure the longevity of your tabletop. Ensure the seal you choose is compatible with epoxy resin. Consult the manufacturer’s guidelines or see our article on what are some good polishers for epoxy resin.
Taking these steps will help you achieve a smooth, durable, and visually appealing epoxy resin table top. For further information on epoxy resin, such as how to mix epoxy resin or how to remove epoxy resin from surfaces, explore our other resources.
Troubleshooting Common Issues
When working with epoxy resin, you may encounter some common issues. Knowing how to address these problems can help you achieve a flawless finish for your tabletop.
Addressing Epoxy Hardening Problems
Epoxy resin hardening issues can result in a sticky or tacky surface, which can be frustrating to deal with. Here are some steps to resolve and prevent these problems:
- Incomplete Mixing: Ensure the epoxy resin and hardener are mixed thoroughly. It’s crucial to follow the manufacturer’s recommended mixing ratio and stir the mixture slowly and evenly.
- Incorrect Temperature: Epoxy resin requires an optimal temperature for curing. Make sure your workspace is at the recommended temperature, generally around 70°F to 75°F (21°C to 24°C).
- Humidity Levels: Excessive humidity can interfere with the curing process. If possible, control the humidity in your workspace to avoid hardening problems.
- Resin Films: A sticky film may form on your surface. To reduce this, use a sponge soaked in hot water to wipe the surface. For preventative measures, be diligent with your preparation and curing environment (ResinPro).
For more detailed guidance, visit our article on how to cure epoxy resin.
Dealing with Air Bubbles
Air bubbles can be a common issue when working with epoxy resin. Here are some tips to minimize and remove them:
- Mixing Techniques: To prevent air bubbles, mix the resin and hardener slowly and carefully. This helps to minimize air being drawn into the mixture.
- Using a Heat Gun: If bubbles appear during the curing process, they can be removed with a heat gun. Hold the heat gun about 6-8 inches above the surface and move it back and forth to remove the bubbles. This method helps in dissipating trapped air without damaging the resin.
- Preventive Measures: Ensure your work area is free of dust and contaminants. Clean tools and a clean workspace can significantly reduce the incidence of air bubbles.
| Step | Action | Tool Needed |
|---|---|---|
| Mixing | Stir the resin slowly and thoroughly | Mixing stick |
| Heat Gun Application | Move heat gun back and forth over the surface | Heat gun |
For more tips on managing these issues, read our guide on how to use epoxy resin.
By addressing these common epoxy resin problems, you can ensure a smooth and durable finish for your tabletop. For additional information, explore our articles on how to mix epoxy resin and how to polish epoxy resin.

