Can You Seal Sand in Epoxy Resin: Techniques and Tips
Understanding Epoxy Resin
Epoxy resin is a versatile material widely used in various applications, including adhesives and coatings. To effectively use epoxy resin for projects such as sealing sand, it’s essential to understand its basics and underlying chemistry.
Basics of Epoxy Resin
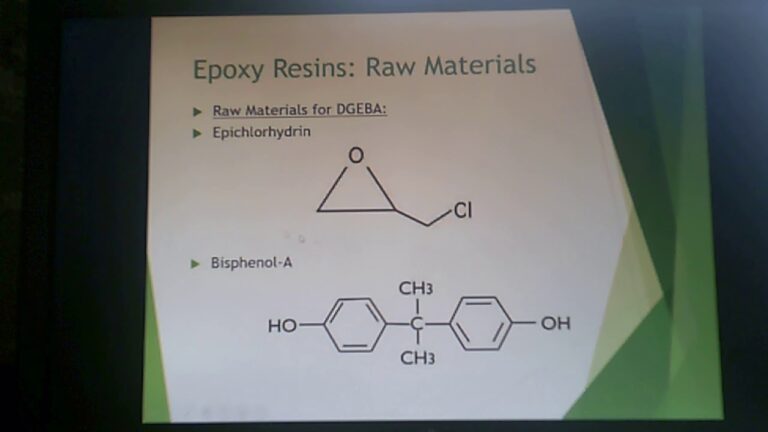
Epoxy resin is a thermosetting polymer created by combining a resin and a hardener. The primary components of epoxy are bisphenol and epichlorohydrin. Bisphenol is derived from a combination of acetone and phenol, which are extracted from petroleum, while epichlorohydrin is derived from allyl chloride (Powerblanket).
When mixed with a hardener, the resin undergoes a chemical reaction that leads to the formation of a rigid, durable material. This resin showcases excellent adhesion to a variety of surfaces, including metals, and provides resistance to chemicals and environmental factors.
Here’s a breakdown of the key components and their origins:
| Component | Source |
|---|---|
| Bisphenol | Acetone and Phenol (from Petroleum) |
| Epichlorohydrin | Allyl Chloride |
To learn more about the versatile bonding capabilities of epoxy, visit our detailed guide.
Epoxy Chemistry
Understanding the chemistry behind epoxy resin is vital for achieving the best results in your projects. The process begins when the epoxy resin and hardener are mixed together, initiating a chemical reaction (WEST SYSTEM). This reaction causes the liquid ingredients to transition through several stages:
-
Liquid Phase (Open Time): The initial stage when the resin is fully mixed and remains in its liquid form. This phase offers an opportunity to apply the epoxy to the desired surface.
-
Gel Phase (Initial Cure): During this stage, the epoxy starts to thicken and becomes tacky. Although it’s not fully cured, it begins to set and becomes less workable.
-
Solid Phase (Final Cure): In this final stage, the epoxy transforms into a solid state, completing the curing process. The material is now rigid, tough, and ready for use.
The entire curing process of epoxy resin, also known as cure time, is crucial for ensuring a strong bond and long-lasting durability.
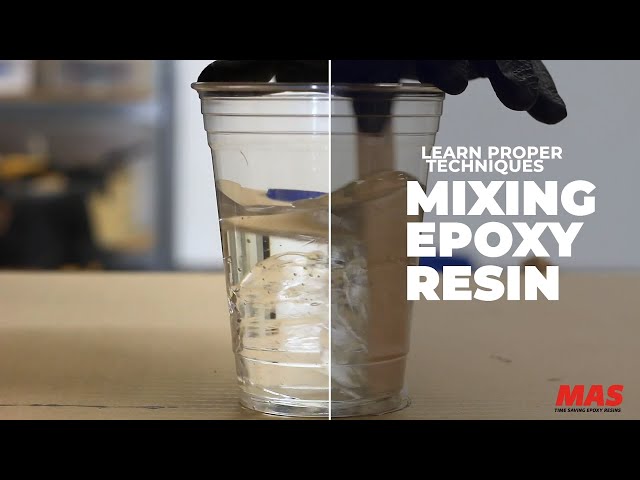
By understanding these basics and the chemistry of epoxy resin, you can confidently undertake projects like sealing sand, ensuring the best results. For additional tips and techniques, check out our articles on how to mix epoxy resin and how to clean epoxy resin.
Outdoor Applications of Epoxy Resin
When considering whether you can seal sand in epoxy resin, it’s essential to understand how epoxy resin performs outdoors. Here we cover its durability and UV resistance, key aspects for any outdoor project.
Durability Outdoors
Epoxy resin is highly durable, making it a preferred choice for various outdoor surfaces such as driveways, paths, and balconies. Its waterproof nature only enhances its suitability for pool sides and other areas prone to wet conditions (Epoxy Flooring UK). However, it’s worth noting that epoxy resin floors can be slippery when wet. Including a non-slip additive can reduce slip hazards, ensuring safety.
| Outdoor Application | Durability (Years) | Maintenance Level |
|---|---|---|
| Driveways | 10-20 | Low |
| Pathways | 10-20 | Low |
| Balconies | 7-10 | Low |
UV Resistance
Epoxy resin is robust, but exposure to ultraviolet (UV) light can pose challenges. Without UV-resistant additives or coatings, epoxy resin can yellow and degrade over time (Epoxy Flooring UK). Utilizing UV-resistant additives and coatings can help prevent this degradation, ensuring the epoxy resin maintains its appearance and structural integrity.
| UV Resistance Features | Benefits |
|---|---|
| UV-resistant additive | Prevents yellowing |
| UV-resistant coating | Enhances longevity |
A high-quality epoxy finish like UltraClear Bar & Table Top Epoxy offers long-lasting results, remaining in top condition for at least seven years with minimal maintenance (Best Bar Top Epoxy).
For tips on how to preserve and maintain your epoxy resin projects, refer to our guides on how to clean epoxy resin and how to polish epoxy resin.
By understanding the durability and UV resistance of epoxy resin, you can ensure your outdoor projects stand the test of time, providing both functionality and aesthetic appeal. Considering these factors will help you get the best results for sealing sand in epoxy resin and other similar applications. If you have any questions or need more details on epoxy resin, explore our comprehensive guide on what is epoxy resin.
Epoxy Resin Application Tips
Applying epoxy resin requires attention to detail, especially if you’re wondering, can you seal sand in epoxy resin. Here’s a closer look at essential application tips to get the best results.
Surface Preparation
Proper surface preparation is crucial for good adhesion. Follow these steps:
- Clean the Surface
- Ensure the bonding surfaces are clean, dry, and free of contaminants. Any grease, oil, or residue can affect adhesion.
- Sand the Surface
- Lightly sand the surfaces to be bonded to create a rough texture. This helps the epoxy resin adhere better. (WEST SYSTEM)
- Remove Amine Blush
- If using a hardener that produces amine blush, wash it off with water and an abrasive pad, dry the surface, and sand if needed. (WEST SYSTEM)
- Conduct Adhesion Tests
- For surfaces like plastics, conduct an adhesion test to ensure proper bonding. G/flex epoxy is recommended for plastics due to its superior bonding properties. (WEST SYSTEM)
Here’s a quick reference table for surface preparation:
| Step | Action |
|---|---|
| Cleaning | Remove contaminants |
| Sanding | Lightly roughen the surface |
| Blush Removal | Wash and dry, then sand if needed |
| Adhesion Test | Check bonding on plastics |
Explore more on how to clean epoxy resin off tools for maintenance tips.
Curing Process
The curing process transforms epoxy resin from a liquid to a solid state, ensuring strong and durable results. Here’s how to manage the curing process:
- Mixing Proportions
- Mix the resin and curing agent in the correct proportions. Accurate ratios are vital for proper curing. (Entropy Resins)
- Temperature Control
- Temperature significantly impacts the curing process. Warmer temperatures speed up curing, whereas colder temperatures slow it down. Store epoxy in a cool place and apply it in a controlled-temperature environment. (Powerblanket)
- Using Heating Blankets
- For cold environments, consider using heating blankets. They provide even heat distribution and tight temperature control, ensuring the epoxy cures properly. (Powerblanket)
- Stages of Curing
- Epoxy goes through different cure stages, from a liquid state to a sandable solid state. Be patient and allow sufficient time for each stage to prevent any issues. (Entropy Resins)
For a visual reference on temperature and curing time, see the table below:
| Temperature (°F) | Approximate Curing Time |
|---|---|
| 60°F | 24-48 hours |
| 70°F | 18-24 hours |
| 80°F | 12-18 hours |
| 90°F | 6-12 hours |
Learn more about how long it takes for epoxy resin to dry.
With these tips, you’ll achieve excellent results in your epoxy resin projects. Don’t forget to check our guide on how to use epoxy resin for additional insights.
Varieties and Uses of Epoxy Resin
Epoxy resins come in different forms, each with unique properties and applications. Understanding these types and their versatile bonding capabilities will help you choose the best option for your project, such as determining whether you can seal sand in epoxy resin.
Epoxy Types
Epoxy resins are categorized based on their chemical composition and physical properties. The main types include:
- Phenolic Glycidyl Ethers: These are known for their excellent adhesion and corrosion resistance. They are often used in high-performance coatings and adhesives.
- Aromatic Glycidyl Amines: These types offer high mechanical strength and chemical resistance, making them suitable for demanding environments like aerospace and automotive sectors.
- Cycloaliphatics: With high UV stability and clarity, these resins are ideal for outdoor and aesthetic applications, including art and craft projects.
| Type | Key Properties | Common Uses |
|---|---|---|
| Phenolic Glycidyl Ethers | High adhesion, corrosion resistance | Coatings, adhesives |
| Aromatic Glycidyl Amines | High mechanical strength, chemical resistance | Aerospace, automotive |
| Cycloaliphatics | UV stability, clarity | Outdoor, art projects |
Versatile Bonding
Epoxy resins are praised for their versatility and strong bonding capabilities across various materials. Here are some ways epoxy resins can be utilized:
- Wood: Epoxy resin is perfect for sealing and bonding wood. It creates a strong, durable layer that enhances the wood’s appearance and resilience. Learn more about the process here.
- Metal: Epoxy provides a strong bond with metals, making it an excellent choice for industrial and hardware applications. For tips on working with metal, visit our article on removing epoxy from metal.
- Plastic and Glass: Epoxy’s adhesive properties extend to plastic and glass, helping you create clear, strong joints that are both functional and aesthetically pleasing. Check out this guide to working with epoxy on plastic.
| Material | Advantages | Applications |
|---|---|---|
| Wood | Strong bond, enhanced appearance | Furniture, repairs |
| Metal | Durable, resistant to corrosion | Industrial, hardware |
| Plastic | Clear, strong joints | DIY crafts, repairs |
| Glass | Transparent bonding | Decorative items, art projects |
For more insights on using epoxy resin, check out our articles on how to pour epoxy resin and how to sand and polish epoxy resin.
Epoxy resins’ high tensile strength, chemical stability, and resistance to wear make them suitable for demanding applications, including automotive and industrial uses. Learn more about its versatile applications and how it can suit your project’s needs. Before starting your next project, ensure you understand the curing process by reading how to cure epoxy resin.
Utilizing the right type of epoxy resin for your specific task ensures that you get the best results, whether for functional or aesthetic purposes. Explore more about epoxy resins and their applications to perfect your next DIY project or professional endeavor.
Specialty Applications of Epoxy Resin
Epoxy resin is a versatile adhesive used in various specialty applications. Let’s take a closer look at how you can utilize epoxy resin for both art and craft projects, as well as automotive and industrial uses.
Art and Craft Projects
Epoxy resin is a favorite among artists and crafters because of its flexibility and ability to create visually stunning effects. You can use it to make:
- Coasters
- Jewelry Boxes
- Lamps
- Resin Pours
- Geode Art
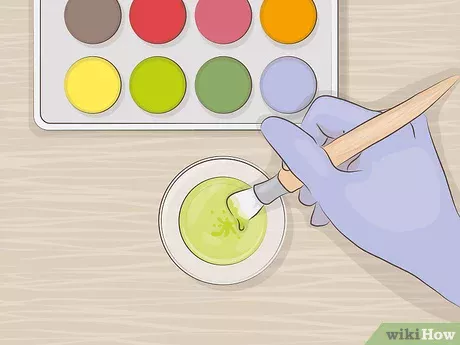
When using epoxy resin in art, you can encase objects and produce a transparent finish, making it perfect for creative projects (Hirosarts). If you’re interested in adding color to your resin, you might find our guide on how to add color pigment to epoxy resin useful.
Additionally, epoxy resin is popularly used in woodworking to fill cracks and flaws, enhancing the beauty and durability of wood surfaces. It even strengthens wood joints, which ensures stability in various wooden crafts (Hirosarts). If you’re curious about using epoxy for woodworking, check our article on how to use epoxy resin on wood.
Automotive and Industrial Uses
Epoxy resin isn’t just limited to art and crafts; it’s also a powerhouse in the automotive and industrial sectors. Its properties make it ideal for:
- Paints
- Adhesives
- Composites
In the automotive industry, epoxy resin is valued for its resilience to chemicals found in lubricants, cleansers, and bleach. It adheres well to metal components and provides rust and corrosion resistance (Hirosarts). For a comprehensive guide on maintaining and cleaning epoxy surfaces, see our article on how to clean epoxy resin.
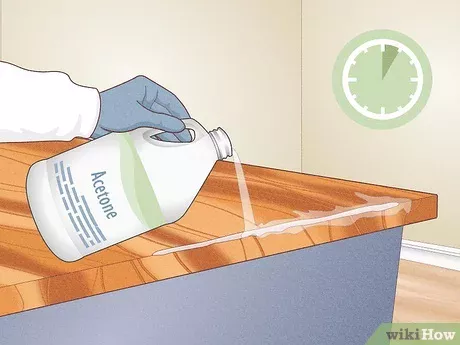
Epoxy resin is also excellent for bonding surfaces in various industrial applications. For optimal adhesion, ensure that the surfaces are clean, dry, and sanded. Contaminants like grease and oil should be removed with appropriate solvents like lacquer thinner or acetone. Sanding smooth non-porous surfaces with 80-grit aluminum oxide paper will also improve adhesion (WEST SYSTEM).
Here’s a quick look at the properties and uses of epoxy resin in different sectors:
| Application | Uses | Key Properties |
|---|---|---|
| Art & Craft | Coasters, jewelry boxes, lamps, resin pours, geode art | Transparent finish, flexibility |
| Woodworking | Filling cracks, strengthening joints | Durability, visual appeal |
| Automotive & Industrial | Paints, adhesives, composites | Chemical resilience, adhesion to metals |
For more tips and techniques on working with epoxy resin, explore our extensive articles on how to use epoxy resin and how to polish epoxy resin.
Maintenance and Best Practices
When working with epoxy resin, it’s crucial to follow best practices for bonding surfaces and protecting the finished product. This ensures strong adhesion and durability, particularly for outdoor applications.
Bonding Surfaces
Proper surface preparation is essential for successful epoxy application. To achieve a strong bond, ensure surfaces are clean, dry, and sanded. Contaminants like grease, oil, wax, or mold release can hinder adhesion (WEST SYSTEM). Follow these steps for optimal surface preparation:
- Clean the Surface: Use solvents such as lacquer thinner or acetone to thoroughly clean the surface.
- Dry the Surface: Make sure the surface is completely dry.
- Sand the Surface: Use 80-grit aluminum oxide paper to sand smooth, non-porous surfaces. For materials like steel or lead, additional steps include removing contamination, sanding to bright metal, applying a coat of epoxy, and sanding the fresh epoxy into the surface (WEST SYSTEM).
| Surface Type | Preparation Steps |
|---|---|
| Non-porous | Clean with solvent, dry, sand with 80-grit aluminum oxide |
| Metal (steel, lead) | Clean, sand to bright metal, coat with epoxy, re-sand epoxy |
| Plastic | Clean, sand, potential flame oxidizing, perform adhesion test |
For plastics, G/flex epoxy is recommended. Hard plastics such as PVC, ABS, and styrene require good surface preparation and may benefit from flame oxidizing to improve bonding (WEST SYSTEM).
Finish Coating and UV Protection
Epoxy resin is highly durable, but its exposure to UV light can cause it to degrade over time. Applying a UV-resistant finish coat will enhance the longevity and appearance of your epoxy project. Here’s how:
- Sand the Surface: After curing, sand the epoxy surface with 80-grit paper to remove any amine blush or glossy areas. Amine blush looks like a wax-like film and can inhibit subsequent bonding (see our guide on how to cure epoxy resin).
- Clean the Surface: Wash the sanded surface with clean water and an abrasive pad, then dry thoroughly to remove all dust and dissolved blush.
- Apply UV-Resistant Coating: Choose a topcoat with UV inhibitors such as a marine varnish or a two-part polyurethane. This will protect the epoxy from UV damage.
| Step | Details |
|---|---|
| Sanding | Use 80-grit sandpaper, remove amine blush and glossy areas |
| Cleaning | Wash with water and an abrasive pad, dry completely |
| Applying UV Coating | Use marine varnish or two-part polyurethane |
By following these steps, you ensure that your epoxy projects will remain strong and visually appealing for a long time. For more guidance on epoxy maintenance and techniques, consider articles on how to clean epoxy resin and what are some good polishers for epoxy resin.

