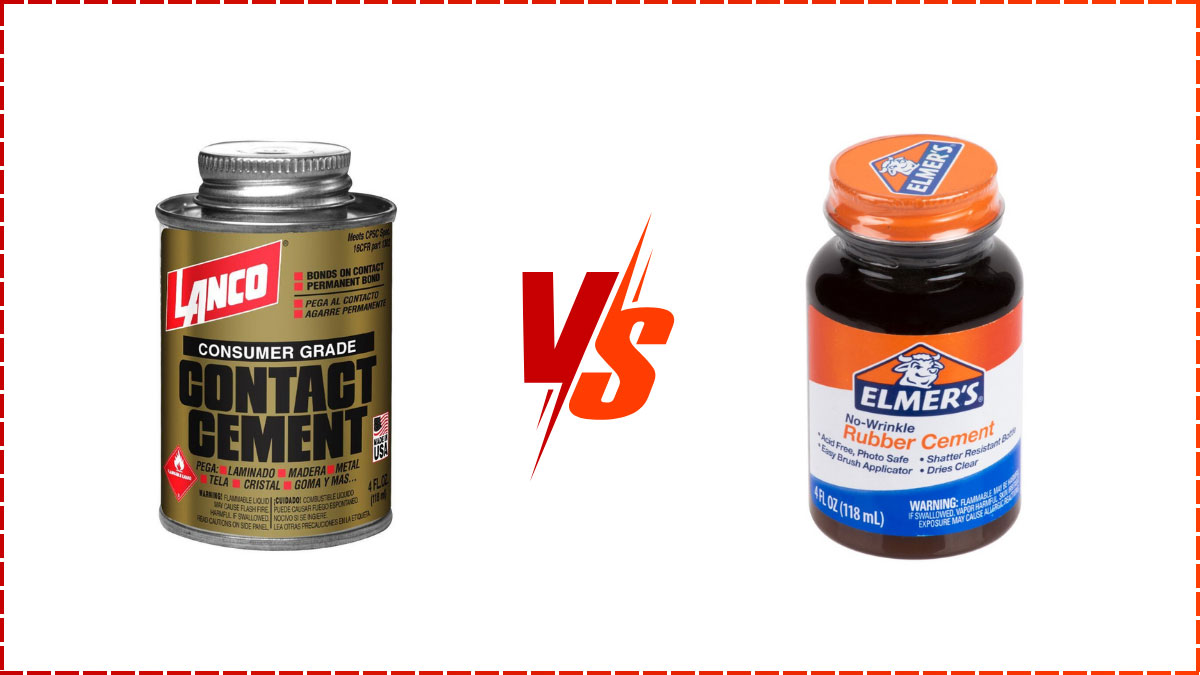
Contact Cement vs Rubber Cement: Which Adhesive to Choose
Choosing the right adhesive can make or break your DIY project, and when it comes to bonding materials, contact cement and rubber cement are two popular options. Both offer unique benefits, but understanding their differences is key to ensuring your project’s success.
Contact cement provides a strong, permanent bond ideal for large surfaces and materials like laminates and veneers. On the other hand, rubber cement offers flexibility and is perfect for temporary bonds, making it a favorite for arts and crafts. Whether you’re tackling a home improvement task or a creative try, knowing when to use each type of cement will save you time and frustration.
Key Takeaways
- Contact Cement: Provides a strong, permanent bond, ideal for large surfaces and nonporous materials like laminates and veneers. It requires precise application as the bond forms immediately upon contact.
- Rubber Cement: Offers flexibility and is perfect for temporary or removable bonds, making it popular for arts and crafts projects with materials such as paper, cardboard, and fabric.
- Application Techniques for Contact Cement: Ensure surfaces are clean, apply an even layer on both surfaces, allow it to air-dry, and then press surfaces together for an immediate bond.
- Application Techniques for Rubber Cement: Clean surfaces, apply a thin layer, let it dry until tacky, and then press surfaces together, allowing for adjustments.
- Comparison: Contact cement is suitable for strong, permanent bonds on large, nonporous surfaces, whereas rubber cement is best for flexible, temporary bonds on delicate materials.
- Safety: Both adhesives require use in well-ventilated areas and adherence to safety precautions to avoid inhalation of fumes and potential hazards.
Overview Of Contact Cement
Understanding contact cement is essential for various applications in both professional and DIY contexts. This adhesive offers unique properties and practical uses, making it an indispensable tool for many projects.
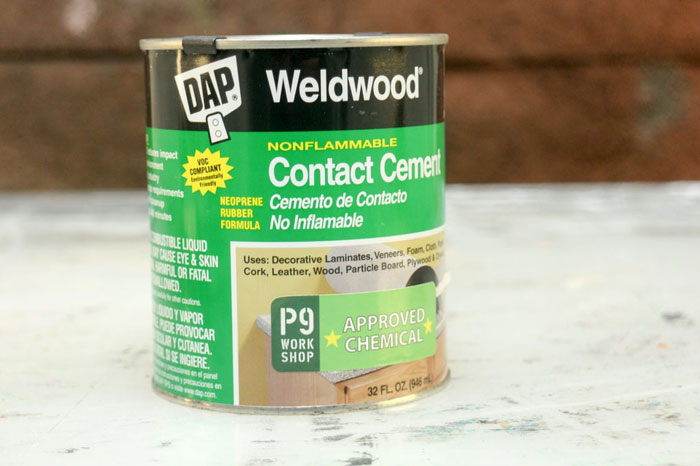
Composition And Properties
- Neoprene Rubber Adhesive: Contact cement primarily comprises neoprene rubber, providing flexibility and strong bonding capabilities.
- Solvent-Based: Often combined with a solvent, which evaporates during the drying process, allowing the adhesive to set.
- Immediate Bond: Once applied to both surfaces and dried, the bond forms immediately upon contact, making adjustments nearly impossible.
Common Uses
- Nonporous Materials: Excellent for bonding materials like plastic, veneers, rubber, glass, metal, and leather.
- Large Surfaces: Ideal for applications involving extensive surface areas, such as countertops and floor tiles.
- No Clamping Needed: The adhesive eliminates the need for clamps, simplifying the bonding process for large projects.
- Surface Preparation: Ensure surfaces are clean, dry, and free from dust.
- Apply Adhesive: Spread an even layer of contact cement on both surfaces to be bonded.
- Air-Drying: Allow the adhesive to dry according to package instructions. This typically takes 30 minutes to an hour.
- Immediate Bonding: Press the surfaces together once the adhesive is fully dry. The bond is instantaneous, requiring precision.
| Step | Description |
|---|---|
| Surface Preparation | Clean, dry, and dust-free surfaces |
| Apply Adhesive | Even layer on both surfaces |
| Air-Drying | 30 minutes to an hour |
| Immediate Bonding | Press surfaces together for an immediate, strong bond |
By mastering these aspects of contact cement, you can enhance the quality and durability of your projects, ensuring professional-level results.
Overview Of Rubber Cement
Rubber cement, essential for crafting, offers a flexible bonding solution. Known for a temporary or removable bond, it’s highly versatile.
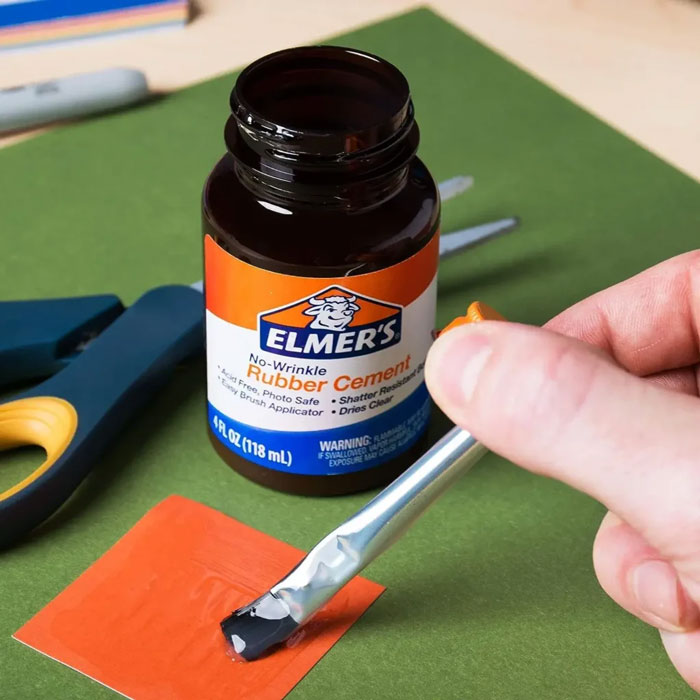
Composition and Properties
Rubber cement comprises unvulcanized gum or rubber dissolved in a solvent. This unique combination provides flexibility and ease of use.
Key Properties:
- Flexibility: Forms a stretchy, rubbery material when dry, allowing for easy material separation.
- Solvent-based: The presence of a solvent aids in quick drying and easy application.
These properties make rubber cement an ideal choice for projects needing a temporary, removable bond without damaging the surfaces.
Common Uses
Rubber cement excels in applications requiring a non-permanent bond with various materials.
Materials:
- Paper: Perfect for school projects and crafts.
- Cardboard: Ideal for creating lightweight models.
- Felt and Fabric: Useful in costume design and scrapbooking.
- Photos: Non-damaging adhesive for mounting photos.
- Rubber: Effective for sticking rubber to other materials.
Applications:
- Crafting: Commonly used in arts and crafts for children’s projects.
- Temporary Attachments: Suitable for tasks requiring adjustments before final application.
These uses highlight rubber cement’s adaptability in temporary bonding scenarios.
Application Techniques
Understanding the correct application techniques ensures effective use of rubber cement.
Steps:
- Surface Preparation: Ensure surfaces are clean and dry.
- Application: Apply a thin, even layer of rubber cement to one or both surfaces.
- Drying Time: Allow the cement to dry until it becomes tacky to the touch.
- Pressing Surfaces: Align and press the surfaces together, adjusting as necessary.
| Material | Preparation | Drying Time | Joining Method |
|---|---|---|---|
| Paper | Clean and trim edges | 5-10 minutes | Press by hand |
| Cardboard | Smooth surface | 10-15 minutes | Align pieces* |
| Felt/Fabric | Ensure flat surface | 10-20 minutes | Use a roller |
| Photos | Keep dry and flat | 5-10 minutes | Use gentle pressure |
| Rubber | Roughen surface | 15-30 minutes | Use a clamp if needed |
**Note: Use minimal pressure to avoid warping.
Proper application techniques maximize rubber cement’s bonding effectiveness and versatility, making it suitable for various projects.
These details provide a comprehensive overview of rubber cement, guiding you to make informed decisions for your DIY projects.
Comparison: Contact Cement Vs Rubber Cement
When comparing contact cement and rubber cement, it’s essential to evaluate their strength, durability, flexibility, usability, and drying time.
Strength And Durability
Contact Cement:
- Strength: Known for its strong, permanent bonds on nonporous materials such as plastic, veneers, rubber, glass, metal, and leather.
- Durability: Once bonded, it’s difficult to reposition or separate the surfaces without causing damage.
Rubber Cement:
- Strength: Offers less durability compared to contact cement, suitable for temporary or semi-permanent bonds on materials like paper, cardboard, felt, fabric, foam, and photos.
- Durability: The bond is flexible but not as strong or durable as contact cement.
Flexibility And Usability
Contact Cement:
- Flexibility: Rigid and less flexible once dried and bonded, ideal for applications where a permanent, strong bond is required.
- Usability: Best for large surfaces and materials that do not require repositioning, such as countertops or floor tiles.
Rubber Cement:
- Flexibility: Provides a flexible bond that allows for easy repositioning, making it suitable for arts and crafts projects.
- Usability: Ideal for projects where a temporary or semi-permanent bond is needed, and works well with delicate materials.
Drying Time And Adhesion
Contact Cement:
- Drying Time: Requires air-drying before pressing the surfaces together, allowing for an instant bond upon contact.
- Adhesion: Forms an immediate bond, making accurate application crucial.
Rubber Cement:
- Drying Time: Quick-drying due to the solvent, forming a rubbery material when dry.
- Adhesion: Allows for repositioning when slightly tacky, providing ease of use for temporary applications.
| Factor | Contact Cement | Rubber Cement |
|---|---|---|
| Strength | Strong, permanent bonds on nonporous materials | Less durable, ideal for temporary bonds |
| Durability | Difficult to reposition or separate | Flexible but weaker bond |
| Flexibility | Rigid once dried | Provides flexibility for repositioning |
| Usability | Ideal for large surfaces, countertops, floor tiles | Suitable for arts, crafts, and temporary bonds |
| Drying Time | Requires air-drying before bonding | Quick-drying due to solvent |
| Adhesion | Forms immediate, strong bond | Allows for repositioning when slightly tacky |
Choosing the right adhesive depends on the specific needs of your project. Use contact cement for permanent, strong bonds on nonporous materials. Opt for rubber cement for flexibility and temporary bonds in crafting projects.
Advantages And Disadvantages
Evaluating the advantages and disadvantages of contact cement and rubber cement is crucial for choosing the right adhesive for your project needs. Each has distinct properties suited to different applications.
Pros And Cons Of Contact Cement
Contact Cement is a heavy-duty adhesive known for its ability to bond nonporous materials.
Pros:
- Strong and Permanent Bond: Creates durable, long-lasting connections between materials like plastic, rubber, glass, metal, and leather.
- Large Surface Areas: Effective in bonding large surfaces such as countertops and floor tiles without needing clamps.
- Versatile: Works on various materials, making it suitable for diverse projects.
Cons:
- Tricky Application: Requires precise application and timing; you must allow it to dry completely before pressing surfaces together, presenting a challenge on curved surfaces.
- No Second Chance: Bonds instantly upon contact, making repositioning hard and leading to potential surface damage if a mistake occurs.
Pros And Cons Of Rubber Cement
Rubber Cement offers a more flexible bonding solution, mainly used for crafting and temporary attachments.
- Flexible Bond: Provides elasticity, making it suitable for delicate materials such as paper, cardboard, felt, fabric, and photos.
- Easy Application: Simple to apply, with a thin layer that becomes tacky when dry, allowing repositioning before setting.
- Quick Drying: Dries quickly due to its solvent base, making it convenient for swift projects.
- Weaker Bond: Not suitable for heavy-duty applications requiring strong, permanent bonds.
- Solvent Fumes: Releases fumes when drying, possibly needing adequate ventilation.
Best Practices For Use
Applying adhesives correctly ensures sturdy, long-lasting bonds and helps you avoid common pitfalls. Understanding the best practices for using contact cement and rubber cement is crucial for achieving professional results. Here’s a detailed guide that includes tips and application techniques for each type of adhesive.
Tips For Applying Contact Cement
Contact cement is ideal for achieving permanent bonds on nonporous materials. Follow these best practices to ensure successful applications:
Preparation:
- Clean the surfaces: Ensure both surfaces are free of dust, grease, or any contaminants.
- Smooth the surfaces: Sand any rough areas to create a uniform bonding surface.
Application Steps:
- Apply Evenly: Coat both surfaces with a thin, even layer using a brush or roller.
- Allow to Air-Dry: Let the adhesive dry completely. This usually takes 15-20 minutes, depending on humidity and temperature.
- Align Precisely: Position the surfaces carefully before pressing them together, as the bond forms instantly.
- Press Firmly: Use a roller or apply even pressure across the surfaces to ensure a strong, uniform bond.
Safety Tips:
- Use in a well-ventilated area to avoid inhaling fumes.
- Wear protective gloves to avoid skin contact.
Tips For Applying Rubber Cement
Rubber cement offers flexibility and is ideal for temporary bonds. Follow these steps to optimize its use:
Preparation:
- Clean the surfaces: Wipe away any dirt or residue.
- Apply in thin layers: For stronger bonds, apply a thin layer on both surfaces.
Application Steps:
- Apply Thinly: Spread a thin layer on one or both surfaces using a brush or applicator.
- Allow to Dry Until Tacky: The adhesive should dry until tacky but not completely dry. This generally takes a few minutes.
- Press Together: Align and press the surfaces together firmly but gently to ensure a flexible bond.
Safety Tips:
- Use in a well-ventilated area to minimize exposure to solvent fumes.
- Keep away from open flames as the solvent is flammable.
Comparative Data On Adhesives
Here’s a quick comparison of contact cement and rubber cement to highlight their differences in application and properties:
| Feature | Contact Cement | Rubber Cement |
|---|---|---|
| Composition | Neoprene rubber, solvent-based | Unvulcanized rubber, solvent-based |
| Bond Strength | Strong, permanent | Flexible, temporary |
| Ideal Materials | Plastic, veneers, rubber, glass, metal, leather | Paper, rubber, leather |
| Drying Time | 15-20 minutes (air-dry) | Few minutes until tacky |
| Application Process | Coat both surfaces, let dry, position carefully, press | Apply thinly, let dry until tacky, press |
| Safety Precautions | Well-ventilated area, protective gloves | Well-ventilated area, flammable |
By following these best practices, you can ensure optimal results when working with contact cement and rubber cement. Proper preparation, precise application, and attention to safety will help you achieve professional-grade results in your projects.
Conclusion
Choosing between contact cement and rubber cement depends on the specific needs of your project. Contact cement offers a strong, permanent bond, making it ideal for large surfaces and nonporous materials. On the other hand, rubber cement provides flexibility and is perfect for temporary bonds in crafting projects.
Understanding the properties and applications of each adhesive ensures you select the right one for your task. Whether you need a durable, permanent solution or a flexible, removable bond, knowing how to use these adhesives effectively will lead to successful and professional results.
Frequently Asked Questions
What is the main benefit of using contact cement?
Contact cement provides a strong, permanent bond that is ideal for large surfaces and nonporous materials like plastic, metal, and glass.
When should I use rubber cement instead of contact cement?
Use rubber cement for flexible, temporary bonds, mainly in arts and crafts or projects with paper, cardboard, felt, fabric, photos, and rubber.
Why is surface preparation important for contact cement?
Proper surface preparation ensures a clean and even bond, enhancing the adhesion quality and durability of the project.
Can surfaces be repositioned after applying contact cement?
No, contact cement creates an immediate bond upon contact, so precise alignment is necessary as repositioning is not possible.
Does rubber cement release fumes?
Yes, rubber cement releases solvent fumes during application, so it is essential to work in a well-ventilated area.
How quickly does rubber cement dry?
Rubber cement dries quickly due to its solvent composition, forming a tacky surface ready for bonding within minutes.
Is contact cement suitable for heavy-duty applications?
Yes, contact cement is perfect for heavy-duty applications requiring a strong, permanent bond, such as countertops and floor tiles.
Can I use rubber cement on nonporous materials?
Rubber cement is generally not recommended for nonporous materials, as it provides a temporary, flexible bond more suitable for porous materials.
What safety precautions should I take when using contact cement?
Ensure proper ventilation, wear protective gloves, and avoid contact with skin and eyes due to the strong solvents in contact cement.
Are there specific surfaces where contact cement works best?
Contact cement is most effective on nonporous surfaces such as plastic, metal, and glass, providing a durable and lasting bond.

