How to Glue Ceramic Back Together: Expert Tips for Seamless Repair
Accidents happen, and when your favorite ceramic piece breaks, it can feel like a small disaster. But don’t worry—you can restore it to its former glory with the right techniques and materials. Gluing ceramic back together is easier than you might think and can save you from having to part with cherished items.
Whether it’s a beloved mug, a decorative vase, or a treasured heirloom, knowing how to properly glue ceramic can make all the difference. In this guide, you’ll learn the essential steps to ensure a strong, almost invisible repair. Get ready to bring your broken ceramics back to life and enjoy them for years to come.
Key Takeaways
- Select the Right Glue: Understand the types and properties of ceramic glue to choose the most suitable adhesive for your repair needs.
- Ensure Clean Surfaces: Thoroughly clean and dry the broken ceramic pieces to ensure a strong bond.
- Apply Glue Properly: Use a thin layer of glue and avoid excess to ensure a durable and invisible repair.
- Align Pieces Correctly: Press and align the broken pieces precisely, using clamps if necessary, to avoid gaps.
- Handle Multiple Breaks Carefully: Systematically approach multiple breaks and fill missing chunks with ceramic filler for a seamless finish.
- Finish and Seal Repairs: Smooth excess glue, paint, and seal the repaired area for a professional and long-lasting result.
Understanding Ceramic Glue
Ceramic glue plays a crucial role in the successful repair of broken ceramic items. It’s important to have a good grasp of the types of glue available and their specific properties to ensure a strong bond. This section explores the key characteristics and applications of ceramic glue to help you make an informed choice.
Key Properties of Ceramic Glue
- Compatibility: Look for glues that specifically state they are suitable for ceramic. Some glues bond well to porous surfaces, which is essential for ceramics.
- Gap-Filling Capability: Choose a glue with the ability to fill gaps if the broken pieces don’t fit perfectly together.
- Food Safety: If repairing items intended for food and drink, opt for glue that is labeled as food-safe to ensure it doesn’t release harmful chemicals.
- Versatility: Some glues can bond with various materials such as wood, plastic, metal, and glass, which might be useful for mixed-material objects.
Types of Ceramic Glue
| Type | Characteristics | Applications |
|---|---|---|
| Epoxy | Two-part adhesive offering strong bond and gap-filling properties. Cures quickly. | Ideal for large breaks or structural repairs. |
| Super Glue | Quick-setting cyanoacrylate adhesive. Does not fill gaps effectively. | Best for small, precise cracks or chips. |
| Ceramic Repair Glue | Tailored for ceramic and porcelain. Food-safe options available. | Perfect for kitchenware and decorative items. |
| Polyurethane Glue | Expands slightly as it cures, offering some gap-filling ability. | Suitable for outdoor ceramics exposed to elements. |
| Silicone Adhesive | Flexible and water-resistant. Cures slowly compared to other glues. | Useful for items that require some flexibility. |
- Assess the Damage: Identify the type and extent of the breakage to determine the appropriate adhesive.
- Consider the Glue Properties: Match the glue’s properties like gap-filling capacity and compatibility with the needs of your ceramic item.
- Check for Food Safety: Confirm the glue is food-safe if you’re repairing kitchenware or dinnerware.
- Evaluate Versatility: If the ceramic piece includes mixed materials, a versatile glue may be beneficial.
Choosing the right ceramic glue sets the foundation for a strong repair. Understanding the distinct properties of each type allows you to select an adhesive that matches your specific needs and ensures the longevity of your restored ceramic items.
Choosing the Right Glue for Ceramic
In the area of ceramic repair, selecting the right adhesive is paramount. Given ceramics’ unique properties, certain glues perform better than others. Here’s how to make an informed choice:
Compatibility with Ceramic
Definition: Compatibility refers to the glue’s ability to bond effectively with ceramic and its typically porous nature.
- Ceramics often have tiny pores that can affect the bonding quality. Ensure the glue mentions its suitability for porous surfaces on the label or product description.
- Epoxy resin, cyanoacrylate (super glue), and polyvinyl acetate (PVA) are often cited for their strong bonding with ceramics.
Multipurpose Glue
Definition: Multipurpose glue is an adhesive that can bond various materials such as wood, plastic, metal, and glass.
- Opt for multipurpose glue to cater to different repairs. This glue will be useful if you are fixing items like mixed-material ornaments or decorative items.
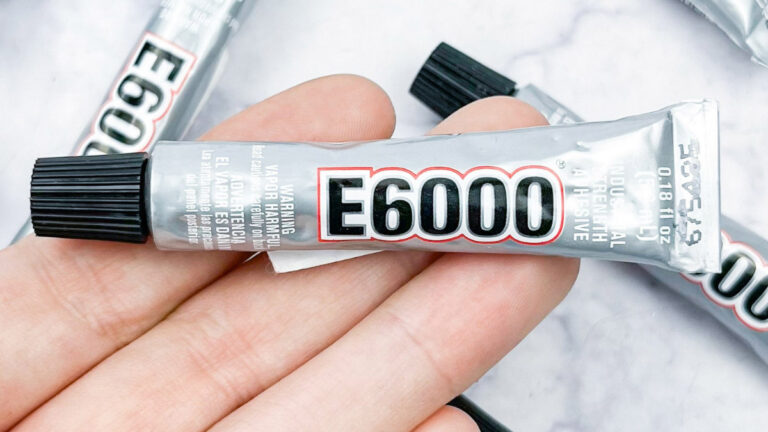
- Example brands: Gorilla Glue, Loctite, and E6000.
Gap-Filling Capabilities
Definition: The ability of glue to fill gaps and voids in the bonding process.
- This is essential if the broken ceramic piece has gaps or minor fractures. Polymers and epoxy resins typically have excellent gap-filling properties.
- Ensure the product mentions “gap-filling” on the packaging for best results.
| Glue Type | Suitable For | Gap-Filling | Examples |
|---|---|---|---|
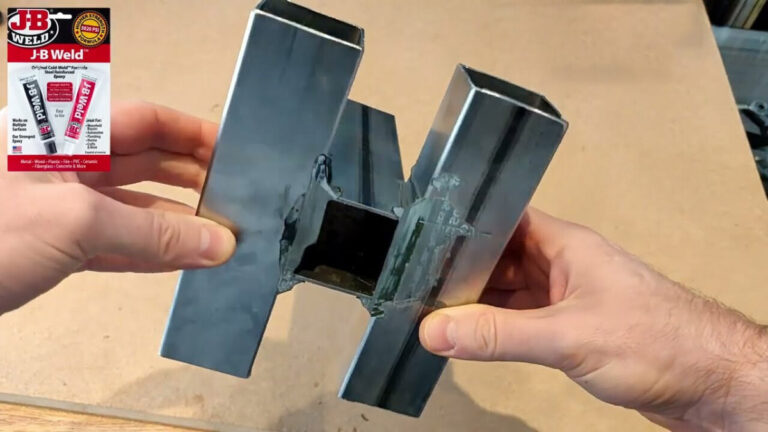
| Epoxy | Ceramics, metals | Excellent | J-B Weld, Gorilla Epoxy |
| Super Glue | Ceramics, glass | Limited | Loctite, Krazy Glue |
| Polyurethane | Various materials | Good | Gorilla Glue |
| Silicone Adhesive | Non-porous surfaces | Moderate | E6000 |
Food Safety
Definition: Food-safe glue is non-toxic and safe for items that come into contact with food and drinks.
- For items like mugs and plates, food-safe glue is crucial. Look for glues that meet FDA regulations for non-toxicity.
- Example product: “Elmer’s E1012 China and Glass Cement” is a popular choice for food-safe repairs.
Checklist for Choosing Ceramic Glue
Definition: A quick reference to ensure all factors are considered.
- Material Compatibility: Ensure glue is designed for ceramics.
- Multipurpose Use: Helps with various repairs, not just ceramics.
- Gap-Filling Properties: Important for seamless fixing.
- Food Safety: Non-toxic, FDA-regulated for contact with food.
Selecting the appropriate glue involves a comprehensive understanding of these factors. Your repairs will be as seamless and durable as possible if you account for compatibility, multipurpose use, gap-filling properties, and food safety.
Preparing the Ceramic Pieces
Repairing ceramics requires a few preparatory steps to ensure a strong bond. Follow the guidelines below to get started.
Collecting All Pieces
- Gather All Fragments: Collect every broken piece. A complete inventory is essential for a seamless repair.
- Inspect for Missing Parts: Check for any missing fragments. Reassemble the pieces to confirm all parts are present.
Performing a Dry Fit
- Test Fit: Arrange all pieces together without glue. This preliminary assembly helps identify the best reassembly sequence.
- Identify Adjustments: Notice any gaps or overlaps. Adjust as needed to ensure a perfect fit before gluing.
Cleaning and Drying the Surfaces
Proper cleaning and drying are crucial for a durable bond.
- Remove Contaminants: Clean each piece thoroughly with a gentle detergent and water to remove dirt, grease, and debris.
- Ensure Dryness: Dry all pieces completely. Moisture can weaken adhesive bonds.
Arranging Pieces Before Gluing
Preparation before applying adhesive enhances accuracy in alignment.
- Rearrange and Align: Lay out the clean, dry pieces carefully. Confirm their alignment meets your expectations before applying glue.
- Temporary Stabilization: Use temporary supports like putty or tape to hold the pieces once arranged. This minimizes movement during gluing.
Repairing your cherished ceramic items starts with proper preparation. Ensuring all steps are followed carefully leads to a stronger and more aesthetically pleasing outcome. Remember, clean, dry, and accurately arranged pieces are key to a successful repair.
Gluing the Ceramic Back Together
Repairing broken ceramic pieces requires precision and patience. Properly applying glue and accurately aligning the pieces are critical steps.
Applying the Glue
Applying glue correctly ensures a durable bond. Follow these steps:
- Select the Right Adhesive: Use a ceramic glue suitable for your needs. Food-Safe Options: Loctite Go2 Gel or Loctite Super Glue Liquid Universal.
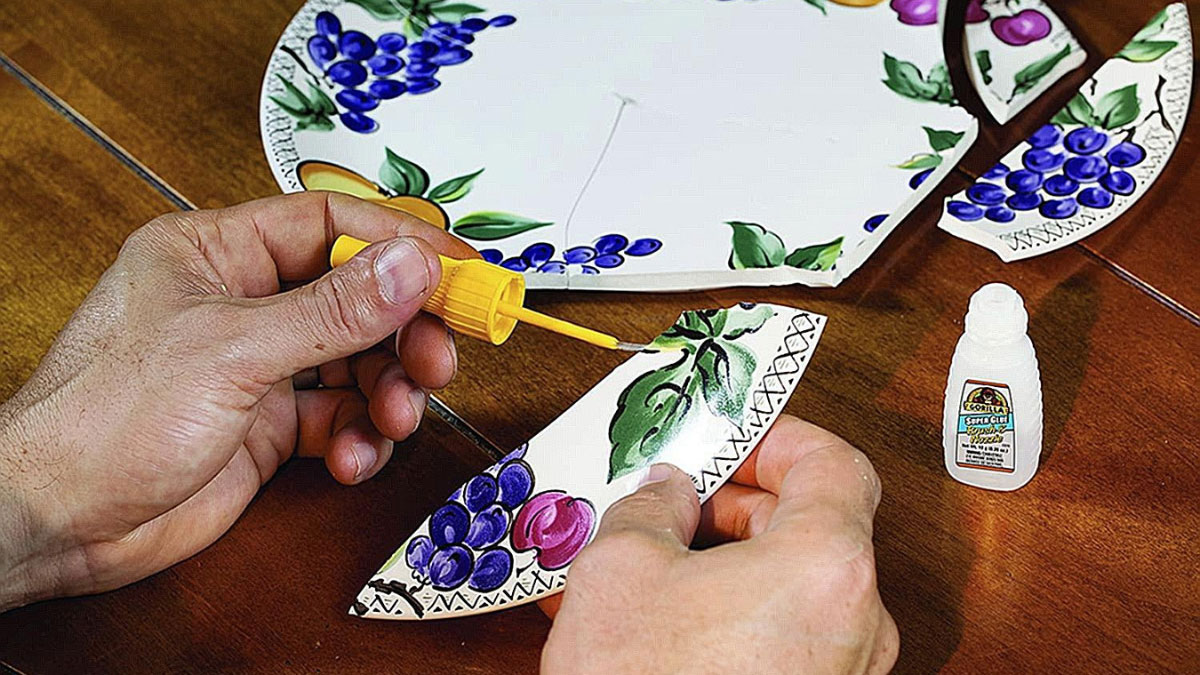
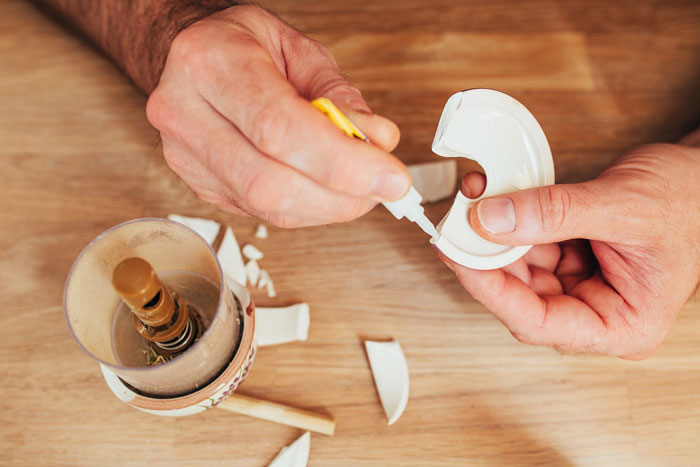
- Apply a Thin Layer of Glue: Add a small amount to the surface you want to bond. For smaller objects, one surface is usually enough.
- Avoid Excess Glue: Excess glue can weaken the bond and make the repair visible.
Aligning and Pressing Pieces
Aligning and pressing pieces accurately is essential for a seamless repair.
- Dry Fit the Pieces: Arrange them without glue to ensure correct alignment.
- Press Firmly: Once glued, press the pieces together firmly.
- Hold or Clamp: Use clamps or your hands to hold pieces in place until the glue sets.
- Check for Gaps: Adjust if necessary to eliminate gaps and ensure a snug fit.
Following these steps helps in achieving a nearly invisible repair, allowing you to restore and enjoy your ceramic items for years.
Handling Multiple Breaks and Missing Chunks
Dealing with multiple breaks and missing chunks in ceramic items requires a systematic approach and patience. Following these steps ensures that the ceramic item is restored to its best possible condition.
Dealing with Multiple Breaks
- Collect and Arrange Pieces: Gather all broken ceramic pieces and check if any are missing. Place them together to ensure you have everything necessary for the repair. Conduct a dry-fit to see how the pieces align.
- Clean the Pieces: Properly clean and dry each piece to remove dust, grease, or other contaminants that might impair the adhesive bond. A wet cloth followed by a dry one works well.
- Apply the Adhesive: For best results, use a glue suited to ceramics. Epoxy adhesive works well for ceramic repairs. Apply a thin layer to both sides of the broken pieces. For tight spots, a glue with a long nozzle or a gel formula is ideal.
- Press the Pieces Together: Firmly press pieces together, making sure they align perfectly. Hold them in place, applying gentle pressure for a few minutes.
Filling Gaps and Missing Chunks
Sometimes, ceramics break in a way that small chunks are missing. Filling these gaps is crucial for both functional and aesthetic reasons.
Materials Needed
- Ceramic Filler: Use a gap-filling adhesive or special ceramic filler.
- Sanding Tools: Fine-grit sandpaper or an emery board.
- Touch-up Paint: Choose a color that matches the ceramic.
- Prepare the Surface: Clean and dry the area around the missing chunk. Ensure it’s free of debris.
- Apply Filler: Use a ceramic filler to fill in the gaps. Apply it in layers if the gap is deep, allowing each layer to dry before applying the next.
- Smooth the Surface: Once the filler is completely dry, sand it down with fine-grit sandpaper to make it flush with the surrounding ceramic.
- Paint and Blend: Use touch-up paint to match the color of the repaired area with the rest of the ceramic. Multiple coats might be necessary for a perfect match.
Following these steps ensures the repaired ceramic item looks as close to its original state as possible. Whether you’re restoring a treasured mug or an heirloom vase, careful handling and attention to detail make a significant difference.
Final Touches and Finishing
After successfully gluing your ceramic pieces together, focus on the final touches to ensure a professional finish. These steps will help you achieve a seamless repair that is both strong and aesthetically pleasing.
Smoothing Excess Glue
Excess glue can harden and mar the surface of your ceramic. Smoothing and removing this excess is crucial for a clean finish.
- Scrape Off Excess Glue:
- Use a sharp blade or a craft knife to carefully remove hardened glue from the surface.
- Ensure blade contact remains parallel to avoid scratching.
- Sand the Joint:
- Use fine-grit sandpaper (e.g., 220-grit) to blend the repaired area with the surrounding surface.
- Sand gently in small circular motions to avoid over-sanding.
- Clean the Sanded Area:
- Wipe the area with a damp cloth to remove any dust or debris from sanding.
- Allow it to dry completely before proceeding to painting.
Painting and Sealing Repairs
Paint and seal the repaired area to match the original ceramic’s color and texture, enhancing durability and appearance.
- Choose Touch-Up Paint:
- Match the paint to the ceramic’s existing color.
- Use high-quality ceramic or acrylic paint for the best adhesion and finish.
- Apply Primer:
- Use a primer on the repaired area to ensure paint adheres properly.
- Allow the primer to dry according to the manufacturer’s instructions.
- Paint the Repaired Area:
- Apply paint in thin, even layers using a small brush.
- Let each layer dry before applying the next one to avoid streaks.
- Seal the Repair:
- Use a clear ceramic sealer to protect the painted area.
- Apply according to the product instructions, ensuring even coverage.
- Allow to Cure:
- Give ample time for the sealer to cure completely before using the ceramic item.
- Follow specific curing times provided by the sealer manufacturer.
By following these steps, you’ll restore your ceramic items to near-original condition, ensuring they remain both functional and beautiful.
Conclusion
Repairing broken ceramics can be a rewarding process when done correctly. By understanding the types of glue available and their specific properties, you can make informed choices that lead to strong and lasting repairs. Preparing your ceramic pieces meticulously and following the gluing steps with precision ensures a seamless restoration.
Handling multiple breaks and missing chunks requires patience and the right tools, but the results can be impressive. Finishing touches like smoothing, sanding, and painting enhance the durability and appearance of your repaired items. With careful attention to detail, you can restore your cherished ceramics to their former glory, ready to be enjoyed for years to come.
Frequently Asked Questions
What should I do if my ceramic item breaks?
First, collect all the pieces carefully and ensure you have everything. Performing a dry fit will help confirm proper alignment before gluing.
What type of glue is best for ceramic repairs?
For small repairs, super glue works well. However, for larger breaks, epoxy or ceramic repair glue provides stronger bonds and gap-filling properties.
Is ceramic glue food-safe?
Not all ceramic glues are food-safe. Check the label for non-toxicity and food safety certification if the repaired item will have contact with food.
How do I clean ceramic pieces before gluing?
Remove any dirt, dust, or oils by washing the pieces gently with soapy water. Ensure they are completely dry before applying adhesive.
Can I use regular household glue for ceramic repairs?
Regular household glue typically lacks the strength and durability needed for ceramic repairs. It’s best to use adhesives specifically designed for ceramics.
How should I apply the glue to the ceramic pieces?
Apply a thin, even layer of glue to one surface, align the pieces accurately, and press them together. Use clamps or hold them in place until the glue sets.
What should I do if there are gaps or missing chunks in my ceramic item?
Use ceramic filler or epoxy putty to fill gaps and rebuild missing areas. Once dry, sand smoothly and paint to match the original color.
How can I ensure a seamless finish in my ceramic repair?
After gluing, remove any excess adhesive, sand the joint smoothly, and clean the area. Apply touch-up paint and sealant to match the original appearance.
Are there specific steps for handling multiple breaks in a ceramic item?
Yes, arrange all the pieces, clean them, apply adhesive systematically, and press them together one section at a time. For best results, handle each break independently.
How long should I wait for the glue to set before using the repaired item?
Follow the glue manufacturer’s instructions for setting and curing times. It usually ranges from a few hours to several days for full strength.

