How to Glue Bricks Together: Expert Tips for DIY Projects
Ever wondered how to glue bricks together for your next DIY project? Whether you’re building a garden wall or a decorative indoor feature, knowing the right techniques can make all the difference. Gluing bricks might seem daunting, but with the right materials and steps, you can achieve a sturdy and professional finish.
Key Takeaways
- Understanding Brick Adhesives: Brick adhesives, also known as masonry adhesives, are crucial for projects involving bricks and masonry. They are easier to apply and quicker to set compared to traditional mortar.
- Types of Brick Adhesives: There are various types, including masonry construction adhesives which offer waterproof properties, fast drying times, and convenient application through caulking guns.
- Glue vs. Mortar: Glue or masonry adhesive is ideal for non-structural, quick projects with its ease of application and fast drying time, whereas mortar is better for structural integrity and load-bearing walls.
- Steps to Glue Bricks: Key steps include cleaning surfaces, pre-fitting materials, choosing the right adhesive, applying in a zig-zag pattern, and allowing sufficient drying time for a strong bond.
- Best Practices: Proper surface preparation, choosing suitable adhesives for the environment, and applying consistent pressure during bonding are essential for a durable finish.
- When to Use Brick Adhesive: Ideal for non-structural projects like garden walls and decorative features, quick repairs, temporary installations, and indoor applications sensitive to moisture.
Understanding Brick Adhesives
Brick adhesives are crucial for various construction and repair projects involving bricks, stones, and other masonry materials. Knowing the types and applications of brick adhesives improves your DIY and professional tasks.
What Is Brick Adhesive?
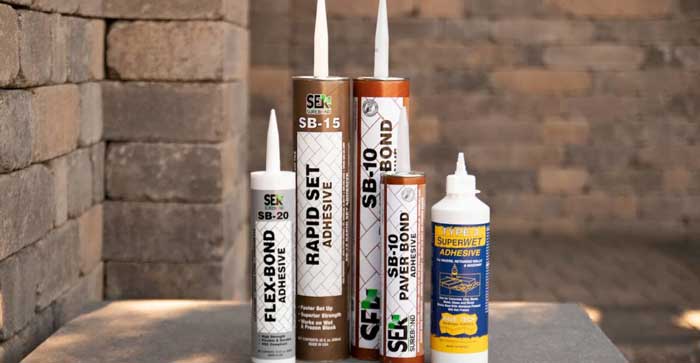
Brick adhesive, or masonry adhesive, is a specialized bonding agent designed to connect bricks, stones, and other masonry materials. Unlike traditional mortar composed of cement, water, and sand, brick adhesives are typically easier to apply and quicker to set.
Types Of Brick Adhesives
Masonry Construction Adhesives
-
Features:
- Comes in cartridges
- Applied using a caulking gun
- Ideal for repairing cracks, veneer, brick walls, single stone repairs, and world blocks
- Waterproof
- Faster drying time than mortar
-
Advantages:
- Convenient application process
- Strong bonding capability
- Enhanced durability due to waterproof properties
- Clean the surfaces: Ensure all surfaces to be bonded are clean and free of debris.
- Pre-fit the pieces: Verify that all pieces fit together accurately before applying the adhesive.
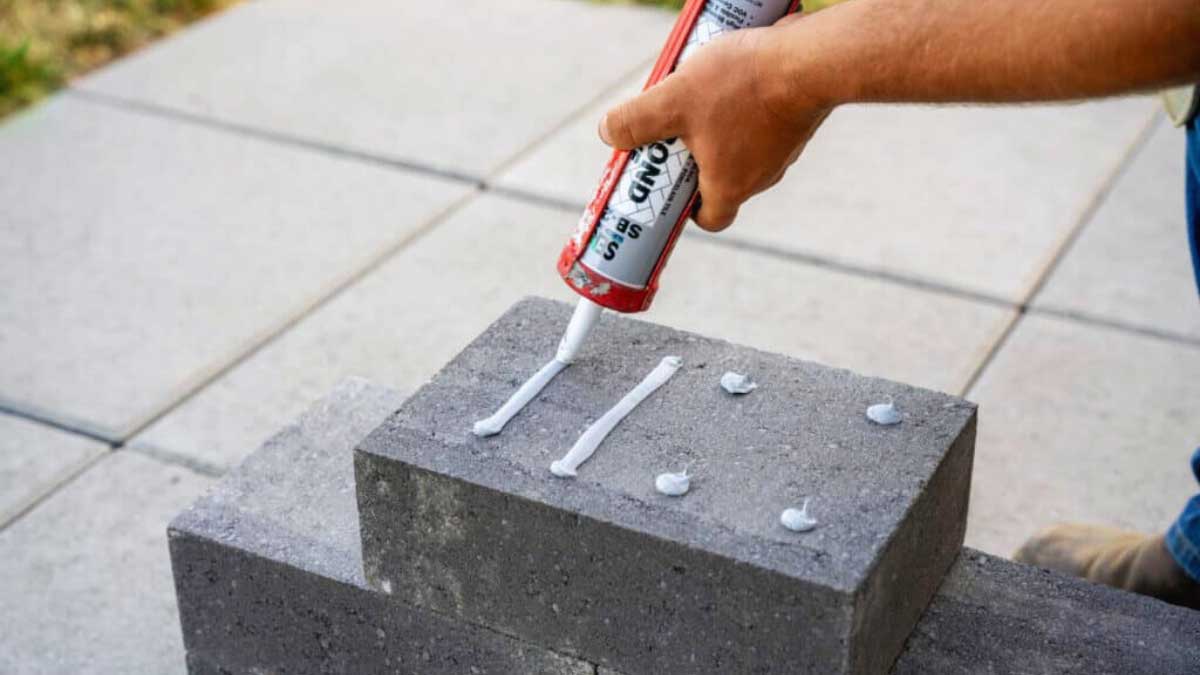
- Load the adhesive: Insert the adhesive cartridge into a caulking gun and cut the applicator tip at a 45-degree angle.
- Apply the adhesive: Dispense the adhesive in a continuous zig-zag stream onto the bonding surfaces.
| Property | Mortar | Masonry Adhesive |
|---|---|---|
| Composition | Cement, Water, Sand | Specialized bonding agent |
| Application | Manual mixing and application | Cartridges and caulking gun |
| Setting Time | Slower | Faster |
| Waterproof | No | Yes |
| Ideal Use | Large scale construction | Repair and smaller projects |
Understanding these aspects of brick adhesive enables more precise and efficient project execution. Choosing the right type of adhesive ensures durability and a professional finish in all your masonry endeavors.
The Difference Between Glue And Mortar
Understanding the difference between glue and mortar is essential when choosing the right bonding agent for your brick project. Both materials have distinct properties and applications.
Glue
Glue, especially masonry adhesive, offers several benefits:
- Ease of Application: Masonry adhesive requires no mixing. It’s ready to use straight from the tube using a caulking gun.
- Fast Drying: Glue dries faster than mortar, making it suitable for quick projects.
- Waterproof: Quality adhesives like Loctite’s masonry adhesive are waterproof, making them ideal for both indoor and outdoor applications.
- Flexibility: Construction adhesives such as Adiseal provide strong, flexible bonds, accommodating slight movements without cracking.
Mortar
Mortar, a mixture of cement, sand, and water, has different use cases:
- Structural Strength: Mortar provides structural integrity, making it suitable for load-bearing walls.
- Thicker Consistency: The thicker consistency allows for better filling of gaps and uneven surfaces between bricks.
- Adjustability: Mortar gives more working time, allowing for adjustments and repositioning of bricks during application.
- Weather Resistance: Mortar is durable and weather-resistant, essential for permanent brick structures.
Table: Key Differences Between Glue and Mortar
| Feature | Glue | Mortar |
|---|---|---|
| Application Method | Easy with a caulking gun | Requires mixing and trowel application |
| Drying Time | Fast | Slow |
| Waterproof | Yes (e.g., Loctite masonry adhesive) | Not inherently waterproof |
| Flexibility | High (e.g., Adiseal construction adhesive) | Low |
| Structural Use | Non-structural additions, decorative use | Suitable for load-bearing applications |
| Consistency | Thin | Thick |
| Adjustability | Low | High |
| Weather Resistance | High (for quality adhesives) | High |
Summary
Choosing between glue and mortar depends on your project’s specific needs. For non-structural, quick projects, and where flexibility and waterproofing are crucial, glue is the best option. For structural integrity and permanent structures, mortar is the preferred choice.
Steps To Glue Bricks Together
Bonding bricks might appear tricky, but with the right technique, it’s straightforward. Follow these steps for a solid, long-lasting bond.
Preparing The Surface
- Clean the Surfaces: Ensure all surfaces you’re bonding are clean and structurally sound. Remove dust, dirt, and loose particles from the bricks. Use a clean cloth or brush to thoroughly remove debris, as any remaining particles can weaken the bond.
- Pre-fit the Materials: Before applying adhesive, pre-fit all materials. Align the bricks to ensure they fit correctly and match your desired arrangement. This step prevents misalignment and ensures a stronger bond once the adhesive is applied.
Applying The Adhesive
- Choose the Right Adhesive: Select an adhesive designed for brick bonding. Options include:
- Loctite PL 500 World Block Adhesive: Ideal for outdoor projects. It withstands weather conditions and ensures a strong bond.
- Adiseal: Suitable for various applications, known for its versatility and strength.
- Cut the Nozzle: If using a cartridge-based adhesive, cut the nozzle to your desired bead size. Ensure the cut is clean to help smooth application.
- Apply the Adhesive: Apply adhesive in a continuous bead on one surface of the brick. This even layer ensures a uniform bond. For larger projects, work in manageable sections to avoid the adhesive drying before the bricks are set.
Securing The Bricks
- Press Bricks Together: Once the adhesive is applied, firmly press the bricks together. Ensure they are aligned correctly. This initial pressure helps create a strong bond.
- Allow Drying Time: Check the adhesive manufacturer’s instructions for recommended drying time. This period is crucial for the adhesive to set and form a durable bond.
| Step | Action | Details |
|---|---|---|
| Clean the Surfaces | Remove dust, dirt, and particles | Use a clean cloth or brush to ensure the surfaces are free from any debris that could weaken the bond. |
| Pre-fit the Materials | Align bricks before adhesive application | Pre-fitting ensures proper alignment and fit, crucial for achieving a strong bond post-adhesive application. |
| Choose the Right Adhesive | Select an appropriate adhesive based on project needs | Examples include Loctite PL 500 for outdoor use and Adiseal for versatility and strength. |
| Cut the Nozzle | Prepare the adhesive cartridge for application | Cut the nozzle to the desired size, ensuring a clean cut for smooth adhesive flow. |
| Apply the Adhesive | Spread adhesive evenly on one brick surface | Apply in a continuous bead to ensure even coverage and a strong, uniform bond. |
| Press Bricks Together | Align and press the bricks firmly | Ensure correct alignment during application to prevent misalignment and increase bond strength. |
| Allow Drying Time | Follow manufacturer’s guidelines for setting time | Adhere to the recommended drying time to ensure that the adhesive sets properly and forms a durable bond. |
These steps ensure your brick bonding project is durable and professionally finished.
Best Practices
Gluing bricks together effectively ensures that your projects are sturdy and professional. Following these best practices will enhance the longevity and strength of your brickwork.
Surface Preparation
- Thorough Cleaning: Clean the brick surfaces to remove dust, dirt, and loose particles. Use a clean cloth or a brush to ensure these surfaces are free from debris.
- Drying: Ensure the surfaces are dry and free from grime before applying the adhesive.
Adhesive Selection
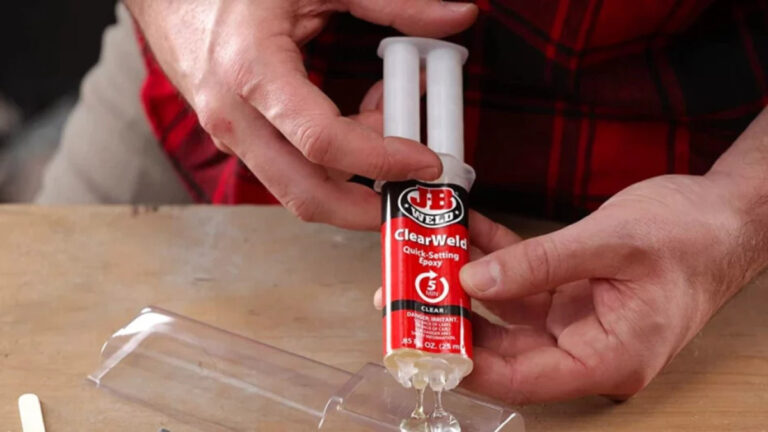
- Masonry Adhesives: Choose a suitable masonry adhesive. Consider options like epoxy or polyurethane-based adhesives such as Gorilla Glue.
- Outdoor Adhesives: For outdoor applications, use waterproof and UV-resistant adhesives like Adiseal.
Application
- Zig-Zag Stream: Apply the adhesive in a continuous zig-zag stream to one of the surfaces you want to bond. This ensures the adhesive spreads evenly for a strong bond.
Ensuring Durability
Adhering to these best practices guarantees the longevity and resilience of glued brick structures.
- Match Adhesive to Environment: Select adhesives that suit the project environment. Wet or sunny conditions may influence your choice.
- Pressure Application: Press bricks firmly together after applying the adhesive to ensure a secure bond. Hold them in place until the adhesive starts to set.
- Cure Time: Respect the manufacturer’s recommended drying or curing time to allow the adhesive to achieve maximum strength.
Avoiding Common Mistakes
Avoid these pitfalls to ensure a successful brick bonding process.
- Using Wrong Adhesive: Not all adhesives are suitable for masonry. Choose specialized masonry adhesives designed for brickwork.
- Insufficient Cleaning: Failure to clean the brick surfaces properly can result in weak adhesion. Ensure the surfaces are free from dirt and debris.
- Ignoring Weather Conditions: Extreme temperatures and humidity can affect adhesive performance. Consider the weather conditions before starting your project.
Summary
Following these best practices ensures durable and lasting brick bonds. Proper surface preparation, correct adhesive selection, and meticulous application are key. Avoiding common mistakes like using the wrong adhesive or ignoring weather conditions will enhance the quality of your brickwork projects.
When To Use Brick Adhesive
Brick adhesive’s versatility makes it suitable for numerous applications, providing a strong bond without the mess of traditional mortar. Consider using brick adhesive in specific situations to ensure optimal results.
Non-Structural Projects
- Garden Walls: Ideal for small garden or world walls where structural support isn’t critical.
- Decorative Features: Perfect for indoor non-load-bearing decorative elements like mantels and accent walls.
- Planters: Suitable for assembling brick planters where durability is essential but structural integrity isn’t a major concern.
Quick Repairs
- Loose Bricks: Efficient in re-securing loose bricks in patios, walkways, or exterior walls without the extended drying time of mortar.
- Cracks: Useful in repairing minor brick cracks by filling them with adhesive, providing a seamless and strong fix.
Temporary Installations
- Event Setups: Excellent for temporary structures and setups for events or exhibitions, allowing for quick assembly and disassembly.
- Seasonal Decorations: Applicable for seasonal garden ornaments or fixtures that need to be taken down or modified periodically.
Projects Requiring Speed
- Fast Setting: Suitable for projects requiring quick turnaround, given the rapid curing time of most brick adhesives.
- Limited Labor: Ideal for applications where minimal labor is available, as adhesive application is less labor-intensive compared to mortar.
Indoor Applications
- Moisture Sensitivity: Beneficial in indoor settings sensitive to moisture, avoiding the complications associated with mortar in damp environments.
- Clean Application: Reduces mess, making it suitable for indoor projects where cleanliness and precision are vital.
Table: Applications of Brick Adhesive
| Application | Description |
|---|---|
| Garden Walls | Non-load-bearing world walls |
| Decorative Features | Indoor accents like mantels |
| Planters | Durable and non-structural planters |
| Loose Bricks | Quick re-securing of loose bricks |
| Cracks | Seamlessly filling minor brick cracks |
| Event Setups | Temporary event structures |
| Seasonal Decorations | Fixtures for seasonal modifications |
| Fast Setting Projects | Quick turnaround projects |
| Moisture-Sensitive Areas | Indoor projects in damp environments |
| Clean Application Needs | Precision and cleanliness-focused indoor tasks |
Action Point
Evaluate your project requirements to determine if brick adhesive suffices, especially for non-structural, quick repair, or temporary installations.
Conclusion
Mastering the art of gluing bricks together can elevate your DIY projects, providing a professional and durable finish. By understanding the differences between adhesives and mortar, you can choose the best material for your specific needs. Following the step-by-step guide and best practices ensures precision and efficiency in your masonry tasks.
Whether you’re building garden walls, creating decorative features, or making quick repairs, using the right adhesive and techniques will guarantee lasting results. Embrace these insights, and you’ll confidently tackle any brick bonding project with ease and expertise.
Frequently Asked Questions
Can bricks be glued together without mortar?
Yes, bricks can be glued together using specialized masonry adhesives. These adhesives are easier to apply and set more quickly than traditional mortar, making them suitable for non-structural projects.
What type of adhesive should I use for brick projects?
For non-structural brick projects, use specialized masonry adhesives like Loctite PL 500 Landscape Block Adhesive or Adiseal. They provide strong bonds and are designed for durability in various weather conditions.
How do I prepare the surface before gluing bricks?
Ensure the brick surfaces are clean and dry. Remove any dust, dirt, or loose particles using a brush or compressed air. Pre-fit the materials to ensure proper alignment before applying the adhesive.
How should I apply masonry adhesive on bricks?
Cut the nozzle of the adhesive tube, apply it in a continuous bead or zig-zag pattern, and press the bricks together firmly. Follow the manufacturer’s instructions regarding drying and curing times.
Is brick adhesive waterproof?
Many masonry adhesives, such as Adiseal, are waterproof and provide reliable bonding even in moist conditions. Check the product specifications for waterproof properties.
Can I use brick adhesive for outdoor projects?
Yes, masonry adhesives like Loctite PL 500 are suitable for outdoor use. They can withstand various weather conditions and are ideal for garden walls and decorative features.
What are common mistakes to avoid when using brick adhesive?
Avoid using the wrong type of adhesive, not cleaning the surfaces properly, and ignoring weather conditions. These mistakes can compromise the strength and longevity of the bond.
How long does brick adhesive take to dry?
Drying times vary by product but generally range from a few hours to a full day. Always refer to the manufacturer’s instructions for precise curing times and ensure proper bonding.
When should I use brick adhesive instead of mortar?
Use brick adhesive for non-structural projects, quick repairs, and temporary installations. Mortar is better for load-bearing and structural applications due to its thicker consistency and strength.
Are masonry adhesives flexible?
Yes, many masonry adhesives are designed to be flexible, allowing them to absorb some movement and reduce the risk of cracking over time. This flexibility makes them ideal for quick, non-structural projects.

