Glue for Rocks: Best Adhesives for Landscaping Projects
Ever tried to create a stunning rock garden or repair a broken stone sculpture only to find that regular glue just doesn’t cut it? When working with rocks, you need a specialized adhesive that can handle the weight and texture of natural stone. Whether you’re a DIY enthusiast or a professional landscaper, choosing the right glue for rocks can make all the difference in your project’s durability and appearance.
Key Takeaways
- Specialized Adhesives for Rock Projects: Use specialized glues like epoxy resin, construction adhesive, or super glue, which offer varying strengths and curing times suitable for different rock projects.
- Proper Preparation is Crucial: Ensure rock surfaces are dry, clean, and sanded if needed. Correct surface preparation enhances adhesion and durability.
- Setting and Curing Times: Allow adhesives to fully cure, generally for 24 hours, to achieve maximum bonding strength. Plan for a dry and optimal temperature environment during application.
- Multiple Uses and Benefits: Rock glue is versatile, preventing erosion, enhancing stability, and being compatible with various materials. It’s ideal for landscaping, aquascaping, and craft projects.
- Maintenance Tips: Regularly clean the bonded areas to remove debris and sediment. Monitor and reapply the adhesive periodically to maintain the bond’s effectiveness.
Understanding Glue For Rocks
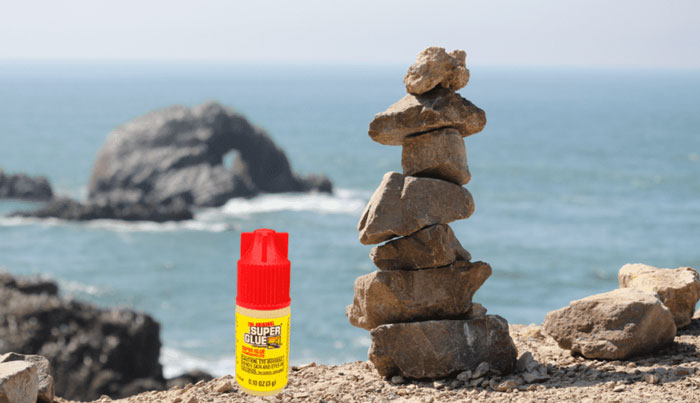
When dealing with rock bonding, it’s crucial to select the right adhesive to ensure durable and effective results. Here, you’ll find a deep jump into the best glue options for rocks, their properties, and applications.
Key Terms
Epoxy Resin: A strong and durable adhesive known for its high bonding strength and resistance to breakage. When mixed properly, it creates a clear bond that sets in about 24 hours.
Strength and Durability: These characteristics describe an adhesive’s ability to hold rock together under stress without failing.
Setting Time: The period it takes for the adhesive to fully cure and reach its maximum bonding strength.
Choose the Best Glue for Rocks
Rock projects like gardens and sculptures demand adhesives that can withstand weight and texture variations. Here are some of the top options:
- Epoxy Resin
- Strength: High, can hold significant weight.
- Durability: Excellent, resistant to breakage.
- Setting Time: Typically 24 hours.
- Application: Mix equal parts by volume; clamp rocks for optimal bonding.
Comparative Data
| Adhesive Type | Bonding Strength | Durability | Setting Time | Notes |
|---|---|---|---|---|
| Epoxy Resin | Very High | Excellent | 24 Hours | Ideal for heavy-duty rock projects. |
| Construction Adhesive | Moderate | Good | 12-24 Hours | Suitable for outdoor uses. |
| Super Glue | Moderate | Fair | Seconds to minutes | Best for small, non-structural projects. |
- Preparation:
- Clean the rock surfaces.
- Sand if necessary to create a rough texture.
- Mixing:
- Combine equal parts of epoxy resin.
- Mix thoroughly to a uniform consistency.
- Application:
- Apply to rock surfaces.
- Align and clamp rocks together.
- Curing:
- Allow 24 hours to set completely.
Selecting the right glue ensures your rock projects’ longevity and strength. Proper preparation, application, and curing are critical steps for achieving optimal results.
Benefits Of Using Glue For Rocks
Using glue for rocks in landscaping projects offers numerous advantages, enhancing both aesthetics and functionality.
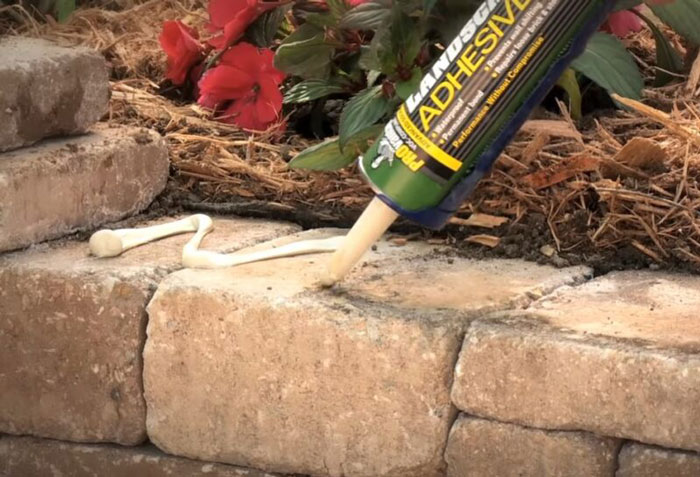
Erosion Prevention:
- Displacement Prevention: Glue for rocks helps prevent displacement caused by wind, rain, and other environmental factors. Products like Shabebe Rock Glue and PetraMax Rock Glue Max combat erosion effectively.
- Stability Enhancement: By keeping rocks, gravel, and pebbles securely in place, these glues enhance the stability of your landscaping design.
Long-Lasting Hold:
- Durability: These glues provide a long-lasting hold, often up to 12 months, reducing the need for frequent maintenance.
- Maintenance Reduction: The extended lifespan offers significant savings in time and effort, letting your projects remain intact longer.
Versatility:
- Material Compatibility: Rock glues are compatible with various materials including rocks, wood chips, gravel, sand, shells, pine straw, and pebbles.
- Multi-Use Functionality: This versatility makes them suitable for a wide range of landscaping and decorative needs.
Easy Application:
- Simplified Process: The application process is straightforward. Typically, the glue is mixed with water and applied using a garden sprayer.
- Effortless Implementation: This ease of use allows both DIY enthusiasts and professionals to apply the adhesive efficiently.
| Benefit | Details |
|---|---|
| Erosion Prevention | Prevents displacement, enhances stability |
| Long-Lasting Hold | Provides durability up to 12 months, reduces maintenance |
| Versatility | Compatible with multiple materials, supports diverse applications |
| Easy Application | Simple mixing and spraying process, user-friendly for all levels of expertise |
Employment of these benefits in your landscaping project not only improves the visual appeal but also ensures longevity and minimal maintenance.
Choosing The Right Glue
When working on projects that involve rocks, selecting the right adhesive is crucial. Whether you’re building a rock garden or repairing a stone sculpture, the right glue can ensure lasting results and structural integrity.
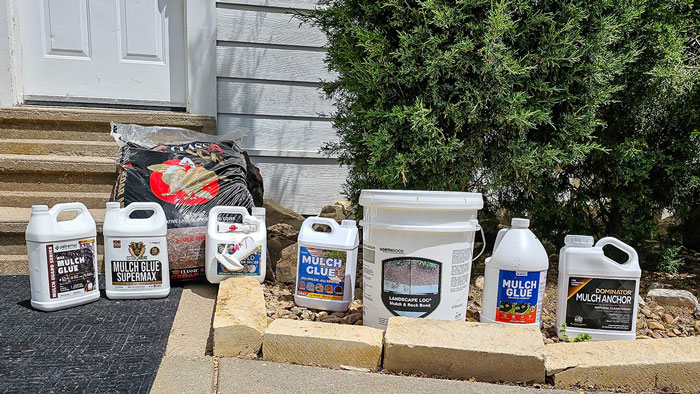
Factors To Consider
Surface Preparation
Prepare all surfaces properly to ensure effective adhesion.
- Dry Rocks:
Rocks must be completely dry before applying glue. Moisture can compromise the adhesive’s effectiveness. - Optimal Temperature:
Apply glue when the temperature is above 50°F. Lower temperatures can hinder adhesion and curing.
Traffic and Use
Determine the type of application based on the area’s traffic.
- High Foot Traffic Areas:
Use robust methods like the “pour and mix” approach with glues such as PetraMax Rock Glue Max. This ensures strong bonding. - Low Foot Traffic Areas:
The “mix and spray” method may suffice for areas with minimal traffic.
Safety and Environmental Impact
Consider the safety and environmental aspects of the glue.
- Non-Toxic and Pet-Safe:
Choose adhesives that are non-toxic and safe for pets. - Environmental Impact:
Ensure the glue does not harm groundwater or clothing. - Water Drainage:
The adhesive should allow water drainage and the passage of nutrients to the soil.
Types Of Glue
Selecting the right type of glue depends on the specific requirements of your project.
Epoxy Resin
Strong and durable, epoxy resin is ideal for heavy-load projects.
- Bonding Strength:
Epoxy resin provides a high level of bonding, making it suitable for large rocks. - Durability:
It resists breakage and can withstand various weather conditions.
Construction Adhesive
Versatile and easy to use, construction adhesive suits a variety of projects.
- Wide Application:
Suitable for different materials and rock sizes. - Ease of Use:
Can be applied directly from the tube, making it user-friendly.
Super Glue
Quick-setting and convenient, super glue works for small, lightweight projects.
- Quick Setting:
Super glue sets quickly, reducing waiting time. - Lightweight Projects:
Best for small rocks and stones where heavy bonding isn’t required.
Summary
Selecting the right glue involves evaluating factors like surface preparation, traffic and use, and safety and environmental impact. Different glues such as epoxy resin, construction adhesive, and super glue serve specific purposes, ensuring your projects are both durable and long-lasting. Proper selection and application can significantly enhance the outcome of your landscaping and decorative projects.
By considering these factors and types of glue, you can ensure the longevity and stability of your rock-based projects. Choose wisely to achieve the best results.
Step-by-Step Application Guide
Applying glue for rocks involves preparing the surface, applying the adhesive, and allowing for proper curing and setting. Each step is crucial for achieving optimal results in your rock-based projects.
Preparing The Surface
Proper surface preparation ensures strong adhesive bonding and project durability:
- Ensure Dryness: Make sure the rocks are completely dry. Moisture negatively impacts glue’s adhesive properties.
- Temperature: Verify that the temperature is above 50°F (10°C). Colder conditions diminish bonding efficiency.
- Cleanliness: Remove all debris and dirt from the rock surfaces. Contaminants weaken the bond.
Applying The Glue
Follow these steps to apply the glue effectively:
- Mixing (if necessary):
- Pour and Mix Method: Use PetraMax Rock Glue Max. Pour the glue onto the rocks, then mix thoroughly with a power drill mixer attachment or by hand using gloves. This method suits high foot traffic areas.
Curing And Setting Time
Adhering to the curing and setting time is essential for a strong bond:
- Initial Set: Most rock glues start setting within 10-15 minutes.
- Full Cure: Allow at least 24 hours for the adhesive to cure fully, ensuring maximum strength and durability.
- Post-Cure Care: Avoid heavy load or stress on the adhered rocks for at least 48 hours post-cure.
Summary
By ensuring dryness, optimal temperature, and cleanliness, you’ll prepare the surface effectively. The glue application method, especially mixing techniques for specific products, is critical to achieve robust bonding. Adhering to the recommended curing and setting times guarantees a durable and lasting adhesive bond for your rock projects.
Common Uses For Rock Glue
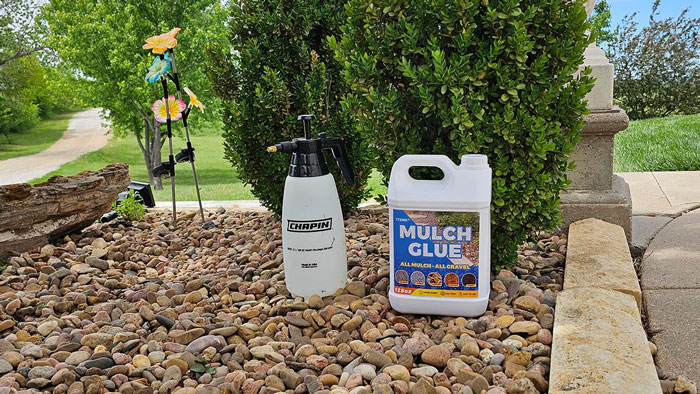
Rock glue, or rock adhesive, stabilizes various materials in landscaping, aquascaping, and craft projects. Here are some common uses:
Landscaping
Rock glue secures rocks, gravel, pebbles, and mulch in landscaping projects.
Holding Materials: Rock glue keeps landscaping materials like rocks, gravel, and mulch from being displaced by foot traffic, pets, or weather conditions.
Application Methods: Mix glue with water and apply using a garden sprayer. Use the pore-and-mix method for high-traffic areas.
Benefits: Rock glue dries quickly, is non-toxic, and pet-friendly. It allows water drainage without harming soil or groundwater.
Maintenance: Reapply annually in heavily used areas.
Aquascaping
Rock glue is vital in aquascaping, creating underwater landscapes.
Decorative Structure: Use glue to attach rocks, driftwood, and corals to create stable, visually appealing underwater designs.
Safe for Aquatic Life: Ensure the glue is non-toxic and suitable for underwater use to protect fish and plants.
Application Methods: Apply glue beneath water or on dry surfaces before submersion.
Setting Time: Most rock glues begin to bond within minutes and fully cure within 24 hours.
Craft Projects
Rock glue supports various craft projects, providing durable bonds.
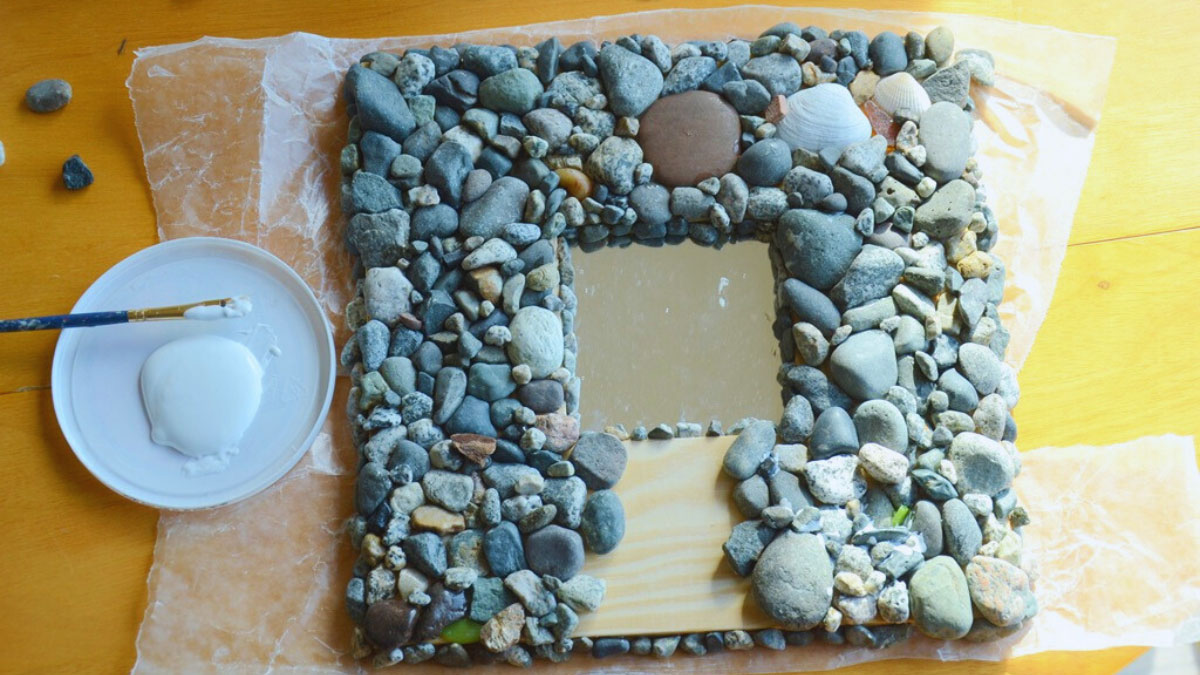
Versatility: Rock glue is effective for small decorative stones, mosaic tiles, and other creative elements.
Application Techniques: Apply small drops of glue to attach precise elements on craft surfaces.
Benefits: Provides a strong, lasting bond ideal for intricate craft applications.
Curing Time: Most rock glues set quickly, enabling fast progression in crafting projects.
By understanding the specific uses and application methods for rock glue, you can enhance the stability and longevity of your landscaping, aquascaping, and craft projects efficiently.
Maintenance And Longevity
Proper maintenance of rock glue ensures long-lasting results and reduces the need for frequent reapplications.
Application and Drying
- Dilution and Application: Most rock glues, like PetraMax Rock Glue Max and Shabebe Rock Glue, require dilution with water. Use a sprayer to apply multiple coats, allowing each coat to dry completely before the next application.
- Drying Time: Depending on weather conditions, drying times can vary from 12 to 24 hours.
Cleaning and Maintenance
- Prevent Debris Buildup: Keep the area free from debris to maintain the glue’s effectiveness. Regularly power wash to prevent dust and sediment from filling the pores and weakening the bond.
- Avoid Premature Exposure: Ensure the glue is fully dry before exposing the area to heavy foot traffic or water.
Tips for Reapplication
- Monitor Regularly: Check the glued areas periodically for signs of wear or loosening. If the bond looks weakened, consider reapplying a new coat of glue.
- Surface Preparation: Before reapplication, clean the surface thoroughly to remove any existing adhesive, dirt, or debris. This ensures better adhesion.
- Dilution Ratio: Follow the correct dilution ratio as instructed by the manufacturer. Over-diluting can weaken the adhesive properties.
- Multiple Coats: Apply multiple thin coats rather than a single thick coat. This helps in achieving a stronger and more durable bond.
- Drying Time: Allow each coat to dry completely before applying the next one. This might take between 12 and 24 hours depending on weather conditions.
Troubleshooting Common Issues
- Weak Bond: If the bond seems weak, ensure that the surface was clean and the glue was properly mixed and applied. Another thin coat might be necessary after cleaning the surface.
- Dust and Sediment Buildup: Regular cleaning can prevent dust and sediment from filling the pores, which can weaken the bond over time. Use a power washer to clean the area periodically.
- Long Drying Time: Longer drying times can result from high humidity levels. If possible, apply the glue during a dry, sunny day to speed up the drying process.
- Cracks in Glue: Cracks can occur if the glue layer is too thick or was applied in very hot or cold temperatures. Apply thinner coats and ensure mild weather conditions during application.
By following these maintenance and troubleshooting tips, you can ensure the longevity and durability of the applied rock glue.
Key Terms
- Dilution: Process of mixing glue with water.
- Adhesion: The property that makes the glue stick to the rock surface.
Maintenance Checklist
- Regular power washing
- Monitoring for signs of wear
- Ensuring full drying before use
- Proper surface preparation pre-application
| Aspect | Key Points | Recommended Actions |
|---|---|---|
| Application & Drying | Multiple coats, drying time 12-24 hours | Use diluted glue, apply with sprayer |
| Cleaning | Prevent debris buildup, power wash regularly | Keep area clean, avoid premature exposure |
| Reapplication | Clean surface, correct dilution, multiple coats | Monitor regularly, follow proper prep steps |
| Troubleshooting | Ensure surface clean, check weather conditions | Apply thin coats, clean buildup, dry during mild weather |
Maintaining your rock glue ensures a strong, long-lasting bond.
Conclusion
Choosing the right glue for your rock projects is crucial for ensuring lasting durability and stability. Whether you’re working on a rock garden, repairing stone sculptures, or creating underwater landscapes, the right adhesive can make all the difference. By focusing on factors like bonding strength, durability, and setting time, you can select the best option for your needs.
Proper surface preparation and application techniques are essential for achieving optimal results. Following the step-by-step guide and adhering to curing times will help you create strong, long-lasting bonds. Remember to consider safety and environmental factors, opting for non-toxic and pet-safe adhesives when necessary.
With the right glue and proper application, your rock-based projects can withstand the test of time, reducing maintenance needs and enhancing the overall appearance and stability of your work.
Frequently Asked Questions
What is the best glue to use on rocks?
The best glue for rocks is epoxy resin due to its high bonding strength and resistance to breakage. Other good options include construction adhesive for versatility and super glue for quick-setting applications on smaller rocks.
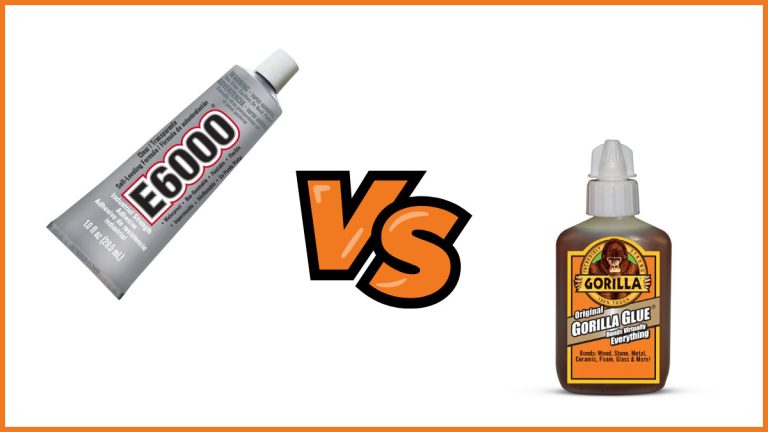
Can you use E6000 on rocks?
Yes, E6000 can be used on rocks. It’s popular for its ability to adhere to various surfaces, including smooth ones like polished pebbles, making it ideal for crafting and DIY projects.
How to glue down landscape rocks?
Clean the rocks to remove any dirt or debris. Apply construction adhesive to both surfaces of each rock to be glued together. Press the rocks firmly and evenly, ensuring no gaps remain between them.
How do you glue stones in place?
Mix one part mulch glue with two parts water. Spray the mixture over the stones using a garden sprayer, ensuring coverage. Apply a second coat after an hour to secure the stones in place.
What can I use to glue rocks together?
You can use epoxy resin, construction adhesive, super glue, or clear jewelry adhesive to glue rocks together. Epoxy resin offers the strongest bond and is ideal for heavy-load projects.
Is there a specific technique for applying rock glue?
Start by ensuring the rocks are clean and dry. Follow the manufacturer’s instructions for mixing the adhesive if required. Apply the glue evenly and press the rocks firmly together. Allow sufficient curing time for a strong bond.
How long does rock glue take to set and cure?
Most rock glues start setting within 10-15 minutes and require at least 24 hours for full curing. Always refer to the product’s instructions for specific setting and curing times.
Can rock glue be used in aquascaping?
Yes, rock glue is suitable for aquascaping. Look for non-toxic, aquatic-safe adhesives that provide a stable bond underwater without harming aquatic life.
What are the maintenance tips for rock projects glued together?
Ensure rocks are clean before applying glue. Consider multiple coats for stronger adhesion. Regularly check for weak bonds and apply additional adhesive if necessary. Proper maintenance reduces the need for frequent reapplications.

