Does Epoxy Resin Stick to Glass: Adhesion Guide
Bonding Epoxy Resin with Glass
When working with epoxy resin on glass, understanding the strength and proper preparation techniques is crucial for a successful bond.
The Strength of Epoxy Resin
Epoxy resin is an incredibly strong adhesive that can bond effectively with various surfaces, including glass. Its strength makes it an excellent choice for various applications, from simple repairs to intricate craft projects and even construction tasks. Epoxy resin can bridge the gap between different materials like metals, plastics, stone, ceramics, and thermoset plastics (Smooth-On). For detailed information on epoxy resin, you can visit what is epoxy resin.
Surface Preparation for Glass Bonding
For epoxy resin to adhere properly to glass, the surface must be adequately prepared. Proper surface preparation involves several key steps aimed at ensuring maximum bond strength:
-
Degreasing: The glass surface must be free from grease, oils, or any contaminants. Use a degreaser or mild detergent to clean the surface thoroughly.
-
Drying: Ensure the glass is completely dry before proceeding. Even a small amount of moisture can affect the bonding process.
-
Roughening the Surface: Abrading the surface of the glass enhances the adhesion of the epoxy resin. Methods like sanding, sandblasting, or chemical etching can be employed. Tools like a sandblaster, wire brush, emery cloth, or glass paper are recommended for this purpose.
-
Chemical or Electrolytic Pretreatment: For the strongest bond, consider a chemical or electrolytic pretreatment. This involves using specific chemicals to further prepare the glass surfaces (Smooth-On).
Suggested Products for Surface Preparation
Here’s a quick look at recommended products for preparing the surface of glass for bonding with epoxy resin:
| Product | Description |
|---|---|
| MT-13® | Ideal for degreasing and preliminary cleaning |
| EA-40® | Known for enhancing adhesion strength |
| Metalset® A4 | Suitable for heavy-duty bonding |
To learn more about various techniques and tips related to epoxy resin, check out our guides on how to use epoxy resin, how to mix epoxy resin, and how to pour epoxy resin.
By following proper preparation techniques, you ensure that the epoxy resin adheres strongly to the glass, providing a long-lasting and durable bond. To explore other aspects of using epoxy resin, such as protecting your work, visit how to polish epoxy resin.
Epoxy Resin Application on Glass
Applying epoxy resin to glass can be a rewarding project if you adhere to the proper techniques. Below are the essentials for ensuring a strong bond between epoxy resin and glass.
Proper Cleaning Techniques
Proper surface preparation is crucial for epoxy resin to adhere effectively to glass. Any dirt, grease, or oil can inhibit the bonding process (Resin Obsession). Here are specific steps to follow for cleaning your glass surfaces:
- Degrease: Use a mild detergent and warm water to remove any grease from the glass. Rinse thoroughly.
- Dry: Ensure the glass is fully dry before moving on to the next step.
- Abrade the Surface: Create a rough surface using sandpaper or a wire brush. This roughness allows the epoxy to grip the glass better.
- Final Cleaning: Wipe the abraded surface with isopropyl alcohol to remove any remaining dust or particles. This ensures a clean surface for optimal adhesion.
Techniques for Applying Epoxy Resin
Once your glass surface is prepared, the next step is the application of epoxy resin. Here are the steps to ensure a successful bond:
-
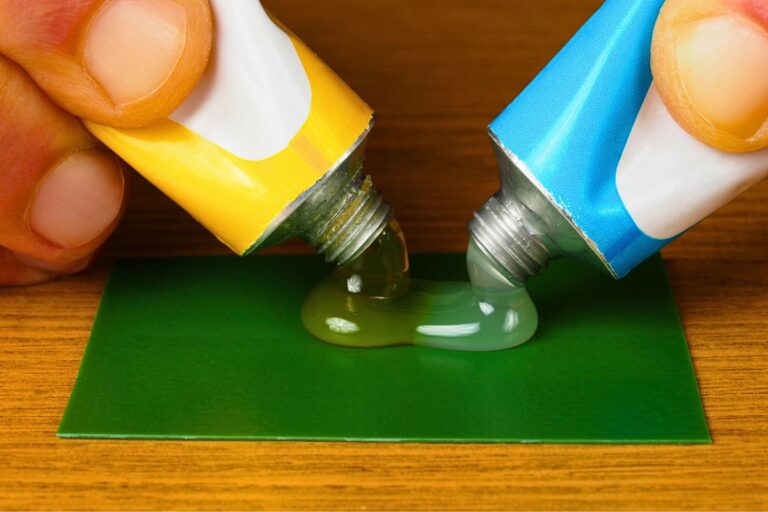
Mix the Epoxy Resin: Follow the manufacturer’s instructions for mixing the resin and hardener. For help, read our guide on how to mix epoxy resin.
-
Apply Epoxy to Glass:
- Spread a thin layer of mixed epoxy onto each glass piece.
- Press the pieces together to ensure full contact.
- Wipe off any excess resin before it begins to cure.
-
Curing: Allow the epoxy to cure according to the manufacturer’s guidelines. Do not disturb the bond during this period for the best results.
Application Techniques
- Thin Layers: Apply the epoxy in thin, even layers to prevent drip marks and ensure a smooth finish.
- Heat Control: Avoid excessive heat when curing as this can cause bubbles and weaken the bond. For curing tips, see how to cure epoxy resin.
| Step | Technique | Tools Needed |
|---|---|---|
| 1 | Degreasing | Detergent, Water |
| 2 | Drying | Clean Cloth |
| 3 | Abrading | Sandpaper or Wire Brush |
| 4 | Final Cleaning | Isopropyl Alcohol |
| 5 | Mixing | Mixing Cups |
| 6 | Applying | Spreader or Brush |
For detailed guidance on various resin projects, visit our pages on how to epoxy resin a table top and can you paint over epoxy resin.
Understanding these steps will help you achieve a strong and durable bond when working with epoxy resin and glass.
Challenges of Using Resin on Glass
The union of epoxy resin and glass can indeed face several challenges due to their differing physical properties. Here, we’ll discuss the main issues: expansion and contraction, as well as cracking prevention methods.
Expansion and Contraction Issues
One of the primary challenges you might encounter when bonding epoxy resin with glass is their different rates of expansion and contraction. When exposed to temperature changes, glass and resin react differently, which can result in structural issues. For instance, a glass-resin window exposed to direct sunlight could crack due to temperature fluctuations (Resin Obsession).
Consider the following table that shows typical expansion coefficients:
| Material | Expansion Coefficient (x10⁻⁶, per °C) |
|---|---|
| Glass | 8 – 12 |
| Epoxy Resin | 50 – 80 |
When these materials experience temperature changes, such as from a cold night to a hot day, they expand and contract at different rates. This might cause the epoxy resin to stress and potentially crack the glass or vice versa.
To mitigate this risk, it’s advisable to create separate elements with resin molds and glue them onto a frame using epoxy as the adhesive. Displaying resin pieces in locations protected from extreme temperature changes can also help prevent cracking.
Cracking Prevention Methods
Cracking of the resin-glass bond can be a significant issue, especially for projects exposed to seasonal weather changes. Here are some strategies to prevent cracking:
Proper Surface Preparation
Ensure the glass surface is meticulously cleaned before applying the resin. Removing all contaminants will help the resin adhere better and reduce the chances of cracks forming. For tips on effective cleaning, you can visit our guide on how to clean epoxy resin.
Controlled Thickness
Apply the resin in thin layers to prevent excessive build-up, which can contribute to cracking during expansion and contraction. Managing the thickness and ensuring proper curing times are essential factors for a successful outcome (Resin Obsession).
Use of Flexible Resin
Opt for a resin that can accommodate slight flexing. Using a more flexible type of epoxy resin may help it to absorb the stresses caused by the different expansion rates between the resin and glass.
For additional helpful tips, check out our resource on tips for straightening curly hair.
Curing and Weather Elements
Always ensure the resin is fully cured before exposing it to outdoor conditions. Partial curing can exacerbate the cracking problem as the material will still be in a semi-flexible state and more susceptible to temperature variations. Display resin art indoors or in sheltered areas to protect it from harsh environmental conditions (Resin Obsession).
For projects that face significant environmental exposure, consider how weather impacts the resin-glass bond and explore our section on special considerations for outdoor projects.
By understanding these challenges and implementing the recommended techniques, you can achieve a more reliable and durable bond between epoxy resin and glass.
Optimizing Resin-Glass Bonding
When bonding epoxy resin with glass, selecting the right type of resin and following precise application techniques can make all the difference. Here, we delve into the recommended epoxy resins and specialized types that work best for glass surfaces.
Recommended Epoxy Resins
Using high-quality epoxy resin ensures a strong and durable bond with glass. The following epoxy resins come highly recommended for their adhesive properties and ease of use:
- MT-13®: Suitable for bonding materials such as wood, plastics, and glass. It provides strong adhesion and durability (Smooth-On).
- EA-40®: Known for its multipurpose applications, EA-40® is effective on glass and other materials like metals and ceramics (Smooth-On).
- Metalset® A4: Excellent for heavy-duty applications, Metalset® A4 works well with glass, offering a robust bond suitable for various surfaces (Smooth-On).
| Product | Suitable For | Additional Benefits |
|---|---|---|
| MT-13® | Wood, Plastics, Glass | Strong adhesion, durability |
| EA-40® | Glass, Metals, Ceramics | Multipurpose, effective on various surfaces |
| Metalset® A4 | Glass, Various Surfaces | Heavy-duty, robust bond |
Use of Specific Resin Types
To achieve optimal results when working with glass, it is important to use specific resin types tailored for your project needs. Consider the following resin types for specialized applications:
- Deep Pour Resin: Ideal for projects requiring deep layers, such as preserving flowers in glass containers or creating intricate designs on glass surfaces (Resin Obsession). This resin type allows for bubbly-free, deep pours, and ensures a clear, transparent finish.
For more on choosing the right type for your project, visit our guide on what is epoxy resin. Additionally, for unique flare and effects, consider adding pigments with our guide on how to add color pigment to epoxy resin.
Ensure you prep your glass surface correctly by degreasing, drying, and roughening through sanding or chemical etching for a secure bond (Smooth-On). Clean surfaces lead to stronger bonds, even if they appear clean initially.
By selecting the recommended products and the appropriate resin type for your specific project, you can optimize the adhesion of epoxy resin to glass, ensuring a robust and lasting bond. For more tips on working with epoxy resin, explore topics like how to use epoxy resin, how long does it take for epoxy resin to dry, and how to clean epoxy resin.
Avoiding Common Issues
When working with epoxy resin on glass, it’s essential to anticipate and mitigate common issues like craters and fish eyes. Understanding how to prevent these problems and following proper application tips can ensure your project turns out beautifully.
Preventing Craters and Fish Eyes
Craters and fish eyes are common issues when applying epoxy resin to glass. They occur due to surface tension issues or environmental contaminants.
Factors Contributing to Craters and Fish Eyes:
- Environmental Contaminants: Dust, dirt, and oils can interfere with resin adhesion.
- Surface Smoothness: If the glass is too smooth, resin may struggle to adhere properly.
- Incompatible Paints: Paints not compatible with resin can cause surface imperfections.
Tips for Prevention:
- Clean Thoroughly: Ensure the glass is clean and free from contaminants. Use isopropyl alcohol to wipe the surface.
- Sand the Surface: Lightly sand the glass with fine-grit sandpaper to create a rougher surface for better resin adhesion.
- Use Compatibility Paints: Only use paints that are known to be compatible with epoxy resin.
Applying a “sealing” layer of resin before the main application can help. Allow it to cure and form a smoother, more adhesive-friendly surface, reducing the occurrence of craters (Resin Obsession).
Resin Application Tips
Applying epoxy resin correctly involves more than just pouring and spreading. Following these expert tips can help ensure a flawless finish.
- Control Environment: Work in a clean, dust-free environment. Temperature and humidity should be within the resin manufacturer’s recommended range.
- Mix Thoroughly: Blend the resin and hardener well to prevent uneven curing. For more details on mixing, check our guide on how to mix epoxy resin.
- Apply Even Layers: Spread resin evenly using a flat tool. Start with a thin sealing layer before adding thicker coats.
- Eliminate Bubbles: Use a heat gun or torch to remove air bubbles after pouring the resin. Hold at a distance to avoid overheating.
- Protect Your Work: Use a cover to shield your project from dust and other contaminants while the resin cures.
By adhering to these tips and anticipating challenges, you can achieve a perfect finish on your epoxy resin and glass projects. For more detailed instructions, visit our extensive tutorial on how to use epoxy resin. Additionally, if you need information on keeping your tools clean, our guide on how to clean epoxy resin off tools may prove helpful.
Special Considerations for Outdoor Projects
Using epoxy resin on glass for outdoor projects requires careful planning and understanding of the challenges presented by weather and temperature fluctuations. Here are key factors to consider:
Weather Impact on Resin-Glass Bond
Epoxy resin and glass have different rates of expansion and contraction when exposed to temperature changes. This disparity can lead to potential issues such as cracking. According to Resin Obsession, it is crucial to be aware of this when planning outdoor projects. Here are some points to keep in mind:
- Temperature Variances: Both the resin and glass will react to changes in temperature, but at different rates. This can cause stress at the interface and lead to cracks.
- Humidity and Moisture: Epoxy resin performs best in dry conditions. High humidity and moisture can weaken the bond over time.
- UV Exposure: Prolonged exposure to UV rays can cause yellowing and degradation of the epoxy resin. Using a resin formula with added UV inhibitors can help mitigate this issue.
Regular inspection and maintenance are recommended for outdoor resin-glass projects to address any emerging issues early.
Designing for Outdoor Durability
To ensure that your outdoor resin-glass projects are durable and withstand the elements, consider these design tips:
- Protective Locations: Display resin art or glasswork in locations that are sheltered from extreme temperature changes. Overhangs, pergolas, or shaded areas can help protect the pieces.
- Resin Type: Choose an epoxy resin specifically formulated for outdoor use. These resins often contain additives that improve UV resistance and flexibility.
- Alternate Methods: Instead of pouring resin directly over glass, create window panes or similar structures with resin molded separately and then adhered to the glass frame.
| Environmental Factor | Consideration | Recommendation |
|---|---|---|
| Temperature Changes | Different expansion rates of resin and glass | Use flexible UV-resistant resin |
| Humidity & Moisture | Weakens the bond over time | Ensure proper sealing and water resistance |
| UV Exposure | Can cause yellowing and degradation | Use UV inhibitors in resin |
By considering these elements, you can confidently create outdoor projects that are not only aesthetically pleasing but also built to last. For more detailed tips on working with resin and glass, explore our guides on how to use epoxy resin, how to remove epoxy resin, and other related topics in our extensive resin resource library.

