Does Epoxy Resin Stick to Plastic: Adhesion Guide
Understanding Epoxy Adhesion
To achieve the best adhesion of epoxy resin to plastic, preparation and testing are crucial. This guide will delve into necessary steps for surface preparation and how to conduct an adhesion test.
Surface Preparation for Epoxy
Proper surface preparation is key for epoxy adhesion to plastics. Surfaces that have not been fully cured may be bonded to or coated with epoxy without washing or sanding. However, for fully cured surfaces, you must wash and sand before applying coatings other than epoxy.
Steps for Preparing Plastic Surfaces for Epoxy Adhesion:
- Cleaning: Wash the plastic surface with soap and water to remove any contaminants.
- Sanding: Lightly sand the surface to create a texture for the epoxy to grip onto.
- Flame Oxidizing: For certain plastics, flame oxidizing can enhance bonding. This process involves briefly passing the plastic through a flame to change its surface properties (WEST SYSTEM).
Adhesion Test on Plastics
Adhesion with epoxy can vary widely among different types of plastics. It’s always recommended to conduct an adhesion test if you are uncertain about the plastic type.
Steps for Conducting an Adhesion Test:
- Prepare a Small Area: Clean, sand, and flame oxidize a small area on the plastic as described above.
- Apply Epoxy: Mix and apply a small amount of epoxy resin to the prepared area.
- Cure Time: Allow the epoxy to fully cure based on the manufacturer’s specifications.
- Test Bond: After the epoxy cures, attempt to peel or scrape it off. If the epoxy adheres well and is difficult to remove, the preparation method is effective.
| Plastic Type | Test Result |
|---|---|
| PVC | Strong Bond |
| ABS | Moderate Bond |
| Styrene | Weak Bond |
For detailed guidelines on mixing and applying epoxy resin, visit our article on how to mix epoxy resin.
Proper surface preparation and adhesion testing ensure the epoxy resin adheres effectively to plastic. To delve deeper into epoxy resin applications and properties, explore our guides on how to use epoxy resin and is epoxy resin food safe.
Bonding with Epoxy Resin
Optimum Plastics for Adhesion
When you’re working with epoxy resin, choosing the right plastic for adhesion is crucial. Epoxy resin can bond to various plastics, but some achieve better adhesion than others. Here are a few plastics that typically work well:
- PVC (Polyvinyl Chloride)
- ABS (Acrylonitrile Butadiene Styrene)
- Styrene
For optimal results, hard and rigid plastics like PVC, ABS, and styrene should be used. Proper surface preparation, such as sanding, is essential to create a suitable bonding area. Products like G/flex epoxy are specially designed for bonding plastics, making them an excellent choice when working on your projects (WEST SYSTEM).
| Plastic Type | Adhesion Quality with Epoxy |
|---|---|
| PVC | High |
| ABS | High |
| Styrene | High |
It’s important to conduct an adhesion test on any plastic you are unsure about. Even with good surface preparation, some materials may not adhere well to epoxy resin (WEST SYSTEM). For more details on how epoxy resin works and its applications, visit our article on what is epoxy resin.
Flame Oxidizing for Improved Bonding
Flame oxidizing is a technique that can dramatically improve the adhesion of epoxy resin to certain plastics. This process involves briefly exposing the plastic surface to a flame to increase its surface energy, which enhances the bonding process of the epoxy resin.
Steps for Flame Oxidizing:
- Clean the Surface: Ensure the plastic surface is free from contaminants.
- Sand the Surface: Lightly sand the surface to create a better bonding area.
- Flame Oxidize: Quickly pass a flame over the surface. Do not overheat or burn the plastic.
This method is particularly effective for hard, rigid plastics like PVC, ABS, and styrene. Remember, after flame oxidizing, apply the epoxy resin immediately for the best results.
For more tips on how to prep and protect your surfaces when using epoxy resin, check out our article on how to use epoxy resin.
By following these recommendations, you can ensure strong and durable adhesion when working with epoxy resin and plastic. If you encounter adhesion issues, consider surface contamination and follow proper surface preparation techniques to improve your results. For more insights on resinous flooring applications and various industries’ usage of epoxy resins, continue exploring our comprehensive guides.
Challenges and Solutions
Adhesion Issues with Plastics
When working with epoxy resin, achieving strong adhesion to plastics can sometimes pose a challenge. Epoxy resin is known for its robust adhesive properties, but not all plastics are equally receptive. Common issues you may encounter relate to the specific type of plastic and its readiness to bond with epoxy.
Rigid plastics like PVC, ABS, and styrene are generally better suited for bonding with epoxy resin when proper surface preparation is employed. G/flex epoxy is a recommended choice for these materials. Conducting an adhesion test is advisable if you’re unsure about the plastic’s compatibility.
Here’s a table summarizing the adhesion potential of different plastics:
| Plastic Type | Adhesion Potential with Epoxy |
|---|---|
| PVC | High |
| ABS | High |
| Styrene | High |
| Polyethylene | Low |
| Polypropylene | Low |
For plastics like polyethylene and polypropylene, achieving strong adhesion with epoxy can be more difficult. These materials often require specialized treatment to improve bonding.
Surface Contamination and Adhesion
Surface contamination is a common factor that can impair the effectiveness of epoxy resin adhesion. Even if a material is generally compatible with epoxy, the presence of dust, oils, or other contaminants can significantly weaken the bond.
Cleaning the surface thoroughly is crucial. For instance, wiping the surface with a solvent like MEK (Methyl Ethyl Ketone) can help remove any contaminants that might interfere with adhesion. Ensuring a clean, dry, and slightly roughened surface can make a notable difference.
| Contamination Type | Effect on Adhesion | Recommended Solution |
|---|---|---|
| Dust | Weakens bond | Clean with isopropyl alcohol |
| Oils | Weakens bond | Clean with MEK solvent |
| Moisture | Weakens bond | Ensure surface is completely dry |
Additionally, on plastics, surface treatments like sanding followed by flame oxidizing can improve adhesion (WEST SYSTEM). Flame oxidizing involves briefly exposing the plastic surface to a flame to increase its surface energy, making it more receptive to epoxy resin.
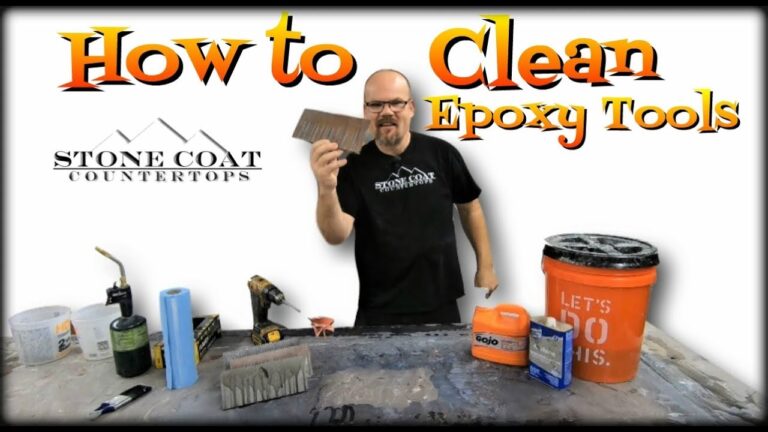
For further reading on how to effectively prepare surfaces for epoxy adhesion, explore our guides on how to use epoxy resin and how to clean epoxy resin off tools. Being mindful of these challenges and solutions can significantly improve your experience when working with epoxy resin.
Resinous Flooring Applications
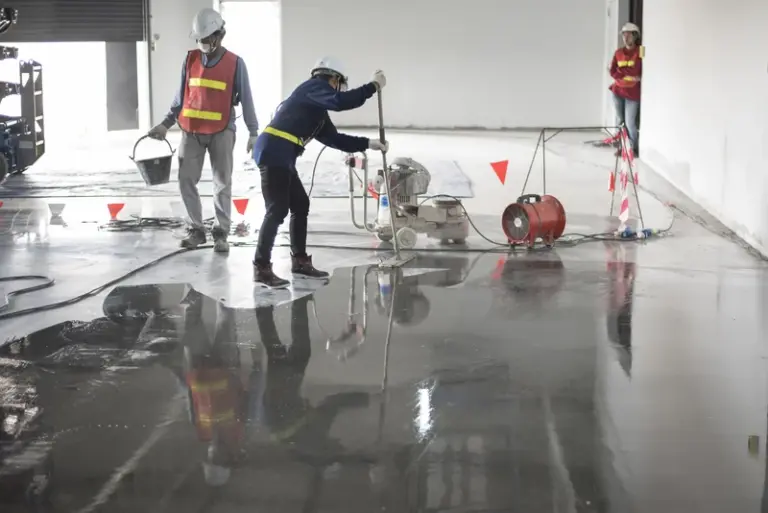
When applying resinous flooring, particularly on concrete surfaces, it is essential to follow specified steps to ensure strong adhesion and longevity. Proper surface preparation and meeting specific substrate requirements are key.
Surface Preparation for Concrete
Preparation is crucial for the success of resinous flooring on concrete. Ensuring a clean, contaminant-free surface allows the resin to adhere better and prevents issues like peeling or bubbling.
-
Cleaning the Surface: Remove all dust, grease, oil, and other contaminants. Methods such as vacuum shot-blasting, sand blasting, and scarifying are effective in getting rid of these impurities (Epoxy.com).
-
Achieving a Rough Finish: The concrete surface should have a rough, sand-paper-like finish to ensure better bonding of the epoxy resin. This can be achieved through mechanical methods like:
- Vacuum shot-blasting
- Sand blasting
- Scarifying
- Grinding
- Acid Etching: While mechanical preparation is preferred, acid etching is another method to achieve the desired surface roughness. This involves applying an acid solution to the floor, which creates a textured surface suitable for resin applications.
Concrete Substrate Requirements
For resinous flooring applications on concrete, there are specific requirements and conditions to meet:
-
Concrete Age: The concrete must be at least 30 days old to ensure it has cured properly. In some cases, special primers can be used on fresh (green) concrete, but consulting product-specific guidelines is recommended (Epoxy.com).
-
Moisture Content: Before applying the resin, the concrete should be dry. High moisture content can lead to bonding failures or bubbling of the resinous coating.
-
Surface Condition: Previous use and contamination can affect bonding. Effective removal of contaminants through the methods mentioned earlier is critical. Mechanical preparation methods are strongly advised to achieve the rough texture necessary for optimal bonding (Epoxy.com).
To summarize, proper surface preparation and adherence to substrate requirements are pivotal in ensuring the success of resinous flooring applications on concrete. Whether you’re dealing with old or new concrete, taking these steps can significantly improve the quality and durability of the epoxy resin flooring.
For more information on working with epoxy resin, check out:
Epoxy Resins Applications
Versatility in Various Industries
Epoxy resins are known for their exceptional versatility, making them a popular choice across numerous industries. These resins are used extensively in sectors such as electrical, automotive, aerospace, and construction (Omnexus).
Epoxies play a crucial role in the electronics industry, often found in motors, generators, transformers, and printed wiring boards (PWB). They are integral for bonding copper foil to circuit board substrates and layers of glass cloth in FR-4 boards due to their high electrical insulating properties and protection against short circuits, dust, and moisture.
In the automotive and aerospace industries, epoxy resins are valued for their high-strength bonds, which are essential for constructing aircraft, automobiles, and boats. These resins also find applications in wind turbine technology composites thanks to their mechanical strength and resistance to environmental degradation.
The construction industry benefits from epoxy’s excellent adhesive qualities for bonding materials like wood, metal, glass, stone, and certain plastics. Its chemical resistance and high strength make it suitable for a range of construction applications. For more on epoxy and its effectiveness on various materials, see what is epoxy resin.
Key Properties and Usage
The properties of epoxy resins make them highly desired in different applications:
-
Adhesion: Epoxies bond exceptionally well with substrates such as metal, glass, stone, and some plastics. Their high adhesive strength ensures durable connections in various structural and repair projects. For those wondering, “does epoxy resin stick to plastic,” it does—but preparation is key. See how to use epoxy resin on wood for more details on adhesion.
-
Chemical Resistance: Epoxy resins exhibit excellent resistance to chemicals and environmental degradation, making them suitable for harsh environments. This property is one reason why they are used in protective coatings and industrial applications.
-
Electrical Insulation: Due to their superior insulating properties, epoxies are widely used in electronic components to prevent short circuits and protect against dust and moisture. Applications include motors, transformers, and semiconductor encapsulants (Wikipedia).
-
Mechanical Strength: Epoxies provide high mechanical strength, essential for applications requiring structural integrity and durability, such as in construction and aerospace.
For ease of use and understanding, here’s a table summarizing some key properties:
| Property | Description | Applications |
|---|---|---|
| Adhesion | High bonding strength with various materials | Construction, Repairs, Aerospace |
| Chemical Resistance | Resistant to chemicals and environmental factors | Industrial Coatings, Petrochemical Sector |
| Electrical Insulation | Superior insulation preventing short circuits | Electronics, Motors, Generators |
| Mechanical Strength | High strength and durability | Wind Turbines, Automotive, Aerospace |
Epoxy resin’s adaptability to different industries enhances its utility and ensures it remains a go-to adhesive and material solution. For more on the various applications and benefits, see how to use epoxy resin and is epoxy resin out of style.
Understanding these properties helps you make informed choices when incorporating epoxy resins into your projects, whether you’re a home renovator or working on a larger scale industrial task. For additional tips and considerations, be sure to explore our other articles on epoxy resin, such as how to add color pigment to epoxy resin and what are some good polishers for epoxy resin.
Self-Leveling Epoxy Considerations
When using self-leveling epoxy resin, it’s crucial to understand both its advantages and disadvantages, as well as the considerations regarding its working timeframe and potential messiness. This guide will help you make the most of your epoxy projects.
Advantages and Disadvantages
Self-leveling epoxy resin offers several benefits for home renovators. However, it’s equally important to be aware of its drawbacks.
Advantages
- Smooth Finish: Self-leveling epoxy creates a seamless and glossy finish, making it ideal for floors, countertops, and other surfaces.
- Durability: This type of epoxy is highly resistant to wear and tear, chemical spills, and stains.
- Easy Application: It levels itself out upon application, reducing the need for extensive manual effort.
Disadvantages
- Waste Generation: A significant drawback is the amount of waste it creates. Containers used for mixing the resin and hardener can’t be reused or recycled due to leftover cured epoxy (Live Small Ride Free).
- Messiness: Self-leveling epoxy can be very messy, especially in confined spaces. It tends to flow off surfaces, leading to drips and overflows (Live Small Ride Free).
| Aspect | Advantages | Disadvantages |
|---|---|---|
| Finish | Seamless and glossy | Messy in confined spaces |
| Durability | High resistance | Waste generation |
| Application | Easy to apply | Can’t reuse containers |
For a more detailed understanding of epoxy resin properties, visit our article on what is epoxy resin.
Working Timeframe and Messiness
When working with self-leveling epoxy, timing and handling are crucial for achieving optimal results.
The working timeframe for self-leveling epoxy is approximately 8 minutes. It is advisable to mix no more than 1 quart at a time to have a reasonable amount of working time (Live Small Ride Free).
Tips for Working with Epoxy
- Mix in Small Batches: Mixing large amounts of epoxy at once accelerates the chemical reaction, causing it to cure faster and potentially leading to waste.
- Temperature Control: Maintain a moderate temperature to prevent premature curing.
- Protective Measures: Use plastic sheeting or drop cloths to cover surrounding areas and contain the mess.
For more tips on handling epoxy, check out our guide on how to use epoxy resin.
| Consideration | Details |
|---|---|
| Working Timeframe | 8 minutes |
| Recommended Batch Size | 1 quart |
| Messiness Level | High, especially in small spaces |
By understanding these considerations, you can effectively navigate the challenges and benefits of using self-leveling epoxy in your home renovation projects. For additional resources on epoxy resin, such as how to clean it or add color pigments, explore our related articles like how to clean epoxy resin and how to add color pigment to epoxy resin.

