How Much Epoxy Resin Do I Need: Calculation Guide
Understanding Epoxy Resin Types
Choosing the right type of epoxy resin is crucial to the success of your project. Understanding the differences between casting resins and coating/doming resins will ensure you get the best results.
Casting Resins
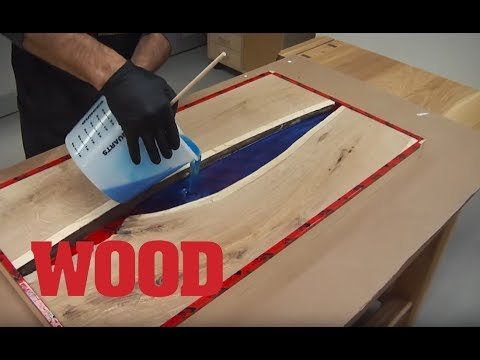
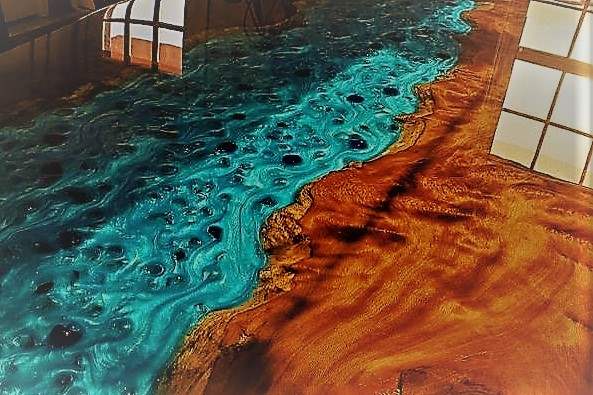
Casting resins are designed to fill spaces and are ideal for projects like river tables and filling vessels with resin. They have a thinner, watery consistency which allows them to flow and fill intricate molds. However, this same consistency means they are not suitable for coating surfaces, as they can cause voids and fish eyes (Resin Obsession).
| Application | Ideal Use |
|---|---|
| River Tables | Yes |
| Resin Molds | Yes |
| Coating Surfaces | No |
Casting resins should be used in applications where there are sides to contain the resin, such as molds or table spaces. This prevents the resin from spilling over and ensures a smooth, even fill.
Coating/ Doming Resins
Coating resins, also known as doming resins, are formulated to create a glossy surface coating on items such as countertops, art panels, or tumblers. Unlike casting resins, coating resins have a thicker consistency, which helps them to stay in place without dripping or flowing out of control. This thickness also means they can hold onto bubbles if used improperly, making them unsuitable for use in molds (Resin Obsession).
| Application | Ideal Use |
|---|---|
| Countertops | Yes |
| Art Panels | Yes |
| Tumblers | Yes |
| Resin Molds | No |
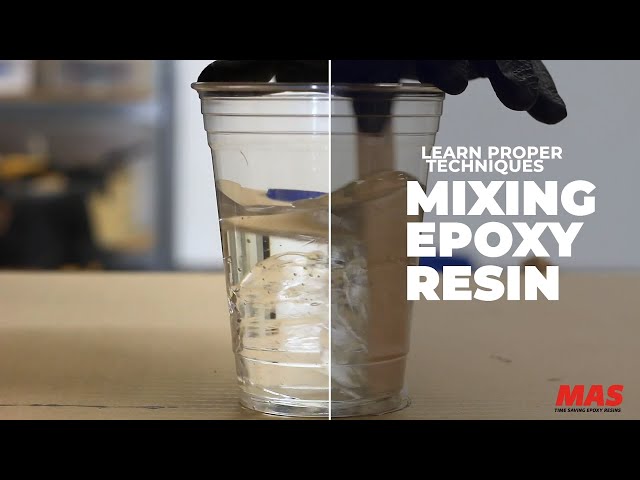
For optimal results with coating resins, ensure your surface is prepped and clean. For more techniques on working with epoxy, check our guide on how to mix epoxy resin.
Understanding the fundamental differences between casting and coating resins will help you determine how much epoxy resin you need for your specific project. Be sure to check out our sections on mixing ratios and curing times for more detailed information.
Essential Considerations for Epoxy Resin Usage
When working with epoxy resin, understanding the key factors affecting its performance and outcome is crucial. Whether you are tackling a small project or a large surface, here are some essential considerations to keep in mind.
Mixing Ratios and Pot Time
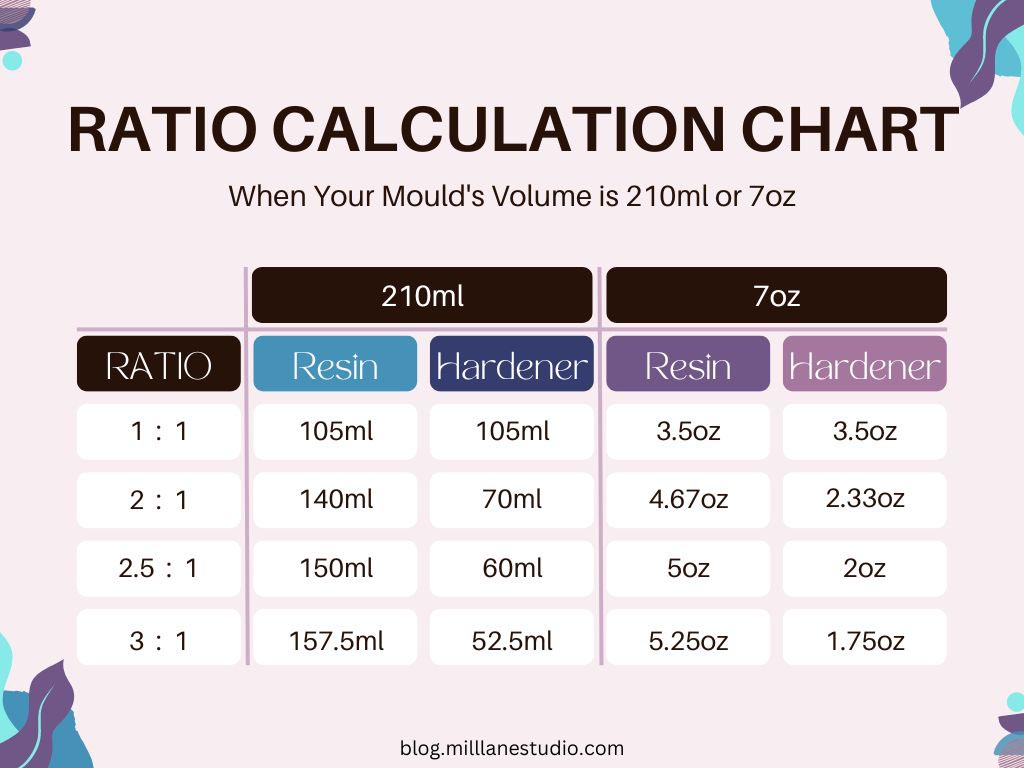
Mixing the correct ratio of resin to hardener is vital for ensuring proper curing and achieving the desired results. Resin and hardener must be mixed in precise proportions, typically described as a ratio (e.g., 1:1 or 2:1), to ensure the chemical reaction occurs correctly.
| Mix Ratio | Mix Time | Pot Time |
|---|---|---|
| 1:1 | 5 minutes | 20-30 minutes |
| 2:1 | 5 minutes | 15-25 minutes |
- Mixing Time: Mix the resin and hardener for at least 5 minutes to ensure they are fully combined.
- Pot Time: This is the working time you have after mixing the resin and hardener before it starts to thicken and cure. Always plan your project to complete within this window to avoid issues with application and curing.
To prepare effectively, follow these steps:
- Measure out the exact volumes of resin and hardener as specified.
- Mix thoroughly, scraping the sides and bottom of the mixing container.
- Use the mixture within the given pot time to ensure optimal performance.
Storage and Room Temperature
Proper storage of your epoxy resin is crucial to maintain its efficacy and ensure its usability over time. Storing the resin and hardener at the right temperature can help maintain their properties and extend shelf life.
- Temperature Control: Keep the resin in a stable environment where the temperature is maintained between 72-75°F (Resin Obsession).
- Avoid Extremes: Prevent exposing the resin to extreme temperatures, whether hot or cold, as this can affect its consistency and curing ability.
| Factor | Optimal Range |
|---|---|
| Storage Temperature | 72-75°F |
| Working Room Temperature | 72-75°F |
- Warmer Conditions: If the working environment is too cool, consider using a space heater to warm the room before starting your project.
- Cooler Conditions: In excessively hot conditions, you might need to cool the storage area to keep the resin within the ideal temperature range.
For additional guidance on using epoxy resin, you can explore related topics like how to mix epoxy resin, how to polish epoxy resin, and how to epoxy resin a table top.
By following these essential considerations, you can ensure the successful application of epoxy resin in your home renovation projects. Proper mixing ratios, understanding pot time, and maintaining suitable storage conditions are fundamental steps in delivering high-quality results. For more detailed instructions, refer to our guide on how to use epoxy resin.
Calculating Epoxy Resin Quantity
When you’re planning an epoxy resin project, determining the right amount of resin is essential. This involves calculating the liquid volume and understanding mix ratios by weight. Use these methods to ensure your project runs smoothly without running short on materials.
Liquid Volume Calculation
Calculating the liquid volume needed for your project depends on the shape and size of the surface area. Here are steps to follow for common shapes:
Rectangular Applications
To calculate the amount of epoxy resin you need for rectangular surfaces, the formula is:
[ \text{Volume} = \text{Length} \times \text{Width} \times \text{Height} ]
For example, if you have a table that is 60 inches long, 30 inches wide, and you want to pour an epoxy layer 0.25 inches deep, the calculation will look like this:
[ 60 \text{ in} \times 30 \text{ in} \times 0.25 \text{ in} = 450 \text{ in}^3 ]
To convert cubic inches to gallons (since resin is often measured in gallons):
[ 450 \text{ in}^3 \div 231 \text{ in}^3/\text{gallon} ≈ 1.95 \text{ gallons} ]
Round or Circular Applications
For circular surfaces, use the formula for the volume of a cylinder, given by:
[ \text{Volume} = \pi \times \left(\frac{\text{Diameter}}{2}\right)^2 \times \text{Height} ]
For instance, if your surface has a diameter of 24 inches and you want an epoxy layer 0.25 inches thick:
[ \pi \times \left(\frac{24 \text{ in}}{2}\right)^2 \times 0.25 \text{ in} ≈ 113.04 \text{ in}^3 ]
Converting to gallons:
[ 113.04 \text{ in}^3 \div 231 \text{ in}^3/\text{gallon} ≈ 0.49 \text{ gallons} ]
Following these steps helps ensure you have enough epoxy resin without requiring multiple purchases (Super Epoxy Systems).
Mix Ratios by Weight
Understanding mix ratios by weight is crucial for achieving the correct chemical reaction between the resin and hardener. This is especially important for smaller volumes, where precision is key.
Epoxy resins commonly use a 1:1 or 2:1 ratio by volume, but by weight, the formula differs due to denser components. Here are the basic steps:
- Determine the Total Weight: Calculate the total weight needed based on the liquid volume calculated earlier.
- Apply the Correct Ratio: Based on your product specifications, apply the weight ratio. For example, if your epoxy resin has a 2:1 ratio by weight and you need 300 grams total:
- Resin: ( \frac{2}{3} \times 300 \text{ g} = 200 \text{ g} )
- Hardener: ( \frac{1}{3} \times 300 \text{ g} = 100 \text{ g} )
Example Table
| Epoxy Type | Ratio by Weight | For 300g (Example) |
|---|---|---|
| 1:1 by Volume | Varies | Follow Manufacturer |
| 2:1 by Volume | 2:1 | 200g Resin / 100g Hardener |
Keeping the mix ratios exact helps avoid issues like sticky, uncured epoxy (Super Epoxy Systems). Always consult your specific product requirements for accuracy.
For additional information on resin projects and techniques, you can explore our other guides on how to mix epoxy resin, how to pour epoxy resin, and what are some good polishers for epoxy resin.
Practical Tips for Epoxy Resin Projects
Mixing and Pouring Techniques
Mixing epoxy resin correctly is essential for a successful project. Here are some practical tips for mixing and pouring:
- Mixing Proportions: Follow the manufacturer’s recommended mixing ratio to ensure proper curing. Mix between the minimum and maximum amounts of resin and hardener to guarantee a strong bond (Resin Obsession).
- Mixing Time: Stir the resin and hardener for at least 5 minutes. This thorough mixing helps to avoid any unmixed portions that could result in sticky or uncured resin (Live Small Ride Free).
- Pot Time Awareness: Keep track of your pot time, which is the working time you have once the resin and hardener are mixed. This period can range from 30 minutes to 2 hours, depending on the product.
- Level Surface: Ensure your work surface is entirely level before pouring the epoxy. This prevents the resin from flowing to one side and creating an uneven finish.
- Applying the Epoxy: Pour the mixed epoxy onto the project surface in a thin stream to reduce air bubbles. Use bristle or foam brushes to spread the resin evenly over the surface.
- Eliminating Air Bubbles: Use a heat gun or propane torch to remove air bubbles from the epoxy surface. This step ensures a clear, flawless finish by allowing trapped air to escape.
Curing Time and Surface Preparation
Proper curing and surface preparation are vital for achieving a professional look and durable finish. Here are some essential tips:
- Surface Preparation: Clean the surface thoroughly and sand it lightly before applying epoxy. This ensures good adhesion. If applying a second coat, sand the first layer to create intercoat adhesion (Counter Culture DIY).
- Curing Time: Allow sufficient curing time as specified by the manufacturer. Typically, a 4-hour wait between coats is recommended. The full cure time can take up to 72 hours before the epoxy can be put to use (Live Small Ride Free).
- Environmental Conditions: Ensure the room temperature is between 70°F and 75°F. Colder temperatures can slow down the curing process, while higher temperatures can cause the epoxy to harden too quickly.
- Protection During Curing: Protect the curing epoxy from dust and debris. Place a cover over the project but ensure there’s adequate ventilation to avoid trapping fumes.
- Sanding Between Coats: If more than 24 hours have passed since you applied the last layer, sand the surface lightly and then clean it before adding a new layer. This step ensures each layer bonds well with the subsequent one.
For more detailed guidelines on working with epoxy resin, explore our articles on how to mix epoxy resin and how to pour epoxy resin. And remember, safety comes first—always use protective gear including gloves and goggles while working with resin.
| Preparation Step | Recommended Action |
|---|---|
| Surface Cleaning | Clean and sand lightly |
| Mixing Time | At least 5 minutes |
| Initial Curing Time | 4 hours between coats |
| Full Curing Time | 72 hours |
Challenges and Solutions with Epoxy Resin
When working with epoxy resin, home renovators may encounter various challenges. To ensure you achieve the best results, it’s essential to understand these potential issues and how to address them effectively.
Achieving a Flawless Finish
Achieving a smooth, flawless finish with epoxy resin can be difficult. Common issues include bubbles, waves, and drips on the finished surface. Here are some practical solutions to help you get that perfect finish:
-
Mixing Thoroughly: Ensure you mix the resin and hardener for at least 5 minutes. Proper mixing helps to reduce the formation of bubbles.
-
Pouring on a Level Surface: It’s crucial to pour epoxy on a perfectly level surface. This prevents uneven distribution and potential waves.
-
Spreading Evenly: Use bristle or foam brushes to evenly spread the epoxy. Consistent spreading helps to eliminate waves and ensures a uniform coat.
-
Removing Bubbles: After pouring a flood coat, use a heat gun or propane torch to eliminate air bubbles. This step is vital for a smooth finish.
| Step | Action |
|---|---|
| Mixing | 5 minutes |
| Pouring | Level surface |
| Spreading | Bristle/Foam brush |
| Bubble removal | Heat gun/Propane torch |
- Curing Time: Follow the curing time requirements meticulously—wait at least four hours between coats and allow a minimum of three days for the epoxy to cure before use. This helps to ensure the epoxy hardens properly, providing a durable finish (Live Small Ride Free).
For more on maintaining and polishing your cured epoxy, check out our guide on how to polish epoxy resin.
Dealing with Imperfections
Despite careful preparation and application, imperfections can occur. Here’s how to tackle common issues you might face when using epoxy resin:
-
Bubbles: If bubbles persist despite using a heat gun, consider pouring the resin in a more controlled environment to minimize dust and air contamination. You may also need to reheat and reapply a thin layer of epoxy.
-
Waves: To address waves, ensure your project is entirely level. If waves have already formed, sanding the cured surface lightly and applying another top layer can help achieve a smooth finish.
-
Drips: Drips often occur at the edges. Once the final coat has been applied, keep an eye on the edges and remove any drips with a brush while the epoxy is still wet. If drips harden, they can be sanded down once the epoxy cures.
-
Working Time: Self-leveling epoxy has a working time of around 8 minutes. To avoid rapid curing and waste, mix smaller batches. For projects requiring large amounts of resin, use multiple small batches to ensure you have enough time to work with the epoxy effectively.
For a detailed tutorial on handling epoxy resin for large surface areas, visit our guide on how to epoxy resin a table top.
By understanding these challenges and implementing the solutions provided, you can confidently tackle your epoxy resin projects and achieve professional-quality results. For more tips and tricks on using epoxy resin and to explore various applications, check out our other articles, including guides on how to use epoxy resin and how to clean epoxy resin off tools.
Specialized Epoxy Resins for Art Projects
Specialty epoxy resins are ideal for various art projects. We’ll explore two popular types: UV resin and resin for geode art.
UV Resin
UV resin is a type of epoxy resin that requires exposure to UV light to harden. Unlike traditional epoxy resins that need a combination of a base resin and a hardener, UV resin consists of a single component and hardens quickly when exposed to a UV light source (Meyspring). This makes UV resin perfect for small, intricate projects that require precise detailing.
Advantages:
- Quick curing time under UV light
- Ideal for small projects such as jewelry and intricate art pieces
- Minimal mixing required
| Feature | UV Resin |
|---|---|
| Curing Time | Minutes under UV light |
| Mixing | Single component |
| Applications | Jewelry, small art pieces |
Resin for Geode Art
Creating stunning geode-inspired art requires a specific type of epoxy resin. This resin should not be too liquid and should involve thin layers mixed with pigment powders or glitters to achieve the desired effect (Meyspring).
These resins typically prioritize features such as minimal fumes, fast curing time, and are suitable for working in small spaces, making them ideal for geode and ocean art projects.
Advantages:
- Minimal fumes and quick curing time
- Can be easily mixed with pigment powders and glitters
- Ideal for creating multi-layered artwork
| Feature | Resin for Geode Art |
|---|---|
| Viscosity | Medium to thick |
| Mixing | Two components |
| Applications | Geode art, ocean art |
For more on utilizing epoxy resin for crafting stunning art pieces, consider exploring how to add color pigment to epoxy resin. If you need tips on how to polish epoxy resin for a flawless finish, we’ve got you covered. You can also learn more about the various uses of epoxy resin in our article on how to use epoxy resin.
By selecting the right type of epoxy resin for your specific art project, you can ensure a beautiful and professional final result. Whether you’re working with UV resin or creating intricate geode-inspired pieces, understanding the properties and benefits of each type of resin will enhance your creative process.

