How to Remove Weatherstrip Adhesive: Easy Steps for Clean Surfaces
Dealing with stubborn weatherstrip adhesive can be a real hassle, especially when it leaves behind a sticky mess on your car or home surfaces. Whether you’re replacing old weatherstripping or just cleaning up, knowing the right techniques can save you time and frustration.
You don’t need to be a professional to tackle this task effectively. With a few simple tools and some tried-and-true methods, you can remove weatherstrip adhesive without damaging the underlying surface. Let’s jump into the steps that will make this job a breeze.
Key Takeaways
- Understand Weatherstrip Adhesive: Knowing the composition, properties, and common uses of weatherstrip adhesive helps in effectively removing it without damaging the underlying surface.
- Common Causes of Adhesive Failure: Factors like improper application, surface contamination, temperature extremes, aging, and mechanical stress can lead to adhesive failure.
- Preparation for Removal: Proper preparation, including gathering necessary tools and ensuring safety precautions, is crucial for smoothly and safely removing weatherstrip adhesive.
- Effective Removal Methods: Mechanical removal, chemical solvents, and heat application are proven methods to effectively eliminate weatherstrip adhesive.
- Cleaning and Surface Preparation: Post-removal cleaning and thorough surface preparation are essential for ensuring a clean, undamaged surface ready for new adhesive application.
- Applying New Adhesive: Correctly applying new adhesive guarantees a durable and functional bond, considering factors like surface preparation, adhesive type, and application techniques.
Understanding Weatherstrip Adhesive
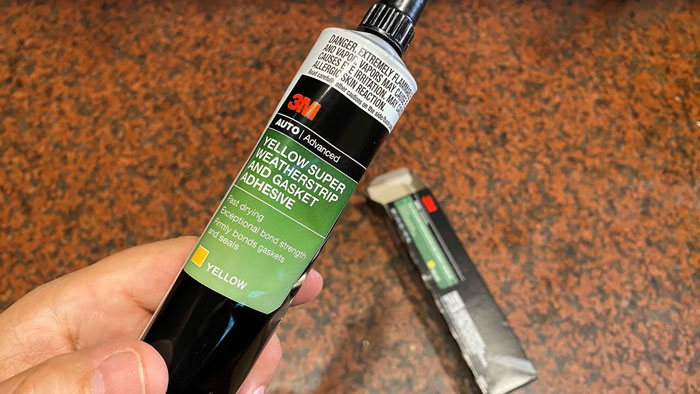
To effectively remove weatherstrip adhesive, understanding its composition and purpose is essential. Weatherstrip adhesive is a specialized glue designed to bond weatherstripping to various surfaces. Typically, it’s used in automotive and home applications to create a seal that prevents air, water, and dust from entering gaps. Here’s a deeper look into what weatherstrip adhesive is and its key properties:
Key Terms
Adhesive
A substance used for sticking objects or materials together. Weatherstrip adhesive is formulated to provide a strong, flexible bond.
Weatherstripping
A material, usually rubber or foam, designed to seal the edges of windows and doors against the elements.
Curing
The process by which the adhesive hardens and fully bonds the weatherstripping to the surface. Curing times can vary, but typically range from a few hours to 24 hours.
Composition and Properties
Weatherstrip adhesive is usually made from rubber-based or synthetic polymers, providing durability and flexibility. These materials help withstand temperature fluctuations, moisture, and physical stress, ensuring a long-lasting bond.
Features
- Strong Bond: Ensures the weatherstripping stays attached, even in harsh conditions.
- Flexibility: Allows the weatherstripping to move with the surface, preventing cracks and gaps.
- Water and Weather Resistance: Protects against environmental factors, prolonging the life of the bond and the weatherstripping.
Common Uses
You can find weatherstrip adhesive in several contexts:
- Automotive: Seals doors, windows, and trunks to prevent leaks and drafts.
- Home: Seals doors and windows to improve energy efficiency and comfort.
- Industrial: Used in machinery and equipment to prevent contamination and maintain internal conditions.
Action Point
Knowing the characteristics and applications of weatherstrip adhesive helps prepare you for the removal process. With the right tools and techniques, removing the adhesive becomes manageable, ensuring you achieve a clean, undamaged surface.
Why Does Weatherstrip Adhesive Fail?
Weatherstrip adhesive can fail for several reasons, often resulting in gaps, leaks, or reduced functionality. Understanding these causes helps you take preventive measures or choose the right remedy.
Common Causes of Adhesive Failure
- Improper Application:
Incorrect application techniques can lead to inadequate bonding. Using too much or too little adhesive can cause failure. Always follow the manufacturer’s guidelines. - Surface Contamination:
Dirt, oil, or moisture on the surface can prevent the adhesive from bonding properly. Clean the surfaces thoroughly before applying the adhesive. - Temperature Extremes:
Extreme hot or cold temperatures can affect adhesive performance. Weatherstrip adhesive needs specific temperature ranges to cure correctly. - Aging and Degradation:
Over time, adhesives can degrade due to exposure to UV light, ozone, or chemicals. Regularly inspect and replace aged weatherstripping. - Mechanical Stress:
Continuous pressure, stretching, or movement of the bonded surfaces can weaken the adhesive bond. Ensure the weatherstripping fits properly without overstretching.
Pre-Application Checklist
Before applying weatherstrip adhesive, consider the following steps to maximize its effectiveness:
- Ensure surfaces are clean, dry, and free from contaminants.
- Use the right amount of adhesive as recommended by the manufacturer.
- Apply adhesive within the specified temperature range (usually between 60°F and 80°F).
- Allow adequate curing time as per the manufacturer’s instructions.
Key Terms
- Curing Time: The period required for the adhesive to reach its full strength.
- UV Light Exposure: Ultraviolet light from the sun that can degrade adhesive over time.
- Surface Contamination: Any unwanted substances on the surface that can impede adhesive bonding.
Summary
Weatherstrip adhesive can fail due to improper application, surface contamination, temperature extremes, aging, and mechanical stress. To ensure a strong bond, always follow the manufacturer’s guidelines and prepare the surfaces properly. Address these factors proactively to enhance the longevity and functionality of your weatherstrip adhesive.
Preparing for Removal
Preparation is crucial for removing weatherstrip adhesive effectively. Follow these steps to ensure a clean, undamaged surface.
Remove the Weatherstripping
- Gently Peel Off:
Carefully peel off the weatherstripping using an appropriate hand tool, like a plastic putty knife. Ensure the underlying surface remains undamaged. - Check the Substrate:
Inspect the substrate for any remnants of the weatherstripping material. Remove any leftover pieces before addressing the adhesive.
Identify the Adhesive
- Type of Adhesive:
Determine the type of adhesive used. Silicone, epoxy, and rubber-based adhesives each require different removal techniques. Knowing the adhesive type ensures you use the correct method and materials.
Necessary Tools and Materials
- Heat Sources:
- Heat Gun or Hairdryer:
Soften the adhesive by applying heat. This makes scraping more manageable. - Tools:
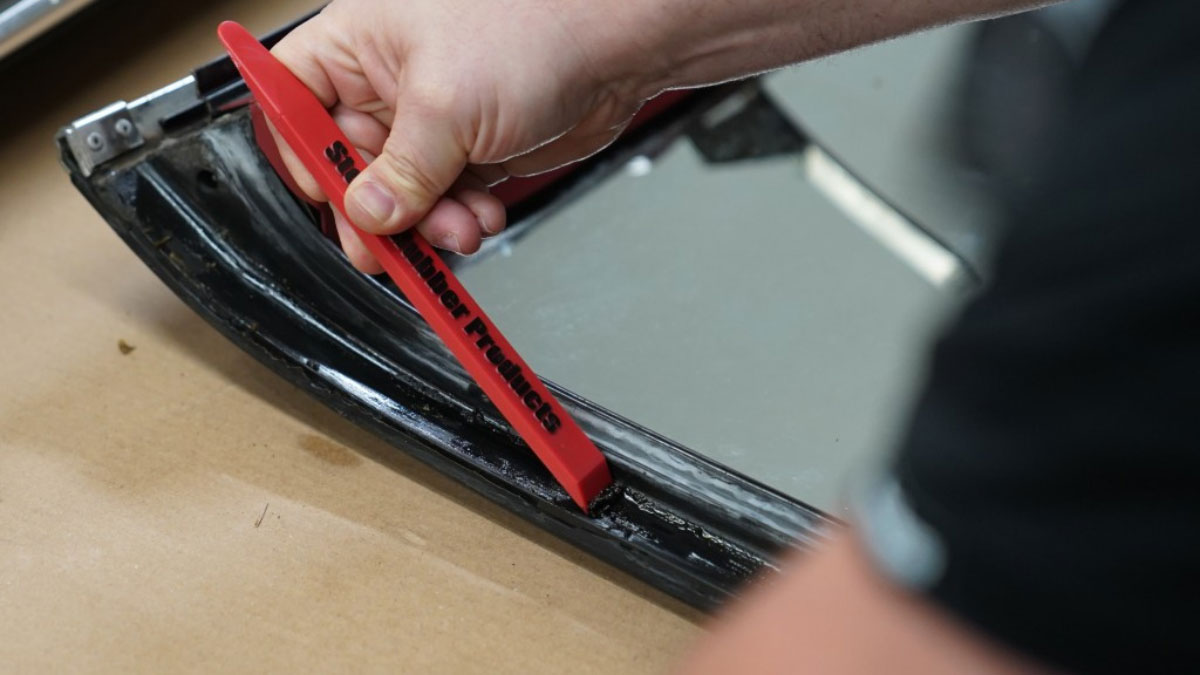
- Putty Knives or Scrapers:
Choose rubber or plastic materials to prevent surface damage. - Flathead Screwdriver:
Use a flathead screwdriver with tape around the tip for tight spots where putty knives can’t reach. - Solvents:
- Adhesive Removers:
Products like 3M Adhesive Remover and Goo Gone Pro are specifically designed to break down adhesive bonds. - Alternative Solvents:
WD-40 can also be used but may leave an oily residue that needs to be cleaned afterward. - Safety Equipment:
- Nitrile Gloves:
Protect your hands from harsh chemicals and solvents.
Safety Precautions
- Ventilation:
Ensure proper ventilation by working in a well-ventilated area. Many adhesive removers release fumes that can be harmful if inhaled. - Protective Gear:
Wear nitrile gloves to avoid skin contact with solvents. If using a heat gun, exercise caution to prevent burns. - Surface Protection:
Place protective coverings around the work area to catch any drips or spills, preventing damage to surrounding surfaces.
Summary Action Point
Collect necessary tools and materials before starting the removal process. Preparing ahead ensures a smoother, more efficient removal experience, minimizing potential damages and health hazards.
Methods to Remove Weatherstrip Adhesive
Removing weatherstrip adhesive can be challenging, but using the right methods and tools makes it manageable. Below are several effective methods to remove weatherstrip adhesive.
Mechanical Removal
Mechanical removal leverages physical tools to strip the adhesive.
-
Peeling and Scraping:
- Carefully peel off the weatherstripping at an obtuse angle to avoid damaging the surface.
- Use a rubber or plastic scraper to remove adhesive residues. This method is gentle on the surface but can be time-consuming.
-
Adhesive Removal Tools:
- For more stubborn adhesives, use tools like the 3M™ Stripe-Off Wheel. These wheels are designed to remove adhesive residues without smearing and are compatible with electric or pneumatic drills at low speed.
Chemical Removal
Chemical removal utilizes solvents to break down the adhesive.
- Adhesive Removers:
- Apply 3M General Purpose Adhesive Remover. Soak a towel or paper towels with the remover and place it over the adhesive. Let it sit for several hours to soften the adhesive. After the adhesive softens, use a plastic scraper to remove the residue.
Using Heat
Heat application can soften the adhesive, making it easier to remove.
- Heat Gun or Hair Dryer:
- Direct a heat gun or hair dryer at the adhesive. Keep the device moving to avoid overheating one spot and damaging the surface.
- Once the adhesive softens, peel or scrape it off.
Data Table
| Method | Tools/Materials | Steps | Time Required |
|---|---|---|---|
| Peeling and Scraping | Rubber/Plastic Scraper | 1. Peel at an obtuse angle. 2. Use scraper for residues. |
Moderate – Time-consuming |
| Adhesive Removal Tools | 3M™ Stripe-Off Wheel, Drill | 1. Attach wheel to drill. 2. Use low speed to remove adhesive. |
Fast |
| Adhesive Removers | 3M General Purpose Adhesive Remover, Towel | 1. Soak towel with remover. 2. Apply to adhesive. 3. Wait several hours. 4. Scrape off. |
Slow |
| Heat | Heat Gun/Hair Dryer | 1. Direct heat at adhesive. 2. Keep moving to avoid damage. 3. Peel or scrape off. |
Moderate |
Action Point
Gather all necessary tools and materials before starting the adhesive removal process. Ensure you have the appropriate scraper, remover, or heat source at hand for a smoother, safer experience.
Cleaning and Surface Preparation
Effective cleaning and surface preparation are crucial for removing weatherstrip adhesive. These steps ensure a clean, undamaged surface, ready for new weatherstripping or finish.
Materials Needed
- Heat Gun or Hairdryer: Used to soften adhesive for easier removal.
- Rubber or Plastic Putty Knives: Ideal for scraping adhesive without damaging surfaces.
- Adhesive Remover: Helps dissolve stubborn adhesive residues.
- Protective Gear: Safety goggles and gloves to prevent injury.
- Cleaning Cloths: Used for wiping away adhesive and debris.
- Tape: To protect areas around the weatherstrip.
Steps for Cleaning and Surface Preparation
- Heat Application
- Heat Gun or Hairdryer: Set at around 300°F, apply heat to the adhesive to soften it. Move the heat source in a circular motion to avoid damaging the surface.
- Mechanical Removal
- Scraping Tools: Use a rubber or plastic putty knife to gently scrape off the softened adhesive. For tighter spaces, wrap a flathead screwdriver with tape.
- Chemical Application
- Adhesive Remover: Follow the manufacturer’s instructions. Apply a small amount to a cloth and rub the adhesive area. Let it sit for a few minutes to break down the adhesive.
- Surface Cleaning
- Cleaning Cloths: Wipe down the area with a damp cloth to remove any remaining adhesive and chemicals. Ensure the surface is dry before applying new adhesive or weatherstripping.
Summary Action Point
Gather all the necessary materials listed above before starting. Following these steps ensures the surface is clean, prepared, and ready for new weatherstripping installation.
| Material | Purpose | Notes |
|---|---|---|
| Heat Gun | Soften adhesive | Use at 300°F, avoid prolonged heat |
| Putty Knives | Scrape adhesive | Use rubber or plastic to avoid damage |
| Adhesive Remover | Dissolve stubborn adhesive | Follow manufacturer’s instructions |
| Protective Gear | Prevent injury | Use safety goggles and gloves |
| Cleaning Cloths | Wipe away adhesive and debris | Use damp cloths for final cleaning |
| Tape | Protect surrounding areas | Especially for tight spaces |
This structured process ensures effective adhesive removal and surface readiness.
Applying New Adhesive
Applying new adhesive correctly guarantees a long-lasting bond and functionality for your weatherstripping. Follow these steps to ensure successful application.
Preparing the Surface
Surface preparation is crucial for good adhesion.
- Clean the Surface: Remove any dust, dirt, or residue. Use a clean cloth and an appropriate cleaner.
- Dry Completely: Ensure the surface is entirely dry. Moisture compromises adhesive strength.
- Check for Damage: Inspect the substrate for any damaged areas that may need repair before applying new adhesive.
Choosing the Right Adhesive
Different adhesives cater to various materials and environmental conditions.
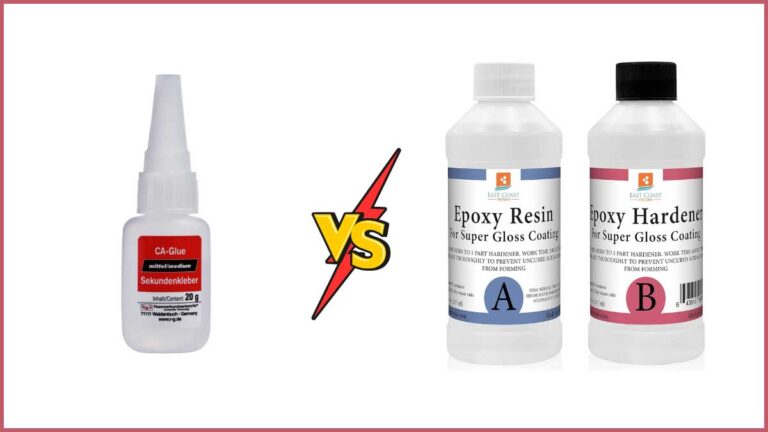
- Single-Component Adhesive: Easy to use, requiring no mixing. Suitable for moderate conditions.
- Two-Component Adhesive: Requires mixing two parts before application. Provides stronger bond for challenging conditions.
- Silicone-Based Adhesive: Offers flexibility and resistance to weather extremes. Ideal for outdoor applications.
- Rubber-Based Adhesive: Provides durability and a strong initial tack. Suited for automotive applications.
Applying the Adhesive
Proper application techniques ensure optimal performance.
- Apply in Small Sections: Work in manageable areas to maintain control and precision.
- Uniform Layer: Spread the adhesive evenly using a flat tool like a brush or spreader.
- Press Firmly: Attach the weatherstripping and press firmly to create a solid bond.
- Cure Time: Allow the adhesive to cure, as specified by the manufacturer, before exposing it to stress.
Key Terms
- Curing Time: The period required for the adhesive to achieve its full strength.
- Initial Tack: The immediate adhesive strength right after the application.
- Substrate: The underlying material to which the adhesive is applied.
Summary Action Point
Prepare your surface thoroughly and use the right adhesive for durable and effective weatherstripping.
| Adhesive Type | Components | Best For | Strength Level | Flexibility |
|---|---|---|---|---|
| Single-Component | One-Part | Moderate Conditions | Medium | Medium |
| Two-Component | Two-Part | Challenging Conditions | High | Low |
| Silicone-Based | Single or Two-Part | Extreme Weather Conditions | High | High |
| Rubber-Based | Single-Part | Automotive Applications | Medium | Medium |
Conclusion
Removing weatherstrip adhesive doesn’t have to be a challenging job. With the right techniques and tools, you can effectively tackle this sticky challenge without damaging underlying surfaces. Whether you opt for mechanical, chemical, or heat methods, thorough preparation and careful execution are key to success.
Remember to clean and dry your surfaces before reapplying new adhesive. Choosing the right type of adhesive for your specific needs ensures a durable and effective bond. By following these steps, you’ll maintain the integrity of your weatherstripping and enjoy a well-sealed environment.
Frequently Asked Questions
What is weatherstrip adhesive used for?
Weatherstrip adhesive is a specialized glue used to bond weatherstripping to various surfaces. It’s commonly used in automotive, home, and industrial applications to seal gaps against air, water, and dust.
What tools are needed to remove weatherstrip adhesive?
Necessary tools include a heat gun or hairdryer, rubber or plastic putty knife, adhesive remover, protective gear like gloves, cleaning cloths, and tape to protect surrounding areas.
Can weatherstrip adhesive be removed without damaging surfaces?
Yes, by using appropriate techniques and tools like heat application, adhesive removers, and gentle scraping, you can remove weatherstrip adhesive without damaging underlying surfaces.
How do you prepare a surface before removing weatherstrip adhesive?
First, gently peel off the weatherstripping. Check the surface for any remaining adhesive and determine the adhesive type since different types require different removal techniques.
What are common causes of weatherstrip adhesive failure?
Common causes include improper application, surface contamination, temperature extremes, aging and degradation, and mechanical stress.
How should you apply new weatherstrip adhesive?
Proper application involves thorough surface preparation, which includes cleaning, drying, and checking for damage. Apply the adhesive in small sections, ensure a uniform layer, press firmly, and allow adequate curing time.
Why is surface preparation crucial before applying adhesive?
Proper preparation ensures a clean, dry surface free from contaminants, which is essential for achieving a strong, long-lasting bond.
What methods can be used for removing weatherstrip adhesive?
You can use mechanical removal (peeling and scraping), chemical removal (adhesive removers), and heat application (heat guns or hair dryers) to remove weatherstrip adhesive effectively.
How long does it take for weatherstrip adhesive to cure?
Curing time varies based on the adhesive type but generally ranges from several hours to 24 hours. Always follow the manufacturer’s recommendations for optimal results.
What types of adhesives are suitable for weatherstripping?
Suitable adhesives include single-component, two-component, silicone-based, and rubber-based adhesives. Choose the adhesive based on the specific material and environmental conditions.
How do you remove weatherstrip adhesive from a car?
Use a heat gun or hairdryer to soften the adhesive, then gently scrape it off with a plastic putty knife. Apply adhesive remover if necessary and clean the area thoroughly with a cloth.
Is it necessary to use protective gear when removing adhesive?
Yes, wearing protective gloves and eye protection is important to avoid skin contact and potential irritation from adhesive removers or other chemicals.

