How to Remove LED Strip Lights Adhesive: Step-by-Step Guide
LED strip lights can transform any room, adding a modern and vibrant touch. But when it’s time to take them down, dealing with the adhesive can be a sticky situation. Whether you’re redecorating or moving out, you want to remove the adhesive without damaging your walls or surfaces.
Don’t worry—removing LED strip light adhesive doesn’t have to be a challenging job. With the right tools and techniques, you can make quick work of it, leaving your surfaces clean and residue-free. In this guide, you’ll learn the most effective methods to safely and efficiently remove that stubborn adhesive.
Key Takeaways
- Understand Adhesive Properties: LED strip light adhesive is designed for a strong bond but can be removed effectively with the right techniques and tools.
- Factors Affecting Removal: Surface type, time length of adhesion, and adhesive quality impact the difficulty of removal.
- Effective Removal Methods: Use heat, solvent-based removers, and gentle peeling techniques to safely remove adhesive without damaging surfaces.
- Necessary Tools and Safety: Essential tools include a hairdryer, plastic scraper, adhesive remover, and cloths. Ensure power is disconnected and use solvents cautiously.
- Handling Challenging Surfaces: Specific strategies are needed for different surfaces like painted drywall, wallpaper, and wood to prevent damage while removing adhesive.
- Future Prevention and Cleanup: Employ preventive measures like removable hooks or painter’s tape to avoid sticky residue. Clean up thoroughly post-removal to maintain surface quality.
Understanding LED Strip Light Adhesive
LED strip light adhesive creates a strong bond to keep the lights in place. Knowing its properties helps remove it effectively without damaging surfaces.
Key Terms
Adhesive Backing
The sticky side of the LED strip that adheres to surfaces. It’s designed for a firm hold yet should be removable.
Adhesive Residue
Leftover sticky material after you peel off the LED strip. Often stubborn, it requires solvent-based or mechanical methods for removal.
Characteristics of LED Strip Light Adhesive
- Strength: Provides a firm grip to prevent falling.
- Durability: Lasts for months or years without deteriorating.
- Applicability: Suitable for various surfaces like walls, cabinets, and ceilings.
Factors Influencing Adhesive Removal
- Surface Type: Glass, metal, or painted walls affect ease of removal.
- Time Length: Longer periods increase adhesion strength.
- Adhesive Quality: Varies by brand and type, impacting removal difficulty.
Common Methods for Removing Adhesive
Heat Application
Use tools like hair dryers or heat guns to soften adhesive, making it easier to peel off without damaging the wall.
Solvent-Based Removal
For residual adhesive, solvents like acetone or lacquer thinner can be effective. Press the cloth soaked in solvent on the adhesive before wiping it off.
- Test a Small Area: Ensure the method won’t damage your surface.
- Apply Heat Evenly: Avoid overheating which might affect the wall.
- Use Gentle Pressure: Prevent wall damage by peeling slowly.
These strategies ensure safe and clean LED strip light adhesive removal.
Tools and Preparations
Removing LED strip lights adhesive can be a meticulous task, requiring the right tools and safety measures. This section outlines the necessary tools and materials needed, along with essential safety measures to ensure smooth and damage-free adhesive removal.
Necessary Tools and Materials
To safely and effectively remove LED strip lights adhesive, you’ll need the following tools and materials:
- Heat Source: Use a hairdryer or heat gun to soften the adhesive on the LED strips. This makes peeling them off easier and reduces the risk of wall damage.
- Removal Tools: Employ an old credit card, plastic scraper, or putty knife to gently lift and remove the LED strips and adhesive residue. Avoid using metal tools to prevent wall scratches.
- Adhesive Remover: Apply substances like WD40, rubbing alcohol, acetone, or lacquer thinner to dissolve any stubborn adhesive residue.
- Cloths: Keep dry cloths ready to wipe away dissolved adhesive and clean the wall surface during the removal process.
- Optional: If you plan to reattach the LED strips elsewhere, double-sided adhesive tape can come in handy for the reapplication process.
Safety Measures
Following these safety measures will help you safely remove LED strips without damaging your walls or harming yourself:
- Disconnect Power Source: Before starting, ensure the LED strip lights are unplugged and disconnected from any power source to avoid electrical hazards.
- Avoid Damage to Walls: Use gentle heat and careful peeling techniques to protect the wall paint or plaster from damage. Start by warming the adhesive slightly and then slowly peel off the strips.
- Protect Surfaces: Be cautious when using solvents like acetone or lacquer thinner, as they can damage certain surfaces and loosen graphics or paint. Test a small area first to check for any adverse reactions.
These tools, materials, and safety measures will assist you in removing LED strip lights adhesive effectively and safely while maintaining the integrity of your surfaces.
Step-by-Step Removal Process
To successfully remove LED strip lights and their adhesive residue without damaging surfaces, follow these steps:
Heating the Adhesive
Warming the adhesive is crucial to soften it for easier removal.
- Use a Hairdryer or Heat Gun: Set your hairdryer or heat gun to a medium setting.
- Move Evenly Along the Strip: Hold the heat source a few inches away from the LED strip. Move it evenly along the length of the strip, ensuring each section receives adequate heat for about 10-15 seconds.
- Focus on Corners: Corners often have more adhesive, requiring extra attention. Apply heat for a longer duration to these areas.
Peeling Off the LED Strips
After heating the adhesive, proceed to gently peel off the LED strips.
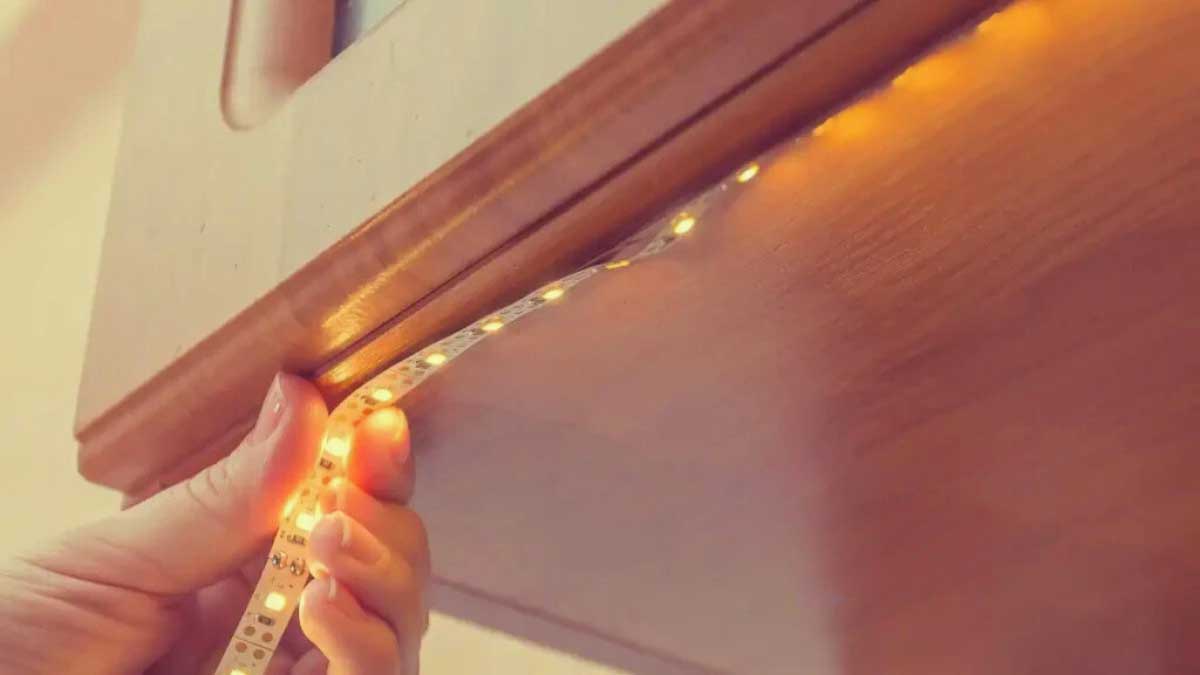
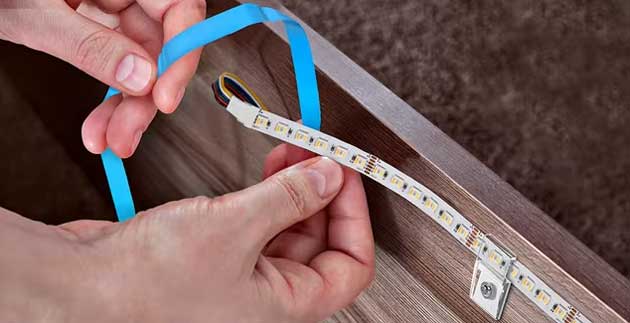
- Start at One End: Begin peeling from one end of the LED strip, moving section by section.
- Use Tools for Stubborn Sections: If sections are resistant, use an old credit card or plastic scraper to gently lift them while heating.
- Go Slowly: To avoid damaging the wall or surface, peel slowly and steadily.
Removing Adhesive Residue
Post removal, some adhesive may remain on the wall. Address this by following these steps.
- Apply Adhesive Remover: Use an adhesive remover like WD40 or rubbing alcohol. Apply a small amount to a cloth.
- Rub Gently: With the cloth, gently rub the residual adhesive until it starts to lift off the surface.
- Clean the Area: After removing the adhesive, wipe the area with a clean cloth and mild soap solution to remove any remaining remover residue.
Tools and Materials Required
Here is a detailed table of tools and materials needed for removing LED strips:
| Tool/Material | Purpose |
|---|---|
| Hairdryer/Heat Gun | Heating the adhesive |
| Old Credit Card/Scraper | Peeling off stubborn sections |
| Adhesive Remover (WD40/Rubbing Alcohol) | Removing adhesive residue |
| Cloth | Applying adhesive remover, cleaning the area |
| Mild Soap Solution | Final cleaning of the area |
By following these steps and using the appropriate tools, you’ll be able to effectively and safely remove LED strip lights along with their adhesive residue. This ensures surfaces remain intact and clean, ready for any new decorations or modifications.
Handling Difficult Surfaces
When removing LED strip light adhesive from challenging surfaces, specific strategies are necessary to preserve the material beneath while ensuring complete removal. These steps and tips help manage various surfaces effectively.
Surfaces Needing Special Attention
Painted Drywall
Painted drywall is prone to damage if treated harshly. To avoid peeling paint or creating dents:
- Use Low Heat: Apply a hairdryer on the lowest setting. Too much heat can crack or blister the paint.
- Gently Peel: Slowly remove the strip, applying minimal pressure.
Wallpaper
Wallpaper can tear easily when removing LED strips:
- Test First: Check a small, inconspicuous area to see how the wallpaper reacts.
- Low Residue Remover: Use a solvent like rubbing alcohol sparingly, as it evaporates quickly and leaves less residue.
Wood
Wood surfaces can absorb adhesive removers and suffer staining:
- Minimal Solvent Use: Apply solvents sparingly and immediately wipe with a dry cloth.
- Natural Adhesive Remover: Opt for natural solutions like lemon oil, which is gentler on wood.
Key Terms
- Adhesive Residue: The sticky material left after removing the LED strip.
- Solvent: A substance used to dissolve the adhesive, making it easier to clean.
Steps for Removing Adhesive
- Preparation:
- Disconnect the power source to eliminate any risk of electric shock.
- Gather a hairdryer, plastic scraper, cloth, and adhesive remover.
- Warm the Adhesive:
- Use the hairdryer on low heat, holding it 2-3 inches from the surface.
- Heat the adhesive backing along the length of the LED strip for 1-2 minutes.
- Peel Off the LED Strip:
- Start from one end and gently peel the strip. Use a scraper for stubborn areas, applying minimal force to avoid damaging the surface.
- Remove Residue:
- Apply adhesive remover to a cloth, not directly to the surface.
- Wipe the residue off gently. Follow up with a clean, dry cloth to remove any solvent traces.
| Surface | Tool | Recommended Solvent | Notes |
|---|---|---|---|
| Painted Drywall | Plastic scraper | Rubbing alcohol | Use low heat, be gentle. |
| Wallpaper | Soft cloth | WD40 or diluted vinegar | Test a small area first. |
| Wood | Plastic scraper | Lemon oil or diluted alcohol | Avoid soaking the wood. |
By following these steps and tips, you can effectively handle difficult surfaces without causing damage. Proper preparation and careful execution ensure clean, residue-free results suitable for a variety of materials.
Preventing Sticky Residue in the Future
Preserving your surfaces from sticky residue can save you time and effort in future removals. By following some preventive steps, you can minimize adhesive buildup and ensure cleaner results next time you remove your LED strip lights.
Use Removable Adhesive Hooks or Clips
Removable adhesive hooks or clips provide a secure hold without leaving sticky residue. These products, like those from Command by 3M, are designed for easy removal and come in various sizes to suit different needs.
Benefits:
- Easy application and removal.
- No sticky residue.
- Versatile sizes and shapes.
Employ Painter’s Tape
Before attaching your LED strip lights, place a layer of painter’s tape on the surface. Attach the LED lights over this tape to create a barrier that prevents the adhesive from sticking directly to the wall.
Steps:
- Clean and dry the surface.
- Apply a strip of painter’s tape.
- Attach LED strip lights over the tape.
Choose Non-Permanent Adhesive Strips
Opt for non-permanent adhesive strips designed for easy removal. Brands like Scotch and Duck offer options that provide a reliable hold but peel off cleanly, reducing the likelihood of residue.
Advantages:
- Strong hold.
- Clean removal.
- Suitable for various surfaces.
Use a Detachable Base
For an even more secure option, consider using LED strip lights with detachable bases. These bases can be permanently attached to surfaces, with the lights easily removable from the base without disrupting the adhesive.
Examples:
- LED lights with magnetic bases.
- LED tracks or holders.
Regular Maintenance
Inspecting and cleaning your LED strip lights periodically can prevent adhesive from hardening too much over time. Gently remove and reapply the lights every few months to ensure the adhesive remains pliable.
Tips:
- Schedule maintenance every 3-4 months.
- Use mild cleaning agents.
| Product Type | Brand | Removal Cleanliness Rating | Additional Features |
|---|---|---|---|
| Removable Adhesive Hooks/Clips | 3M Command | 5/5 | Various sizes and designs |
| Painter’s Tape | Scotch | 4/5 | Strong yet removable |
| Non-Permanent Adhesive Strips | Duck | 4.5/5 | Residue-free removal |
| LED Lights with Magnetic Bases | Philips | 5/5 | Easy mounting system |
| LED Tracks or Holders | GE | 4.8/5 | Secure and reusable |
Taking preventive measures ensures that you’ll face less hassle when removing your LED strip lights. By using removable hooks, painter’s tape, non-permanent strips, or detachable bases, you can maintain clean surfaces while enjoying the flexibility of redecorating whenever you wish.
After Removal: Cleanup and Surface Care
Once you’ve removed the LED strip lights and most of the adhesive, ensuring the surface is properly cleaned and maintained is essential. Effective cleanup will not only restore the appearance of your surfaces but also prepare them for any future applications.
Cleaning Residual Adhesive
Residual adhesive can be stubborn. Here’s how to tackle it:
- Softening Adhesive: Use a hair dryer or heat gun to soften any residual adhesive. Apply heat evenly to avoid damaging the surface.
- Applying Solvent: Dab a cloth in an adhesive remover like rubbing alcohol or WD40 and gently rub over the sticky residue.
- Scraping Gently: Use a plastic scraper or an old credit card to lift softened adhesive. Avoid metal tools to prevent surface scratches.
Surface-Specific Care
Different surfaces may need varied care methods:
- Painted Drywall: Be cautious to prevent paint damage. Heat application followed by adhesive remover works well.
- Wallpaper: Test a small area with heat and adhesive remover before full application to avoid paper damage.
- Wood: Use minimal heat and mild adhesive remover to protect the finish.
Cleaning Solutions
Once the adhesive is removed, clean the area with appropriate solutions:
- Mild Soap Solution: Mix a few drops of dish soap with warm water. Use a cloth to wipe the area, then dry it.
- Vinegar Solution: Mix equal parts of vinegar and water. This is effective for stubborn residues and is surface-safe.
Preventative Measures
After cleaning, consider these steps to prevent future residue issues:
- Use Removable Adhesive Hooks: These minimize residue when hanging LED strip lights.
- Choose Non-Permanent Strips: Select LED lights with detachable bases or non-permanent adhesive to avoid stubborn residues.
- Protect Suspceptible Surfaces: Use painter’s tape beneath the adhesive to shield paint or wallpaper.
Summary
Proper cleanup and surface care ensure that your space remains clean and ready for new decorations or applications. Following these methods, you can effectively eliminate adhesive residues and maintain the quality and appearance of your surfaces.
When to Seek Professional Help
Certain circumstances necessitate professional assistance for removing LED strip light adhesive. This ensures the job is done efficiently and safely without damage. Identifying these situations helps save time and avoid potential pitfalls.
Signs You Need a Professional
- Hard-to-Remove Adhesive: Adhesive remains resistant even after multiple removal attempts using heat and solvents. Example: Industrial-strength adhesives.
- Sensitive Surfaces: Surfaces are delicate or prone to damage, like antique wallpaper or fragile paint.
- Large Installations: Extensive LED setups covering large areas or involving complex wiring.
- Previous Damage: Presence of surface damage or staining from previous attempts.
Professional Services Offered
- Advanced Tools: Professionals use specialized tools and techniques to remove stubborn adhesives efficiently.
- Surface Protection: Experts ensure that surfaces remain unharmed during removal, preserving their integrity.
- Cleanup and Restoration: Comprehensive cleaning that leaves surfaces ready for any future installations.
- Safe Disposal: Proper disposal of adhesive residues and old LED strips, adhering to environmental guidelines.
Situations Requiring Professional Assistance
- Commercial Spaces: Large-scale commercial installations entail intricate wiring or heavy-duty adhesives.
- Historical Buildings: Special care required to prevent any damage to historical structures and finishes.
- High Ceilings and Inaccessible Areas: Locations posing safety hazards due to inaccessibility or height, like vaulted ceilings.
Choosing the Right Professional
- Credentials: Verify the professional’s license and insurance.
- Reviews and References: Look for positive testimonials and ask for references.
- Service Offerings: Ensure they provide the specific services required for your situation.
- Cost Estimates: Obtain clear, detailed cost estimates to avoid surprises.
Summary and Next Steps
Identifying when to seek professional help can save time, money, and prevent damage. Assess your specific situation against the given criteria. If professional assistance seems beneficial, choose a reputable service provider who matches your requirements.
Conclusion
Removing LED strip light adhesive doesn’t have to be a challenging job. By understanding the properties of the adhesive and utilizing the right techniques and tools, you can achieve clean and residue-free results without damaging your walls or surfaces. Remember to test small areas first, apply heat evenly, and use gentle pressure to avoid any mishaps.
For those tricky situations or sensitive surfaces, don’t hesitate to seek professional assistance. Professionals come equipped with advanced tools and expertise to handle even the most stubborn adhesives, ensuring a thorough and safe removal process.
By following these guidelines and taking preventative measures, you’ll keep your surfaces in pristine condition, ready for future decorating endeavors.
Frequently Asked Questions
What are some methods to remove adhesive from LED strip lights?
Effective methods include heat application and solvent-based removal. Use a heat source like a hairdryer to soften the adhesive for easy peeling, and solvents like rubbing alcohol or WD-40 to clean any remaining residue.
Can LED strip light adhesive damage walls or surfaces?
Yes, improper removal can damage walls or surfaces. Applying too much force or using the wrong tools can peel off paint or wallpaper. Always apply heat evenly and use gentle pressure.
What tools are essential for adhesive removal?
Essential tools include a heat source (hairdryer or heat gun), removal tools (old credit card or plastic scraper), adhesive removers (WD-40 or rubbing alcohol), and cleaning cloths.
How do I remove adhesive from painted drywall?
Apply heat to soften the adhesive, then gently peel off the strip. Use a plastic scraper for stubborn areas and clean with a mild soap solution. Avoid excessive force to prevent damage to the paint.
Is it safe to use solvents on all surfaces?
Not all surfaces react well to solvents. Test a small, inconspicuous area first to ensure no adverse reactions occur. Solvents like rubbing alcohol are generally safe for most surfaces but caution is advised.
What are some preventative measures for future adhesive issues?
Use removable adhesive hooks, non-permanent strips, or painter’s tape to avoid future adhesive problems. These alternatives are designed to be easily removed without damaging surfaces.
When should I consider professional help for adhesive removal?
Consider professional help for hard-to-remove adhesives, sensitive surfaces, large installations, or previously damaged areas. Professionals have advanced tools and techniques to ensure safe and effective removal.
How do I clean residual adhesive after LED strip removal?
Soften any remaining adhesive with heat, apply a suitable solvent, and gently scrape it off. Clean the area with a mild soap solution afterward to ensure no residues are left behind.
Are there specific strategies for removing adhesive from wallpaper?
Apply heat carefully to avoid damaging the wallpaper, then peel off the strip gently. Use a plastic scraper and mild solvent if necessary, testing a small area first to prevent adverse reactions.
What care should be taken for wooden surfaces during adhesive removal?
Use heat application cautiously, followed by a gentle peel. Avoid sharp tools that can scratch the wood. Clean with an appropriate solvent and finish with a wood-safe cleaner to restore the surface.
