Glue for Rearview Mirror: Best Adhesives and DIY Guide
Ever had your rearview mirror suddenly fall off? It’s not just inconvenient; it can be downright dangerous. Whether it’s due to temperature changes or old adhesive, a detached rearview mirror needs immediate attention.
You might think fixing it requires a trip to the mechanic, but with the right glue, you can easily reattach it yourself. In this guide, you’ll discover the best types of glue for rearview mirrors, how to apply them, and tips to ensure a secure, long-lasting fix.
Key Takeaways
- Properly reattaching a rearview mirror yourself can save time and money. Use recommended adhesives like Permatex, 3M, or Loctite for reliable results.
- Thorough cleaning of both the windshield and the metal button is essential. Use a razor blade and chemical cleaners like acetone for best results.
- Ensure proper application by following the kit’s instructions. Apply the activator first, then apply the adhesive to the metal button and press firmly.
- Observe important considerations such as temperature sensitivity and curing time. Allow the adhesive to cure fully before using the mirror to ensure a strong bond.
- Select a professional-strength adhesive specifically designed for rearview mirrors to withstand daily wear and tear. Avoid general-purpose glues.
- Use safety precautions, including wearing gloves and eye protection, and work in a controlled environment to avoid humidity and temperature extremes that could affect the adhesive.
Overview Of Rearview Mirror Adhesives
When it comes to reattaching a rearview mirror to your windshield, the right adhesive is crucial for a secure and lasting bond. Various adhesives on the market cater to this specific need, but not all of them offer the same level of performance. Below, you’ll find detailed information about some of the most reliable options, their application process, and important considerations.
Recommended Adhesives
Permatex, 3M, and Loctite Kits
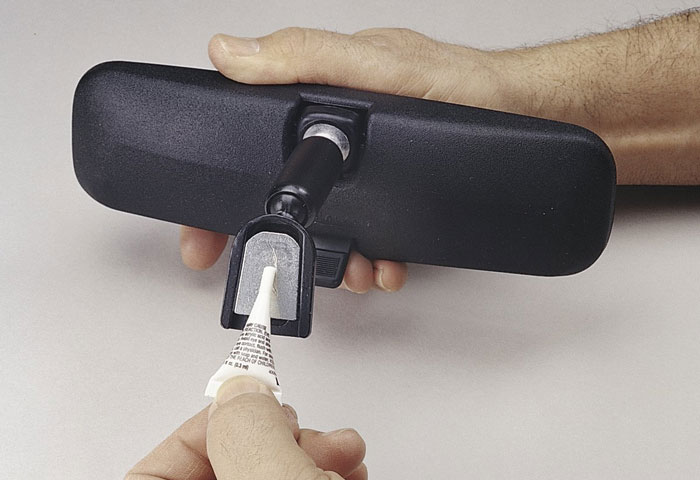
- Permatex Rearview Mirror Adhesive: This adhesive is highly recommended for its OEM-specified formula, providing a strong and permanent bond. It includes a two-part system with an adhesive and an activator.
- 3M Rearview Mirror Adhesive: Known for its professional-strength bonding capabilities, this kit also follows an OEM-approved formula and includes a two-part adhesive and activator system.
- Loctite Rearview Mirror Adhesive Kit: This brand is widely trusted for its durable bonding. The kit comes with a metal button adhesive and an accompanying activator.
Application Process
Cleaning
- Thorough Cleaning: Use a razor blade to remove old adhesive from both the windshield and the metal button. Ensuring a clean surface is essential for a strong bond.
- Chemical Cleaning: For an even more thorough clean, wipe the surfaces with acetone or MEK (methyl ethyl ketone). These chemicals effectively remove any remaining residue.
Application
- Activator Application: Apply the activator to the glass according to the instructions provided in the kit. Let it sit for the specified time before proceeding to the next step.
- Adhesive Application: Apply the adhesive to the metal button, then press it firmly onto the glass. Hold it in place as directed by the kit’s instructions to ensure a secure bond.
Key Considerations
- Temperature Sensitivity: Some adhesives work best at certain temperatures. Make sure to read the kit’s instructions about the optimal temperature range for application.
- Curing Time: Allow the adhesive to cure as recommended, which could range from several hours to overnight. Rushing this process can compromise the bond’s strength.
- Weight and Vibration: After reattaching the rearview mirror, avoid excessive weight or vibration for at least 24 hours to ensure the adhesive fully sets.
| Brand | Formula Type | Strength | Curing Time | Application Notes |
|---|---|---|---|---|
| Permatex | OEM-specified | High | 30 minutes – 24 hours | Clean with acetone or MEK |
| 3M | OEM-approved | Professional | 15 minutes – 24 hours | Apply activator on clean glass |
| Loctite | Metal button adhesive | Durable | 10 minutes – 24 hours | Follow specified curing times |
Summarizing, using the right rearview mirror adhesive is key for a secure and lasting bond. Choose an OEM-specified formula like those from Permatex, 3M, or Loctite for best results. Follow the detailed application process and consider important factors like temperature sensitivity and curing time.
Key Features To Look For
When selecting glue for reattaching your rearview mirror, it’s crucial to consider several important features to ensure a secure and lasting bond.
Strength And Durability
Strength and durability are essential when choosing the right adhesive. Rearview mirrors require professional strength to withstand daily wear and tear.
Key Points:
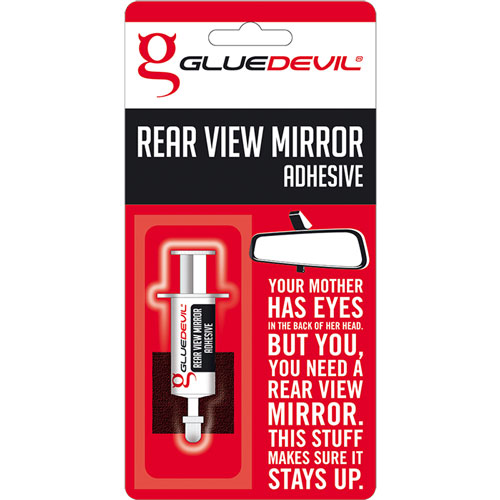
- Professional Strength: Opt for adhesives like Permatex Extreme Rear View Mirror Adhesive, designed specifically for rearview mirrors with an OEM-specified formula.
- Compatibility: Ensure the adhesive is suitable for the materials involved, particularly metal buttons. Leading brands such as Permatex, 3M, and Loctite are compatible with metal buttons but not plastic ones.
Ease Of Application
An adhesive’s ease of application can significantly impact the overall success of the repair. Choosing an easy-to-apply product reduces the risk of mess and error.
Key Points:
- Application Method: Select adhesives that offer a 2-part system, like a towelette and pipette. Products such as Permatex include a medical-grade towelette for precise application.
- Cleaning Instructions: Ensure the kit includes clear instructions on surface cleaning before applying the adhesive. Proper cleaning ensures better adhesion and a stronger bond.
Drying Time
Drying time is another crucial factor. A quick-drying adhesive can reduce the total repair time, allowing you to use the vehicle sooner.
Key Points:
- Quick Setting: Look for adhesives with a fast curing time. Many professional-grade adhesives like 3M’s Mirror Adhesive can cure within minutes under the right conditions.
- Temperature Sensitivity: Consider products that perform well under various temperatures. Adhesives such as Loctite are known for their reliable performance in different environmental conditions.
| Brand | Strength Rating | Compatibility | Drying Time | Application Method |
|---|---|---|---|---|
| Permatex | Professional Strength | Metal Buttons | Minutes | 2-part system (towelettes, pipette) |
| 3M | OEM Specified | Metal Buttons | Minutes | Traditional application |
| Loctite | OEM Specified | Metal Buttons | Minutes | Simple application |
Each of these features plays a significant role in ensuring your rearview mirror remains secure and functional. When you choose an adhesive, consider these factors to achieve a reliable and lasting repair.
Step-By-Step Application Guide
To effectively reattach a rearview mirror, follow these detailed steps to ensure a secure and lasting repair using the right adhesive.
Preparation
- Clean the Area:
- Thoroughly clean the windshield and the metal button of the rearview mirror. Use a razor blade and a cleaning agent like acetone or alcohol. This step removes any old adhesive and residue.
- Ensure the area is completely dry. No cleaning agent residue should remain.
- Identify the Correct Location:
- Mark the original location of the mirror button on the windshield. Use a crayon or marker for this task to ensure proper alignment.
Application
- Prepare the Adhesive:
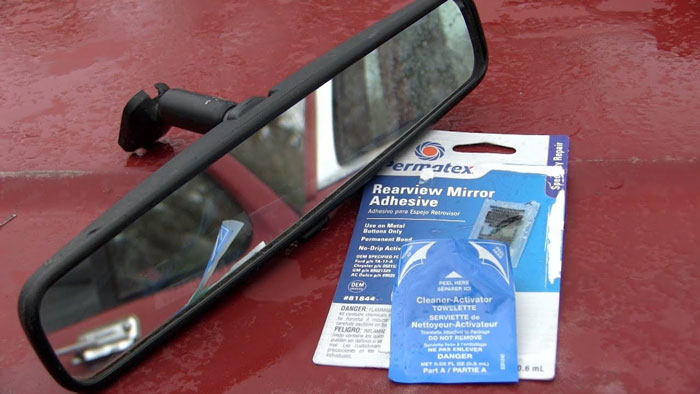
- Choose a rearview mirror adhesive kit specifically designed for this purpose. Recommended brands include Permatex, 3M, and Loctite. These kits usually include a cleaner/activator and adhesive.
- Follow the instructions provided with the kit carefully when preparing the adhesive.
- Apply the Cleaner/Activator:
- Apply the cleaner/activator from the kit to both the windshield and the metal button. Let it dry for the specified time in the product instructions.
- Apply the Adhesive:
- Apply a small amount of adhesive to the metal button. Follow the specific guidelines in the adhesive kit for the amount needed.
- Press the metal button firmly against the marked spot on the windshield. Hold it in place for the recommended time (usually 1-2 minutes) to ensure a strong bond.
Curing Process
- Allow Adequate Curing Time:
- Let the adhesive cure according to the manufacturer’s instructions. Typically, it takes 24 hours for the adhesive to fully set.
- Avoid attaching the mirror or applying any stress to the button during this curing period.
- Attach the Rearview Mirror:
- Once the adhesive has fully cured, reattach the rearview mirror to the metal button. Ensure it is securely in place and properly aligned.
Data Rich Detailed Table for Adhesive Comparison
| Brand | Type | Drying Time | Strength | Suitable for | Notes |
|---|---|---|---|---|---|
| Permatex | Adhesive Kit | 24 hours | High | Metal/Glass | Includes activator, OEM specified |
| 3M | Adhesive Kit | 24 hours | High | Metal/Glass | Known for reliability, quick bond |
| Loctite | Adhesive Kit | 24 hours | High | Metal/Glass | Strong bond, professional strength |
Summary
Follow these steps carefully for reattaching a rearview mirror. Cleaning the area, preparing the adhesive, and allowing sufficient curing time are crucial for a strong bond. Select a quality adhesive kit from brands like Permatex, 3M, or Loctite for the best results.
Safety Precautions
Ensuring the safety and effectiveness of reattaching a rearview mirror relies on meticulous preparation and careful adherence to procedures. Below are essential safety precautions to consider:
Cleanliness
- Clean the Windshield and Metal Button: Use a thin razor blade or sandpaper to remove old adhesive residue. Ensuring the surfaces are clean is crucial for the new adhesive to adhere properly.
- Final Wipe: After scraping, wipe down the surfaces with a clean, dry cloth.
Use of Protective Gear
- Gloves: Wear latex gloves to prevent skin oils from interfering with the adhesive. Skin oils can weaken the bond between the adhesive and the surfaces.
- Eye Protection: Use safety glasses to protect against accidental splashes when handling adhesives and cleaning agents.
Surface Preparation
- Isopropyl Alcohol: Wipe the cleaned surfaces with isopropyl alcohol. Make sure the alcohol dries completely before applying the adhesive. This step removes any remaining contaminants.
- Drying Time: Allow at least 5 minutes for the alcohol to evaporate entirely before proceeding.
Adhesive Application
- Follow Instructions: Read and follow the adhesive kit’s instructions carefully. The effectiveness of the bond depends on proper application.
- Apply to Metal Button: Apply the adhesive exclusively to the metal button, not the windshield. This ensures direct contact with the most critical bonding surface.
- Temperature Sensitivity: Check the recommended temperature range for the adhesive. Most adhesives perform best between 60°F (15°C) and 75°F (24°C).
- Avoid Humidity: High humidity can interfere with the adhesive’s curing process, so try to perform the task in a controlled environment.
By following these safety precautions, you can ensure a secure and durable reattachment of your rearview mirror. Proper preparation and adherence to instructions are key to achieving an effective bond.
Troubleshooting Common Issues
Encountering problems with rearview mirror adhesives can be frustrating, especially if you’re unsure how to fix them. Let’s explore common issues like a loose mirror and adhesive failure to help you find effective solutions.
Loose Mirror
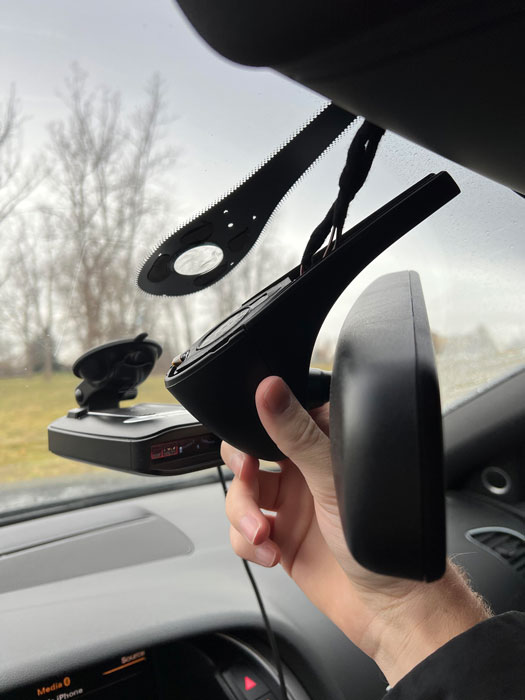
A loose rearview mirror can be a distraction and a safety hazard. Ensuring a secure attachment is crucial for clear visibility and road safety. Here are some key points to consider:
- Choosing the Right Adhesive:
- Professional Strength Adhesives: Opt for products like Permatex Extreme Rear View Mirror Adhesive, 3M, and Loctite. These are specifically formulated for rearview mirrors, ensuring a strong bond.
- Avoid General Purpose Glues: Common adhesives like superglue or epoxy might not provide reliable bonding for the weight and vibration of a rearview mirror.
- Preparation Steps:
- Clean the Surfaces: Use a razor blade and a solvent such as acetone or alcohol to remove old adhesive residue from the windshield and mirror button.
- Mark the Original Position: Before removing the mirror, mark its original location on the windshield with a non-permanent marker to help proper alignment during reattachment.
- Applying the Adhesive:
- Use an Activator: If included in the kit, apply an activator to both surfaces to improve adhesion.
- Follow Instructions: Apply the adhesive according to the manufacturer’s guidelines, ensuring even coverage.
- Bonding and Curing:
- Press and Hold: After applying the adhesive, press the mirror button firmly against the windshield and hold it in place for the recommended time.
- Curing Time: Allow the adhesive to cure for at least 24 hours before attaching the mirror to ensure a strong bond.
Adhesive Failure
Adhesive failure often results from improper application or environmental factors. Addressing these can prevent future issues.
- Environmental Considerations:
- Ideal Conditions: Apply the adhesive in a controlled environment with proper temperature and humidity levels as specified by the adhesive manufacturer.
- Avoid Extreme Conditions: Extreme heat or cold can affect the strength of the bond.
- Common Causes of Failure:
- Surface Contamination: Oils, dust, and old adhesive residue can weaken the bond. Thorough cleaning is essential.
- Improper Adhesive: Using general-purpose glue rather than a rearview mirror-specific adhesive often leads to failure.
- Insufficient Curing Time: Not allowing sufficient curing time before using the mirror can result in a weak bond.
- Steps to Address Adhesive Failure:
- Re-Clean Surfaces: Clean the bonding surfaces again using a razor blade and solvent, ensuring no contaminants are present.
- Reapply Adhesive: Use a recommended professional-strength adhesive, following the application steps meticulously.
- Ensure Proper Curing: Allow the adhesive the full curing period specified by the manufacturer before reattaching or using the mirror.
Adhesive Comparison Table
Below is a comparison table of some recommended adhesives, detailing their drying times, bond strength, and suitable surfaces.
| Adhesive Brand | Drying Time | Bond Strength | Suitable Surfaces |
|---|---|---|---|
| 3M Rearview Mirror Adhesive | 15 minutes | High | Glass, metal |
| Permatex Extreme Adhesive | 1 hour | Very High | Glass, metal |
| Loctite Rearview Mirror Bond | 30 minutes | High | Glass, metal |
Following these guidelines and best practices can easily troubleshoot issues with your rearview mirror adhesive. Ensuring thorough preparation and proper application will result in a strong, durable bond, keeping your mirror secure and functional.
Conclusion
Reattaching your rearview mirror doesn’t have to be a challenging job. With the right adhesive and proper application technique, you can achieve a secure and durable bond. Choose professional-strength products like Permatex, 3M, or Loctite to ensure reliability.
Always follow the detailed steps for cleaning and preparation, and pay attention to curing times and environmental factors. By adhering to these best practices, you’ll keep your rearview mirror securely in place and functional, enhancing your driving safety and convenience.
Frequently Asked Questions
How do I reattach my rearview mirror?
To reattach your rearview mirror, use special “rearview mirror” adhesive available at auto parts stores. Ensure the windshield and metal button are thoroughly cleaned. Follow the adhesive kit’s instructions, apply the cleaner/activator, then the adhesive, and let it cure for 24 hours before reattaching the mirror.
What type of glue works best for reattaching a rearview mirror?
Professional-strength adhesives specifically designed for rearview mirrors are the best choice. Recommended brands include Permatex, 3M, and Loctite, which offer strong, durable bonds between metal and glass.
Can I use Gorilla Glue for my rearview mirror?
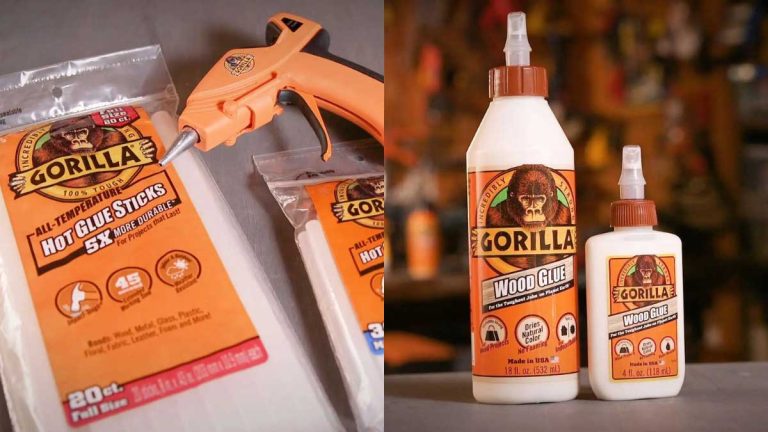
While Gorilla Glue has strong bonding capabilities, especially with glass and plastic surfaces, it’s better to use adhesives specifically formulated for rearview mirrors for optimal results.
What should I look for when choosing an adhesive for my rearview mirror?
Key features to consider include strength and durability, ease of application, and drying time. Choose adhesives designed for rearview mirrors, ensure compatibility with metal buttons, and opt for quick-drying products for faster repairs.
How do I ensure a strong bond when reattaching my rearview mirror?
Ensure surfaces are clean and free of old adhesive residue. Use isopropyl alcohol for thorough cleaning. Follow the adhesive kit’s instructions carefully, apply the cleaner/activator and adhesive, and allow a proper curing time of 24 hours.
What safety precautions should I take when reattaching my rearview mirror?
Ensure surfaces are clean, wear protective gear like gloves and safety glasses, and follow the adhesive instructions carefully. Avoid skin contact with adhesive and ensure proper ventilation during the process.
Why did my rearview mirror adhesive fail?
Common reasons for adhesive failure include improper surface cleaning, insufficient curing time, or using the wrong type of adhesive. Ensure materials are thoroughly clean, follow application instructions meticulously, and allow the adhesive to cure for the recommended time.
How can I troubleshoot a loose rearview mirror?
If your rearview mirror is loose, first clean the surfaces thoroughly and remove old adhesive residue. Reapply a professional-strength rearview mirror adhesive and follow the curing instructions. Ensure minimal weight and vibration during the curing period to achieve a strong bond.

