Command Strips Not Sticking to Wall: Solutions and Tips to Fix It
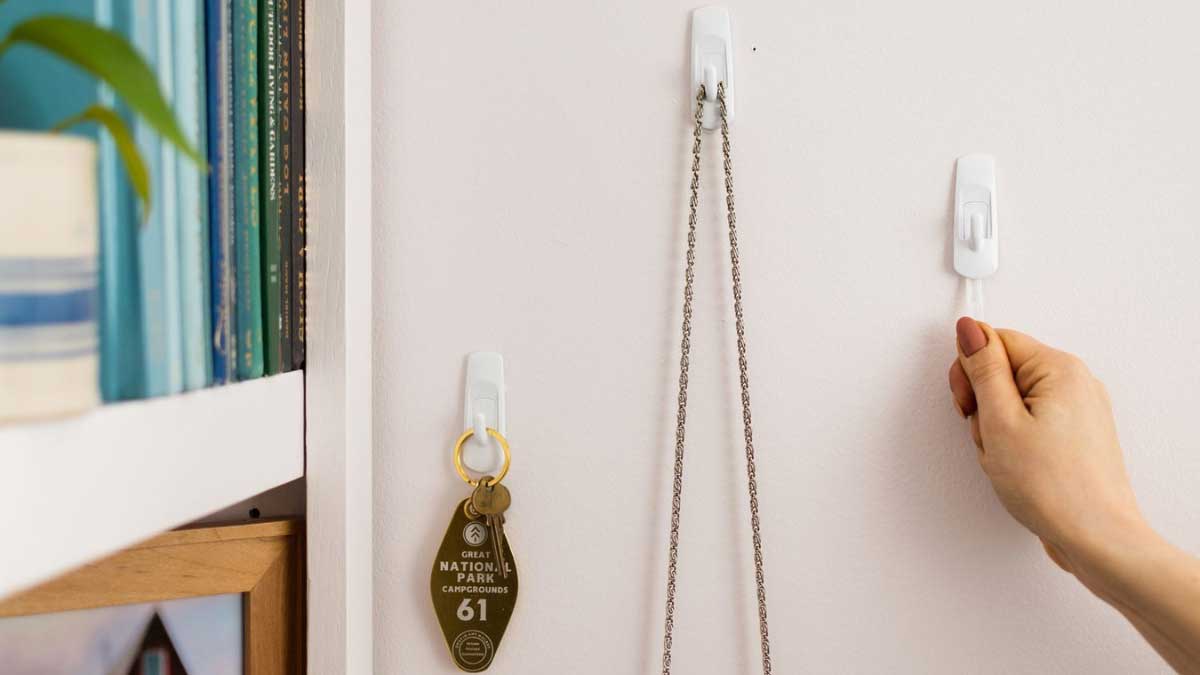
You’ve probably experienced the frustration of command strips not sticking to your wall, leaving your favorite pictures and decorations in a precarious situation. These handy tools promise a damage-free solution for hanging items, but sometimes they don’t live up to expectations.
Understanding why command strips fail can save you time and prevent damage to your walls. Whether it’s the type of surface, improper application, or environmental factors, we’ll jump into the common reasons and offer practical solutions to ensure your decorations stay put.
Key Takeaways
- Weight Limit Adherence: Ensuring that the weight of the item matches the specific weight rating of the Command strips is crucial for effective adhesion and long-lasting results.
- Environmental Conditions: Temperature and humidity can significantly impact the adhesive properties of Command strips. Adhere to recommended conditions to ensure optimal performance.
- Surface Preparation: Properly clean and dry the surface using rubbing alcohol before applying Command strips to ensure the strongest bond.
- Application and Bonding Time: Press the strips firmly and allow sufficient bonding time (at least 1 hour for light items and up to 12 hours for heavier items) before hanging objects.
- Surface Texture Consideration: Different wall types require customized approaches. Smooth surfaces offer better adhesion, while textured walls may need specialty adhesives.
- Troubleshooting Tips: Re-cleaning and reapplying strips, as well as ensuring proper weight distribution, can effectively resolve common sticking issues.
Common Reasons Command Strips Don’t Stick
Understanding why Command strips sometimes fail to adhere to walls can save you time and frustration. Here are the main reasons why these handy tools might not perform as expected.
Weight Limitations
Command strips have specific weight ratings. Each package details the maximum weight the strips can hold. Overloading the strips with heavier objects will cause them to fail.
Key Points:
- Small Strips: Can hold up to 1 pound (e.g., small framed photos).
- Medium Strips: Can support up to 4 pounds (e.g., banners).
- Large Strips: Handle up to 16 pounds (e.g., large picture frames or mirrors).
Adhering to these weight restrictions ensures the longevity and effectiveness of the strips.
Temperature and Humidity
Command strips are sensitive to environmental conditions like temperature and humidity. Extreme conditions can affect their adhesive properties.
Ideal Conditions:
- Temperature Range: 50°F to 105°F (ideal room temperature).
- Humidity Levels: Should be low to moderate. Steamy bathrooms or kitchens can impair adhesion.
Adhesive strips perform best in stable environments. Avoid placing them in areas prone to high humidity or dramatic temperature changes.
Surface Texture
Surface texture plays a critical role in the adhesion strength of Command strips. Certain textures create challenges for proper bonding.
Surface Considerations:
- Smooth Surfaces: Excellent adhesion (e.g., painted drywall, glass).
- Textured Surfaces: Poor adhesion (e.g., orange peel walls, brick).
Surface cleanliness also impacts adhesion. Ensure the surface is clean and dry before application for the best results.
Surface Preparation Steps:
- Clean Surface: Use rubbing alcohol to remove dirt and grease.
- Dry Surface: Allow the surface to dry completely before applying the strip.
- Apply Strip: Press firmly and wait for the recommended bonding time before hanging objects.
These precautions improve the chances of your Command strips sticking effectively.
Bonding Time
Allowing sufficient bonding time is essential for the adhesive to set properly. Different products have varying bonding times required before putting weight on them.
Common Bonding Times:
- Lightweight Items: Typically need 1 hour.
- Heavier Items: May need up to 12 hours.
Adhering to the recommended bonding time helps ensure a secure hold.
| Weight Category | Max Weight (Pounds) | Bonding Time |
|---|---|---|
| Small Strips | 1 | 1 hour |
| Medium Strips | 4 | 12 hours |
| Large Strips | 16 | 12 hours |
Understanding and following these guidelines can prevent common issues related to Command strips not sticking to walls.
Best Practices for Surface Preparation
To ensure Command strips stick effectively, surface preparation is crucial. Follow these steps to prepare your surface properly.
Cleaning the Surface
You need a clean, residue-free surface to ensure the adhesive forms a strong bond.
- Use Rubbing Alcohol: Clean the wall with rubbing alcohol using a cotton pad. This removes dirt, grease, and other residues without leaving a slippery film. Avoid household cleaners or water as they might leave residue.
- Smooth Surface: Ensure the wall surface is smooth. Command strips adhere best to flat, glossy surfaces. If your wall is textured (e.g., orange peel walls or brick), consider using specialty adhesive products designed for such surfaces.
- Remove Hardware and Debris: Before applying the strips, remove any hanging hardware from the back of the frame and ensure no debris remains on the surface. This provides a clean area for the adhesive to stick.
Drying and Waiting Periods
Proper drying and waiting periods are essential for a secure bond.
- Dry the Surface: Allow the surface to dry completely after cleaning it with rubbing alcohol. Moisture can interfere with the adhesive’s bonding ability.
- Wait Period: After cleaning and drying the surface, wait at least 10 minutes before applying the Command strips. This ensures the surface is thoroughly dry and ready for adhesion.
- Adhesive Bond Time: Once applied, press the Command strip firmly against the wall for about 30 seconds to ensure it adheres properly. Wait at least an hour (ideally 24 hours) before hanging your item. This allows the adhesive to bond strongly to the wall.
By following these best practices, you’ll maximize the effectiveness of your Command strips and ensure your decorations remain securely in place.
Correct Application Techniques
Proper application of Command strips ensures they adhere securely to your wall. Following a structured approach maximizes their effectiveness and longevity.
Preparing the Surface
- Clean the Wall: Wipe the surface thoroughly using quick-drying rubbing alcohol to remove dust, dirt, and residues. Avoid household cleaners or water, as these can leave behind residues that hinder adhesion.
Aligning and Placing Strips
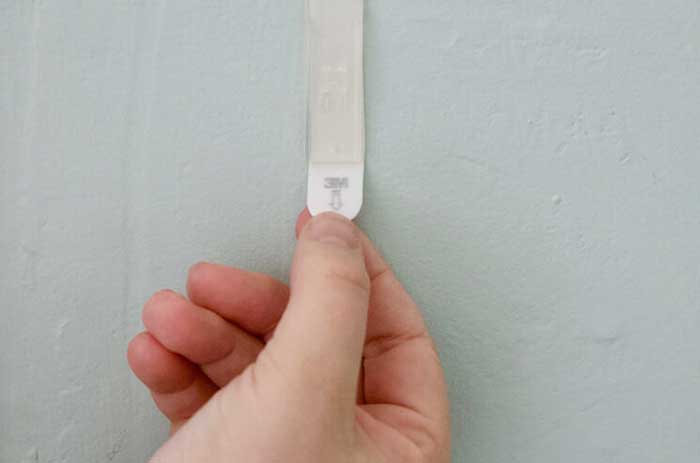
- Correct Orientation: Ensure the correct part of the Command strip faces the wall. The black part marked “wall” should be against the wall, not the red part marked “Command”.
- Surface Compatibility: Confirm the surface is suitable for Command strips. Avoid applying strips to paper, soft surfaces, or newly painted walls (wait at least 7 days after painting).
| Surface Type | Suitability | Notes |
|---|---|---|
| Smooth (glass, tiles) | Ideal | Best adhesion |
| Painted walls | Suitable | Wait 7 days if freshly painted |
| Paper/soft surfaces | Not suitable | Weak adhesion, may damage surface |
| Textured walls | Variable | Less effective, consider alternative |
Pressing and Holding
- Firm Press: Following package instructions, press the strip firmly on the wall for about 30 seconds. This ensures strong initial bonding.
- Bonding Time: Wait at least an hour (ideally 24 hours) before hanging items to allow the adhesive to set properly.
Summary
Taking the time to clean and prepare the wall ensures Command strips stick well. Aligning the strips correctly and pressing them firmly further enhances their bonding strength. Waiting adequate bonding time before adding weight ensures they hold securely. Use these techniques to maximize the performance of Command strips and keep your decorations in place.
Tips for Different Wall Types
When it comes to ensuring Command strips stick properly, different wall types present unique challenges. Whether you have textured, glossy, or any other wall surface, adjusting your approach can make a considerable difference.
Textured Walls
Textured walls, such as those with orange peel, brick, or stucco, often pose adherence issues for standard Command strips.
- Specialty Adhesives: Use products engineered for textured surfaces. Regular Command strips may not provide sufficient grip on rough surfaces.
- Alternative Products: Consider products like Command Outdoor Adhesive Strips or adhesive hooks designed specifically for difficult surfaces.
- Preparation: Ensure the surface is as clean as possible. Use a wire brush to remove loose particles, then clean with rubbing alcohol.
Glossy Walls
Glossy walls, including those painted with high-gloss or semi-gloss paint, provide a smooth surface but can be tricky due to their slippery texture.
- Surface Cleaning: Clean the wall thoroughly with rubbing alcohol to remove any residue that could hinder adhesion.
- Proper Pressing: Press the strips firmly against the wall for at least 30 seconds to ensure maximum contact.
- Adhesive Types: Use general-purpose Command strips, as they perform well on smooth surfaces like glass, tile, and high-gloss paint.
| Wall Type | Challenges | Recommended Solutions |
|---|---|---|
| Textured | Poor adherence | Specialty adhesives, alternative products |
| Glossy | Slippery surface | Thorough cleaning, proper pressing |
By understanding and addressing the specific requirements of different wall types, you can significantly improve the effectiveness of Command strips. Ensure that both preparation and product selection are tailored to the wall type to achieve the best results.
Troubleshooting Sticking Issues
Issues with Command strips not sticking to the wall can be frustrating. Understanding the causes and solutions can help you ensure a secure bond for your decorations.
Adjusting Weight Distribution
Proper weight distribution is critical when hanging items with Command strips.
- Check Weight Limits: Every type of Command strip has a specified weight limit. Exceeding this limit can cause the strip to fail. Verify the weight of your item against the strip’s capacity.
- Use Multiple Strips: For heavier items, use multiple Command strips to distribute the weight evenly. For example, use two strips for objects weighing up to 16 pounds, spreading the load to enhance adhesion.
- Support Placement: Place strips evenly along the back of the item. Distribute strips along the top and bottom edges if the item is tall, enhancing stability.
Weight Limit Specifications:
| Command Strip Type | Single Strip Weight Limit | Suggested Max for Multi-Strip Use |
|---|---|---|
| Small | Up to 1 pound | 2 strips for up to 2 pounds |
| Medium | Up to 4 pounds | 4 strips for up to 8 pounds |
| Large | Up to 8 pounds | 2 strips for up to 16 pounds |
Re-cleaning and Reapplying
Sometimes, re-cleaning and reapplying the strips can solve sticking issues.
- Clean the Surface: Ensure you clean the application area thoroughly with isopropyl rubbing alcohol. Avoid household cleaners that might leave a residue. Residues can prevent an effective bond.
- Dry Completely: Make sure the wall is thoroughly dry after cleaning. Moisture can hinder the adhesive properties of the Command strips.
- Reapply Properly: Follow these steps for effective reapplication:
- Press Firmly: After positioning the strips, press them firmly for at least 30 seconds.
- Wait Before Hanging: Allow the adhesive to set. Ideally, wait 24 hours before hanging items to ensure the strongest hold.
By adhering to these guidelines, you can troubleshoot and address common sticking issues with Command strips effectively.
Conclusion
Ensuring command strips stick properly to your walls requires understanding the factors that affect their performance. By following best practices for surface preparation and application, you can significantly enhance the effectiveness of these adhesive solutions. Pay attention to weight limits, environmental conditions, and surface textures to avoid common sticking issues.
Remember to clean surfaces thoroughly with rubbing alcohol and allow sufficient bonding time for optimal results. For challenging wall types, consider using specialty products designed for those surfaces. Proper weight distribution and reapplication techniques can also help address any sticking problems you encounter.
By implementing these strategies, you’ll keep your decorations securely in place and avoid the frustration of command strips failing to stick.
Frequently Asked Questions
Why won’t my command strips stick to the wall?
Command strips may not stick due to a variety of reasons including surface texture, weight limits, and environmental factors like humidity and temperature. Ensuring the surface is clean, dry, and smooth, as well as following proper application guidelines, can help improve adhesion.
How can I prepare my wall for command strips?
Clean the surface with rubbing alcohol to remove any residue. Ensure the wall is smooth and dry, and wait at least 10 minutes before applying the strips. Firmly press the strip for about 30 seconds and wait at least an hour (ideally 24 hours) before hanging items.
Can I use command strips on textured walls?
Command strips generally perform best on smooth surfaces. For textured walls, consider using specialty adhesives designed for rough surfaces or alternative products. Thorough cleaning and proper application techniques are crucial for success.
What are the environmental conditions that affect command strips?
Command strips are sensitive to temperature and humidity. They perform best in stable, moderate environments. Avoid using them in high-humidity areas like bathrooms or fluctuating temperatures, which can compromise the adhesive.
How much weight can command strips hold?
Each type of command strip has a designated weight limit. Exceeding this limit can cause the strip to fail. Always check the packaging for specific weight guidelines, and use multiple strips for heavier items if necessary.
What surfaces are not suitable for command strips?
Command strips are not suitable for rough surfaces such as brick, cement board, and rough-sawn wood. Smooth surfaces like painted walls, tiles, and glass offer the best adhesion for command strips.
How long should I wait before hanging items on command strips?
After applying command strips, you should wait at least 1 hour before hanging anything. For best results, wait up to 24 hours to allow the adhesive bond to reach maximum strength.
Why do my command strips keep falling off?
Command strips may fall off if the weight exceeds the recommended limit, the surface is not properly prepared, or the environmental conditions are not ideal. Re-cleaning and reapplying the strips with proper techniques can help achieve a stronger bond.

