How to Use Shoe Goo for Effective Shoe Repairs
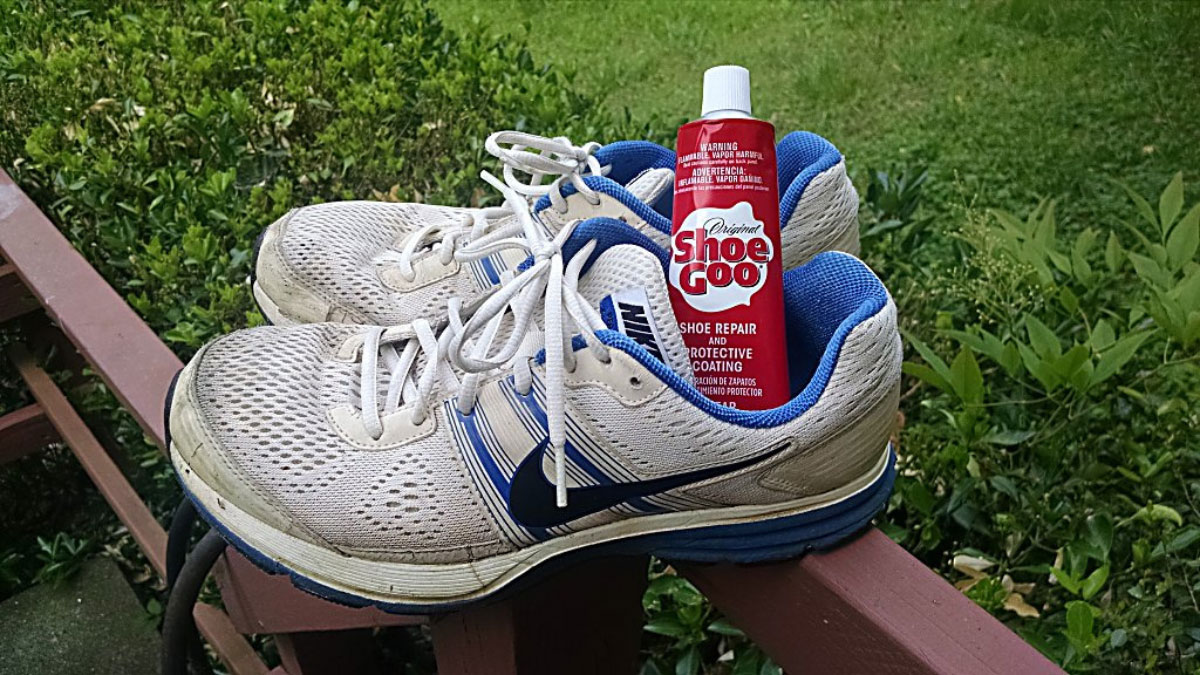
Got a favorite pair of shoes that need a little TLC? Whether it’s a worn-out sole or a pesky hole, Shoe Goo can be your go-to solution for extending their life. This versatile adhesive not only repairs but also protects your footwear, making it a must-have in your DIY toolkit.
Key Takeaways
- Versatile and Durable: Shoe Goo is designed to repair, seal, and protect various types of footwear, making it a versatile adhesive suitable for boots, sneakers, and sandals.
- Waterproof and Flexible: It creates a waterproof bond that withstands normal movements and bending, ensuring long-lasting repairs without compromising the comfort and natural movement of shoes.
- Preparation is Key: Clean and dry the damaged area thoroughly, and use 120-grit sandpaper to roughen surfaces for better adhesion before applying Shoe Goo.
- Proper Application Techniques: Apply a thin, even layer of Shoe Goo directly to the repair area and smooth it with tools like an ice cube to avoid sticky fingers and ensure a professional finish.
- Curing Time: Allow the adhesive to cure for at least 24 hours in a well-ventilated area to achieve maximum bonding strength and durability.
- Safety Precautions: Use Shoe Goo in a well-ventilated space, wear protective gear, avoid direct contact with skin, and follow manufacturer instructions for safe handling and disposal.
What Is Shoe Goo?
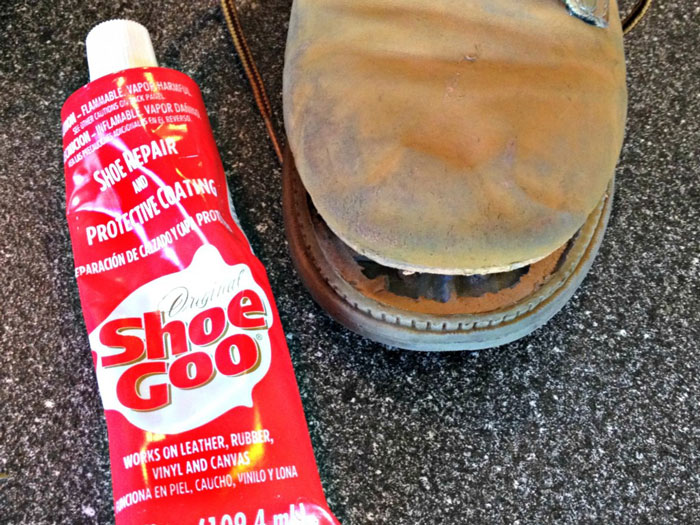
Shoe Goo is a versatile adhesive and sealant specifically designed for repairing and extending the life of footwear. It excels in fixing worn-out soles, sealing holes, and providing overall protection for different types of shoes, making it a go-to solution for many.
Characteristics of Shoe Goo
- Versatile Adhesive: Shoe Goo is strong and durable, suitable for various types of shoes, including boots, sneakers, and sandals.
- Waterproof Bond: Creates a waterproof seal, protecting shoes from water damage and wear.
- Flexibility: Withstands normal movements and bending of shoes without cracking or breaking.
Key Terms
- Adhesive: A substance used for sticking objects or materials together.
- Sealant: A material used for sealing something to make it airtight or watertight.
- Waterproof: Impervious to water.
- Flexibility: The quality of bending easily without breaking.
Benefits
- Durability: Shoe Goo offers a long-lasting repair solution.
- Water Resistance: Ideal for waterproofing shoes.
- Flexibility: Maintains the comfort and natural movement of footwear.
Steps to Use Shoe Goo
- Preparation:
- Clean the Area: Remove dirt and debris using a damp cloth or a soft brush. Ensure complete drying before application.
- Roughen the Surface: Use 120-grit sandpaper on the edges around holes or damaged areas for better adhesion.
- Application:
- Apply Shoe Goo: Squeeze an appropriate amount of Shoe Goo onto the damaged area.
- Spread Evenly: Use a spatula or a similar tool to evenly spread the adhesive.
- Curing:
- Allow to Dry: Let the adhesive cure for 24 hours for maximum strength.
Action Point
Regularly inspect your shoes and apply Shoe Goo to minor damages immediately to prolong their lifespan.
Essential Tools And Materials
To get the best results with Shoe Goo, gather these essential tools and materials. Each item plays a specific role in ensuring a smooth and effective shoe repair process.
Tools And Materials
- Shoe Goo: This is the primary adhesive/sealant used for repairing and protecting shoes. It comes in clear and black varieties.
- Purpose: Bonds, seals, and repairs.
- Availability: Both clear and black options.
- Clean Cloth: A damp cloth is necessary for cleaning the area of the shoe that needs repair.
- Purpose: Ensures a clean surface for better adhesion.
- Usage Tip: Dampen the cloth slightly for effective cleaning.
- Ice Cube: Used to smooth out the applied Shoe Goo, preventing it from sticking to fingers.
- Purpose: Smooths adhesive for a professional finish.
- Usage Tip: Rub the ice cube over the Shoe Goo gently.
- Duct Tape: This can be applied from the inside of the shoe to create a surface for the Shoe Goo to adhere to.
- Purpose: Provides backing for larger holes.
- Usage Tip: Apply firmly inside the shoe over the hole.
- 120-Grit Sandpaper: Optional for roughening the edges around holes or damaged areas.
- Purpose: Improves adhesion by roughening surfaces.
- Usage Tip: Lightly sand around the damaged area.
- Ventilation: Good ventilation is essential to avoid inhaling harmful vapors from the Shoe Goo.
- Purpose: Ensures safety by dispersing vapors.
- Usage Tip: Work in a well-ventilated area or use a fan.
- Petroleum Jelly: Apply a thin coat to the threads of the tube for easy cap removal.
- Purpose: Prevents cap from sticking to the tube.
- Usage Tip: Use sparingly on the tube threads.
Action Point
Collect all these tools and materials before starting your repair. Having everything on hand ensures a smooth and effective repair process.
Step-By-Step Guide To Using Shoe Goo
Utilizing Shoe Goo for footwear repair is a straightforward process, but it’s important to follow the steps meticulously to achieve optimal results.
Preparing The Surface
- Clean the Area: Ensure the surface is free from dirt and grease. Use a damp cloth or soft brush to scrub the area you plan to repair. Let the footwear dry completely before moving to the next step.
- Remove Debris: Use 120-grit sandpaper to roughen the edges around any holes or damaged sections. This step improves the adhesive capability of the Shoe Goo.
- Protect Surrounding Areas: Keep away from finished surfaces to avoid damage from the adhesive. Use masking tape around the repair area if needed to shield adjacent surfaces.
Applying The Shoe Goo
- Puncture the Seal: Use the pointer cap to puncture the seal in the neck of the tube.
- Apply Shoe Goo: Squeeze a small amount of Shoe Goo directly onto the area needing repair. For holes, place duct tape inside the shoe as a backing for the adhesive to adhere properly. Smooth the Shoe Goo with an ice cube if necessary for a neat finish.
Curing And Drying Time
Allow the Shoe Goo to cure for 24 hours in a well-ventilated area. Full curing time ensures maximum bonding and durability. Avoid using the repaired shoes until the adhesive is completely dry to maintain the integrity of the repair.
| Tool/Material | Purpose |
|---|---|
| Shoe Goo | Main adhesive for repair |
| Clean cloths | Surface preparation |
| Ice cubes | Smoothing adhesive |
| Duct tape | Backing for holes |
| 120-grit sandpaper | Improved adhesion |
| Masking tape | Protecting surrounding areas |
Gather all necessary tools and materials before starting the repair process to ensure a smooth and efficient experience. Proper preparation and application will help extend the lifespan of your shoes.
Tips And Tricks For Best Results
When using Shoe Goo, there are several techniques to ensure optimal outcomes. Follow these tips and tricks to get the best results from your shoe repair endeavors.
Preparation and Application
- Clean the Surface: Ensure the area to be repaired is clean, dry, and free of dirt and grease. Use a damp cloth or soft brush to clean the area, then let it dry completely before applying Shoe Goo.
- Prepare the Area: Use 120-grit sandpaper to roughen the edges around any holes or damaged areas to improve adhesion.
- Apply Shoe Goo: Puncture the seal in the tube using the pointer cap and apply a small amount of Shoe Goo directly to the surface. Make sure to cover the area adequately to secure a strong bond.
Application Techniques
- Smooth Out the Goo: Use an ice cube to smooth out the Shoe Goo. This helps in spreading it evenly and prevents it from sticking to your fingers.
- Use Duct Tape for Holes: Apply duct tape from the inside of the shoe if there’s a hole. This creates a surface for the Shoe Goo to adhere to.
Key Steps for Best Results
- Cleaning:
- Importance: Cleaning ensures that no dirt or grease interferes with the bond.
- Tools Needed: Damp cloth, soft brush.
- Example: Wipe down a muddy boot thoroughly and let it dry overnight.
- Surface Preparation:
- Purpose: Roughening the edges improves glue adhesion.
- Tools Needed: 120-grit sandpaper.
- Example: Scruff up the edges around a torn sneaker sole.
- Application:
- Method: Apply a small, controlled amount of Shoe Goo.
- Tools Needed: Pointer cap for puncturing the tube.
- Example: Patch a small hole in a boot by applying Goo directly.
Additional Tips
- Use an Ice Cube: Smooth out the goo with an ice cube to avoid sticky fingers and ensure even application.
- Layering: Apply in thin layers and allow each layer to dry for stronger results.
- Curing: Allow 24 hours for the Shoe Goo to cure completely in a well-ventilated area.
Summary Action Point
Gather necessary tools and materials before starting your repair. Proper preparation and careful application of Shoe Goo will help extend the lifespan of your shoes, ensuring reliable and long-lasting repairs.
Common Mistakes To Avoid
Understanding common errors in using Shoe Goo helps ensure successful repairs. Below are some typical mistakes and how to avoid them:
Using Excessive Adhesive
Applying too much adhesive can create a mess and hinder bonding. A thin, even layer provides better results. Excess adhesive takes longer to cure and can cause a weak bond.
Skipping Surface Preparation
Failing to clean and dry the surface leads to poor adhesion. Always clean the area thoroughly using a damp cloth. Use a soft brush if necessary.
Ignoring Cure Time
Rushing the curing process compromises repair strength. Allow the adhesive to partially cure for about 2 minutes before bonding surfaces. Complete dryness typically takes 24 hours, and maximum strength requires 48 to 72 hours.
Misapplying for Waterproofing
For waterproofing, thin coats yield the best results. Allow each layer to set for 3-4 hours before applying the next. This method ensures an even and effective waterproof seal.
Incorrect Seal Puncturing
Improperly puncturing the seal in the tube leads to uneven adhesive flow. Use the pointer cap to puncture the seal cleanly. This step ensures controlled application.
Neglecting Ventilation
Using Shoe Goo in poorly ventilated areas hampers curing and poses health risks. Always work in a well-ventilated space to help proper adhesive setting and avoid inhaling fumes.
Overlooking Temperature Conditions
Temperature impacts the curing process. Shoe Goo cures best between 50°F and 90°F (10°C and 32°C). Extreme temperatures slow down or disrupt curing.
Table of Common Mistakes and Solutions
| Mistake | Impact | Solution |
|---|---|---|
| Using Excessive Adhesive | Weak bond, mess | Apply thin, even layer |
| Skipping Surface Preparation | Poor adhesion | Clean and dry area thoroughly |
| Ignoring Cure Time | Compromised repair strength | Allow appropriate curing time |
| Misapplying for Waterproofing | Ineffective seal | Use thin coats, set for 3-4 hours |
| Incorrect Seal Puncturing | Uneven adhesive flow | Use pointer cap to puncture seal |
| Neglecting Ventilation | Health risks, improper curing | Work in well-ventilated area |
| Overlooking Temperature | Disrupted curing process | Ensure ambient temperature 50°F-90°F |
Action Point
Double-check these common mistakes during your next shoe repair with Shoe Goo. Accurate application and adherence to instructions maximize the strength and lifespan of your repairs.
Safety Precautions
Taking proper safety precautions is crucial when using Shoe Goo. Adhering to certain guidelines can ensure a safe and efficient shoe repair process.
Key Terms:
- Ventilation: Ensuring fresh air flow while working with adhesives.
- Protective Gear: Items like gloves and masks to protect skin and respiratory health.
- Work Area: A well-illuminated and spacious place to perform repairs.
- Use in Well-Ventilated Area: Ensure there’s adequate airflow while applying Shoe Goo. Inhalation of strong fumes can be harmful.
- Wear Protective Gear: Always wear gloves to avoid adhesive contact with your skin. If you’re sensitive to fumes, consider using a mask.
- Avoid Direct Contact: Use tools like ice cubes to manipulate the adhesive, preventing it from sticking to your fingers.
- Keep Away from Children and Pets: Store Shoe Goo out of reach to prevent accidental ingestion or contact.
- Read Manufacturer Instructions: Follow all guidelines provided by the Shoe Goo manufacturer for safe application and handling.
- Dispose Responsibly: Follow local regulations for disposing of adhesive products. Avoid pouring remnants down the drain.
Use the following table for quick safety reference:
| Safety Measure | Details |
|---|---|
| Ventilation | Ensure fresh airflow during application. |
| Protective Gear | Wear gloves and use a mask if sensitive to fumes. |
| Tool Usage | Use items like ice cubes to manipulate adhesive safely. |
| Child and Pet Safety | Store out of their reach. |
| Manufacturer Instructions | Follow provided guidelines for safe handling. |
| Disposal | Adhere to local regulations for proper disposal. |
Adhering to these precautions helps maintain a safe environment while working with Shoe Goo, ensuring both effective and secure shoe repairs.
Conclusion
Shoe Goo is an invaluable tool for extending the life of your footwear. By following the steps and tips outlined, you can ensure effective and durable repairs. Remember to gather all necessary tools and materials beforehand and pay attention to safety precautions. Regularly inspect your shoes for minor damages and address them promptly with Shoe Goo to maintain their condition and comfort. With proper use, Shoe Goo can help you keep your favorite shoes in great shape for years to come.
Frequently Asked Questions
How do you apply Shoe Goo?
To apply Shoe Goo, squeeze a small amount onto the area of the shoe that needs repair. Smooth it out evenly using a tool like a plastic scraper or an ice cube to cover the entire damaged area. Let it cure for 24 hours for the best results.
What type of glue do shoemakers use?
Shoemakers typically use neoprene cement and urethane shoe glue. Both provide a strong, waterproof bond, making them ideal for sealing holes and bonding the sole to the shoe.
How waterproof is Shoe Goo?
Shoe Goo is highly waterproof once fully cured. Apply thin layers and allow each to set for 3-4 hours. For complete waterproofing, let the adhesive cure for 24 hours.
How long does it take for Shoe Goo to set?
Shoe Goo sets initially in 2 minutes for bonding. For waterproofing, use thin layers and let each layer set for 3-4 hours. Allow 24 hours for a full cure, although some surfaces may take 48-72 hours for maximum strength.
Is Shoe Goo the same as rubber cement?
Shoe Goo is a specialized type of rubber cement, containing a cleaning/degreasing solvent and an abrasion-resistant synthetic rubber, making it ideal for shoe repairs.

