How to Use Rubber Cement: Tips for Effective Bonds and Repairs
Ever wondered how to use rubber cement effectively? This versatile adhesive is a must-have for any DIY enthusiast, offering a clean and flexible bond for various materials like paper, photos, and even some fabrics. Whether you’re working on a craft project or a quick repair, mastering rubber cement can save you time and frustration.
Key Takeaways
- Versatile Adhesive: Rubber cement is ideal for various DIY projects, offering both temporary and permanent bonding options for materials like paper, photos, and some fabrics.
- Composition and Types: Made from elastic polymers dissolved in solvents, rubber cement is available in both solvent-based and water-based formulas stabilized by ammonia.
- Application Methods: For repositionable bonds, apply to one surface and press together immediately. For permanent bonds, apply to both surfaces, let them become tacky, and then press together.
- Safety Precautions: Always use rubber cement in well-ventilated areas, wear protective gloves and goggles, and store away from heat sources due to its flammable nature.
- Effective Removal: Use eraser gum or isopropyl alcohol to remove rubber cement from different surfaces, ensuring minimal damage and clean results.
- Optimal Bonding: Clean and dry surfaces before application, use thin, even coats of adhesive, and allow full drying time to achieve strong, flexible bonds.
What Is Rubber Cement?
Rubber cement is a versatile adhesive made from elastic polymers like latex or synthetic rubber, dissolved in a solvent such as acetone, hexane, heptane, or toluene. The solvent keeps the rubber in a fluid state for easy application as an adhesive. Water-based formulas, stabilized by ammonia, offer an alternative to the solvent-based types.
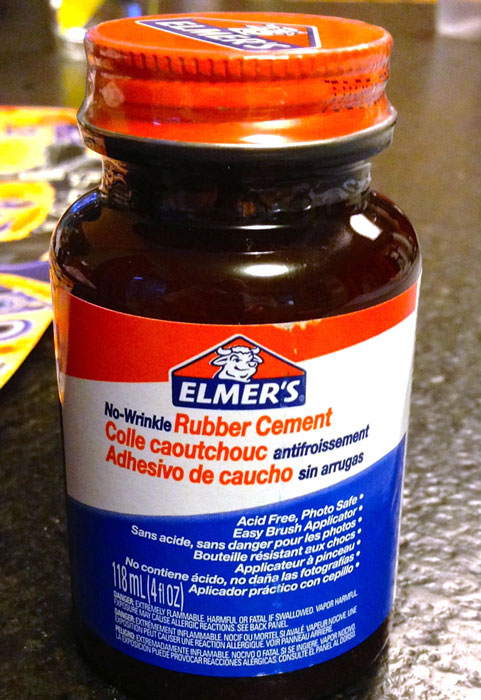
Key Characteristics of Rubber Cement
Composition:
- Rubber polymers suspended in a solvent
- Solvents used: acetone, hexane, heptane, toluene
- Water-based options exist (stabilized by ammonia)
Usage:
- Crafting projects
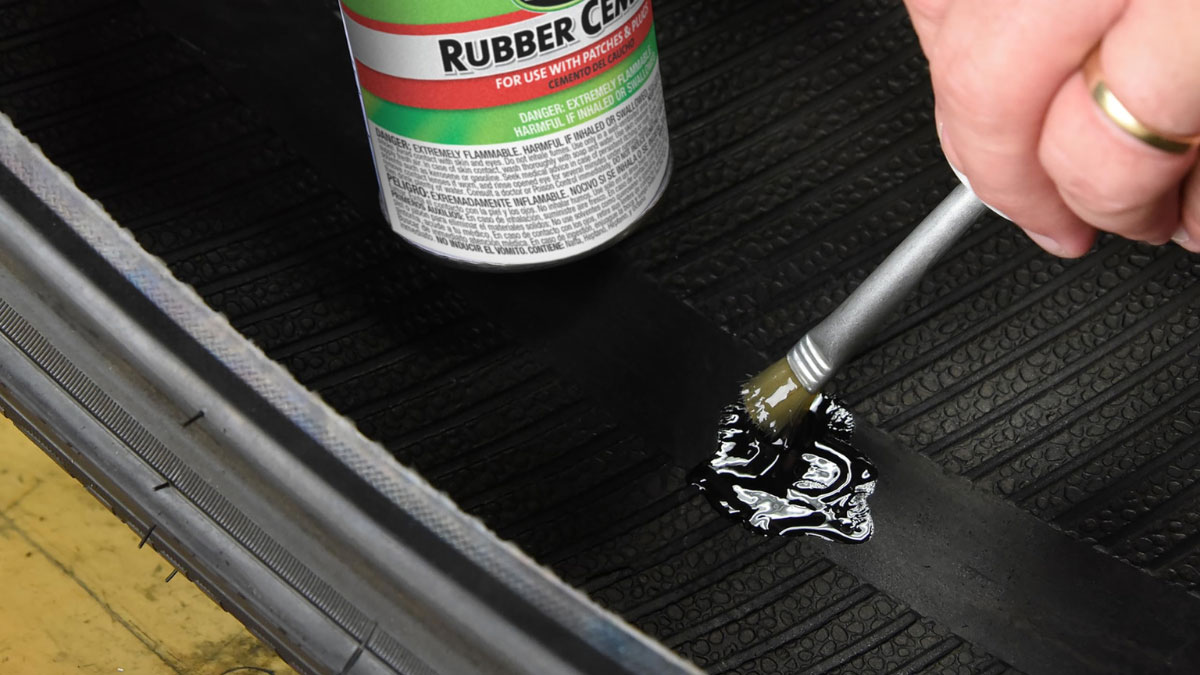
- Repairing punctured bike tubes
- Bonding paper and photos
Bonding:
- Repositionable and permanent bonds
- Depends on application method
Rubber cement forms a flexible bond upon solvent evaporation. The resulting adhesive layer is clean and adjustable, making it beneficial for various applications.
How to Use Rubber Cement
- Preparation:
- Clean and dry the surfaces.
- Buff the area if necessary to roughen the surface.
- Application:
- Apply an even coat to both surfaces.
- Let the solvent evaporate until the adhesive feels tacky.
- Press the surfaces together firmly.
| Feature | Details |
|---|---|
| Elastic Polymers | Latex, Synthetic Rubber |
| Solvents | Acetone, Hexane, Heptane, Toluene |
| Water-Based Formulas | Stabilized by Ammonia |
| Bond Types | Repositionable, Permanent |
| Applications | Crafting, Bike Tube Repair, Paper Bonding |
Understanding rubber cement’s key characteristics and proper usage ensures effective and reliable bonding, suitable for various DIY projects and repairs.
Benefits And Uses
Rubber cement is a versatile adhesive, perfect for various household and craft projects. With its unique properties, it offers both temporary and permanent bonding options.
Temporary Bonds
Rubber cement is excellent for creating temporary bonds. It’s ideal for projects where you need flexibility without damaging the surfaces involved.
- Scrapbooking and Crafts: Perfect for repositionable applications, such as arranging photos or decorative elements before finalizing their placement.
- Household Repairs: Useful for quick fixes on items like paper, cardboard, and light fabrics. The bond remains strong but can be easily undone if needed.
When used on non-porous surfaces like plastic, wood, or metal, rubber cement forms temporary bonds. It’s not suitable for permanent adhesion on these materials.
Permanent Bonds
While rubber cement is primarily known for temporary bonds, you can also create permanent bonds if applied correctly.
- Proper Surface Preparation: Ensure surfaces are clean and dry. Apply thin layers of cement to both surfaces and wait until it’s tacky before pressing them together.
- Materials: Works well with paper products and certain fabrics. Test on a small area first to ensure compatibility.
By applying rubber cement to both surfaces and allowing it to dry slightly before pressing, the bond becomes more permanent. This method provides a strong and lasting hold, especially on porous materials.
For efficient use of rubber cement in your projects, understanding its properties and applications can maximize both its effectiveness and versatility.
Step-by-step Guide To Using Rubber Cement
Rubber cement is a versatile adhesive crucial for DIY projects, scrapbooking, and quick repairs. Here’s a detailed guide to help you use it effectively.
Preparing The Surface
Clean the Surface:
- Importance: Dirty surfaces weaken adhesive bonds.
- Action: Wipe the surfaces with a clean, dry cloth. For stubborn dirt, use a mild detergent and rinse thoroughly.
Roughen the Surface (if necessary):
- Importance: Enhances adhesion for certain materials, like rubber.
- Action: Lightly buff the area with fine sandpaper. Focus on bicycle tubes or similar projects. Ensure the area is dry before applying cement.
Applying The Cement
Apply to One or Both Surfaces:
- Repositionable Bond: Use for items you may need to adjust, such as photos or paper cutouts.
- Action: Apply an even coat to one surface. Let it cure completely before joining it to the other surface.
- Permanent Bond: Ideal for more durable connections.
- Action: Apply a thin, even coat of rubber cement to both surfaces.
Use a Thin Coat:
- Importance: Prevents excessive drying time and ensures a strong bond.
- Action: Spread a smooth, thin layer. Avoid applying too much as it can cause wrinkling or bubbling.
Joining The Materials
Align the Surfaces:
- Importance: Ensures a precise bond.
- Action: Carefully place one surface onto the other. For repositionable bonds, align before pressing down.
Press Firmly:
- Importance: Promotes effective adhesion.
- Action: Apply even pressure across the surface. Use a roller or a flat object to smooth out air bubbles.
Allowing To Dry
Allow To Air Dry:
- Dry Time: Depending on the climate and thickness of the layer, it can take several minutes to a few hours.
- Action: Leave the joined materials undisturbed to set properly.
Monitor Bond Strength:
- Importance: Ensures the bond is secure before handling.
- Action: Check the edges after drying. If loose, apply additional cement and allow more drying time.
Key Terms
- Repositionable Bond: A bond that can be adjusted after initial placement.
- Permanent Bond: A bond that is intended to be long-lasting and difficult to separate.
- Cure: The process of the adhesive setting and hardening.
| Conditions | Approximate Drying Time |
|---|---|
| Thin Layer, Dry Climate | 10-15 minutes |
| Thin Layer, Humid Climate | 15-30 minutes |
| Thick Layer, Dry Climate | 30-60 minutes |
| Thick Layer, Humid Climate | 1-2 hours |
Understanding these steps will make your rubber cement application effective, providing durable and clean bonds for your projects.
Tips For Effective Use
To use rubber cement effectively, follow best practices to achieve a clean and strong bond. Adopting the correct techniques prevents common issues like weak adhesion or material damage.
Safety Precautions
Prioritizing safety ensures a hazard-free experience when working with rubber cement. Adhere to these guidelines to minimize risks:
- Ventilation: Use rubber cement in a well-ventilated area to avoid inhaling fumes.
- Protection: Wear gloves to prevent skin contact and goggles to protect your eyes.
- Storage: Keep rubber cement away from heat sources and direct sunlight, as it’s highly flammable.
Maximizing Bond Strength
Implementing proper techniques maximizes the bond strength between surfaces. Follow these steps for optimal results:
- Application Method:
- Even Coating: Apply a thin, even coat of rubber cement to both surfaces. For a strong bond, allow the solvent to evaporate before pressing them together. For a repositionable bond, press the surfaces together immediately after applying the cement to one side.
- Surface Cleanliness: Clean surfaces thoroughly and remove any debris. For puncture repairs, lightly buff the area around the puncture to create a roughened surface.
- Drying Time:
- Complete Evaporation: Ensure the solvent evaporates completely before joining the surfaces. This step helps form a strong and flexible bond.
- Excess Removal:
- Cleaner Finish: Use a rubber cement eraser or gently pull off any excess cement to prevent damaging the bonding surface or wrinkling the paper.
- Surface Preparation:
- Full Coating: When working with paper, coat the entire back and over the edges to ensure a flat, smooth lay.
| Step | Key Actions | Purpose |
|---|---|---|
| Application Method | Apply thin, even coats to both surfaces | Ensures effective adhesion and flexibility |
| Drying Time | Wait for complete solvent evaporation | Forms a strong, durable bond |
| Excess Removal | Use rubber cement eraser or pull off excess gently | Prevents damage to materials and maintains appearance |
| Surface Preparation | Ensure surface clean, buff, and full coating on paper | Improves bond strength and material’s presentation |
Applying these tips guarantees that rubber cement works effectively, delivering reliable bonds for your projects.
Removing Rubber Cement
Removing rubber cement requires careful steps to avoid damaging the underlying material. Follow these guidelines for effective removal:
Materials Needed:
- Eraser gum (specific new tools for this purpose)
- Cotton swabs
- Isopropyl alcohol
- Soft cloth
Methods:
- Using an Eraser Gum:
- Procedure: Rub the eraser gum gently over the rubber cement residue.
- Outcome: This friction dislodges the cement, allowing you to wipe it away.
- Applying Isopropyl Alcohol:
- Procedure: Dampen a cotton swab with isopropyl alcohol. Dab it onto the rubber cement.
- Outcome: The solvent properties of isopropyl alcohol break down the adhesive, making it easier to remove with a soft cloth.
Steps for Different Surfaces:
- Paper:
- Eraser gum: Use this to gently rub off excess cement without ripping the paper.
- Isopropyl Alcohol: Apply sparingly to avoid soaking the paper.
- Fabric:
- Scraping: Use a blunt edge to loosen the cement.
- Isopropyl Alcohol: Apply to remove thin cement layers, ensuring minimal fabric saturation.
- Photos:
- Eraser gum: Rubbing lightly to avoid scratching.
- Isopropyl Alcohol: Avoid, as it may damage the photo finish.
Key Considerations:
- Test a Small Area: Always test the removal method on an inconspicuous area first.
- Drying Time: Allow the area to dry completely before reusing or storing the material.
- Ventilation: Ensure the area is well-ventilated when using solvents like isopropyl alcohol.
| Material | Tool | Effectiveness | Precautions |
|---|---|---|---|
| Paper | Eraser Gum | High | Avoid excessive force |
| Fabric | Isopropyl Alcohol | Moderate | Test a small area first |
| Photos | Eraser Gum | Moderate | Gentle rubbing to prevent surface damage |
| All | Soft Cloth | Varies | Use with alcohol to wipe off dissolved adhesive |
Removing rubber cement effectively demands consideration of the material’s delicacy and the adhesive’s properties. Use eraser gums for solid surfaces like paper or photos and isopropyl alcohol for more permeable materials like fabric. This approach ensures you maintain the integrity of your items while achieving clean removal.
Conclusion
Mastering the use of rubber cement can significantly elevate your DIY projects and quick repairs. By understanding its properties and following best practices, you can achieve clean and strong bonds for various materials. Whether you’re working on crafts, scrapbooking, or household repairs, rubber cement offers versatile bonding options that cater to both temporary and permanent needs.
Always prioritize safety by ensuring proper ventilation and using protective gear. Proper surface preparation, application techniques, and drying times are crucial for effective results. With these insights, you’re well-equipped to make the most of rubber cement in your creative and repair endeavors.
Frequently Asked Questions
How do you prepare surfaces before using rubber cement?
Before applying rubber cement, ensure the surfaces are clean and free from oils or debris. A quick wipe with isopropyl alcohol works well to remove contaminants. For better adhesion, roughen the surface slightly if necessary.
How long does rubber cement take to dry?
Rubber cement typically dries within 2-3 minutes. Drying times can vary based on climate conditions and layer thickness, so it’s best to wait until the adhesive is tacky but no longer wet.
Can rubber cement be used to seal a tire?
Yes, rubber cement can create an effective seal when used with tire patches. Ensure to scuff the tire area first for better adhesion. While not vulcanizing, regular rubber cement acts as an excellent adhesive agent.
Does rubber cement remain flexible after it dries?
Yes, rubber cement forms a flexible, strong bond once dry. This flexibility makes it ideal for projects requiring slight movement without breaking the bond.
Is rubber cement waterproof once dry?
Yes, when rubber cement dries, it forms a waterproof and flexible bond. It is suitable for bonding materials like rubber, leather, glass, and ceramic, providing a durable and secure hold.
Can rubber cement bonds be repositioned?
Rubber cement allows for repositionable bonds if applied thinly and used correctly. This characteristic is ideal for crafts like scrapbooking, where items may need adjustment without damaging the surfaces.
What are some safety precautions when using rubber cement?
Ensure proper ventilation, wear protective gear like gloves and masks, and store rubber cement safely to prevent accidents. Always follow the manufacturer’s safety instructions and keep it out of reach of children and pets.
How can you remove rubber cement from surfaces?
To remove rubber cement, use eraser gum or cotton swabs with isopropyl alcohol. For paper, use eraser gum sparingly. For fabrics, scrape gently and apply alcohol. Always test a small area first and ensure proper ventilation when using solvents.

