What Adhesive to Use to Attach Sink to Vanity: Expert Guide
Attaching a sink to a vanity might seem straightforward, but choosing the right adhesive can make all the difference in ensuring a secure and lasting bond. Whether you’re a DIY enthusiast or a professional, understanding the best adhesive options will save you time and prevent future headaches.
You’ll need an adhesive that offers strong bonding, water resistance, and durability. With so many products on the market, it can be overwhelming to decide which one suits your specific needs. Let’s jump into the top adhesives that will keep your sink firmly in place and give you peace of mind.
Key Takeaways
- Proper Adhesion is Crucial: Ensuring a secure and durable bond when attaching a sink to a vanity prevents leaks and potential damage.
- Surface Preparation Matters: Thoroughly clean and dry both the sink and vanity surfaces to enhance adhesive performance.
- Adhesive Selection: Choose the right adhesive based on the materials involved. Options include silicone for flexibility, epoxy for strength, and polyurethane for versatility.
- Application Techniques: Apply adhesive uniformly and allow it to cure according to manufacturer instructions for a strong bond.
- Avoid Common Mistakes: Skipping surface preparation, using the wrong adhesive, applying insufficient adhesive, ignoring drying times, and over-tightening fasteners can all compromise the installation.
Importance of Proper Adhesion
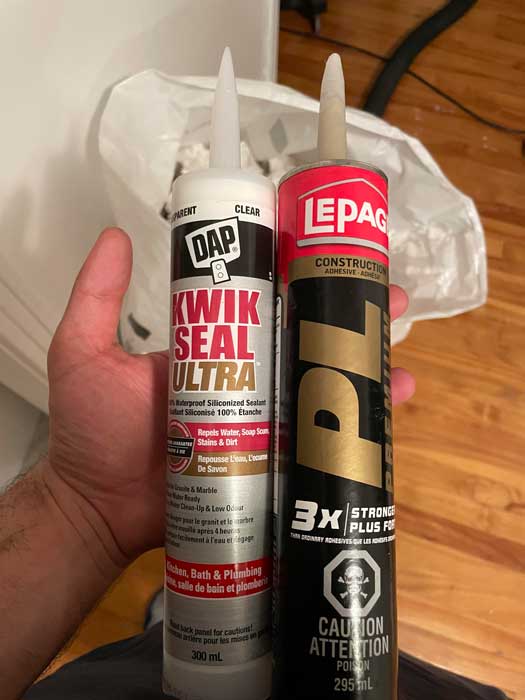
Proper adhesion when attaching a sink to a vanity is crucial for ensuring a secure and durable installation. A strong bond guarantees that the sink remains firmly in place, preventing leaks and potential damage. This section outlines the key components and reasons why proper adhesion is essential.
Key Components of Proper Adhesion
- Strength: The adhesive needs sufficient tensile and sheer strength to hold the sink securely.
- Durability: Adhesives must withstand various environmental conditions without degrading.
- Water Resistance: A water-resistant adhesive helps prevent issues related to moisture and leaks.
- Compatibility: The adhesive must be compatible with both the sink material and the vanity surface.
Steps for Ensuring Proper Adhesion
- Surface Preparation: Clean both the sink and vanity surfaces thoroughly to remove any dirt, grease, or debris.
- Adhesive Selection: Choose the right adhesive based on the materials involved. Options include Liquid Nails for Granite and Marble, two-part epoxy, and silicone adhesive.
- Application: Apply the adhesive uniformly to the relevant areas, ensuring it covers the necessary contact points.
- Drying Time: Follow the manufacturer’s guidelines for drying times to allow the adhesive to set properly.
Table of Adhesive Options
| Adhesive Type | Materials Suitable For | Drying Time | Key Features |
|---|---|---|---|
| Liquid Nails for Granite | Granite, Marble | Follow manufacturer | Strong bond, durable |
| Two-Part Epoxy | Various materials | ~30 minutes | High strength, fast setting |
| Silicone Adhesive | Multipurpose, especially gaps | Varies by brand | Waterproof, flexible |
Summary
Proper adhesion ensures your sink stays in place and functions well over time. Clean surfaces, choose the right adhesive, apply it correctly, and follow drying times. For the best results with granite or marble, consider using Liquid Nails for Granite and Marble. If you need a quick-setting solution applicable to various materials, a two-part epoxy works well. Silicone adhesive is an excellent option for sealing gaps and providing water resistance.
Types of Adhesive for Attaching Sink to Vanity
When securing a sink to a vanity, the choice of adhesive plays a crucial role. The right adhesive provides a secure, durable bond, ensuring the installation lasts. Here are the top adhesive options for this task:
Silicone Adhesive
Usage: Silicone adhesive is widely used for attaching sinks to vanities due to its flexibility and water resistance. It effectively seals gaps and prevents water ingress.
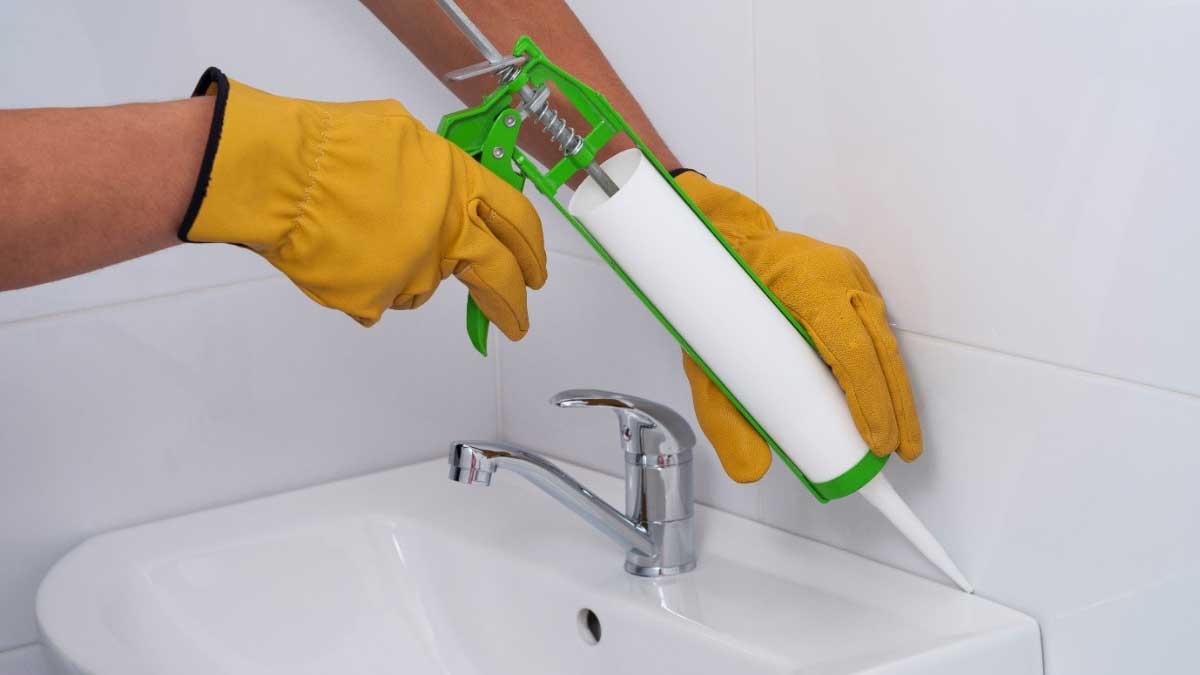
Application: Apply a bead of silicone adhesive along the top edges of the vanity and around the sink where it meets the wall. This helps seal any gaps and ensures a watertight bond.
Strength: Silicone adhesive is strong enough to hold the sink in place but allows for some flexibility, which benefits materials that may expand or contract.
Epoxy Resin
Usage: Epoxy resin is a strong, durable adhesive suitable for attaching sinks to vanities, especially when working with materials like granite or marble.
Application: Mix the two components of the epoxy resin thoroughly before applying. Spread the mixture evenly where the sink meets the vanity to ensure a strong bond.
Strength: Epoxy resin offers excellent strength and durability, making it ideal for heavy and less flexible materials.
Polyurethane Adhesive
Usage: Polyurethane adhesive provides a robust, flexible bond, making it suitable for various sink and vanity materials, including wood and composites, like MDF (Medium-Density Fiberboard).
Application: Apply the adhesive directly to the contact surfaces. Ensure even coverage to create a strong, durable bond.
Strength: Polyurethane adhesive is known for its high bond strength and elasticity, accommodating slight movements without compromising the bond.
Construction Adhesive
Usage: Construction adhesive is a versatile product that can be used for a wide range of materials and applications, including attaching sinks to vanities.
Application: Apply the construction adhesive in a continuous bead along the vanity’s top edges and where the sink makes contact. Press firmly to ensure even distribution and good adhesion.
Strength: Construction adhesive provides a strong bond, capable of holding heavy sinks in place, and is often resistant to moisture and temperature changes.
| Adhesive Type | Ideal For | Flexibility | Water Resistance | Strength |
|---|---|---|---|---|
| Silicone | Porcelain, Ceramic, Glass | High | Excellent | Strong but Flexible |
| Epoxy Resin | Granite, Marble, Stone | Low | Moderate | Very Strong |
| Polyurethane | Wood, Composites | High | Good | Strong and Elastic |
| Construction | Various Materials | Moderate | Good | Strong |
Selecting the right adhesive involves considering the materials of both the sink and the vanity, as well as the installation environment. Use the above information to choose the most suitable adhesive for your sink-to-vanity attachment project.
Choosing the Right Adhesive for Your Sink and Vanity
Choosing the right adhesive for attaching your sink to a vanity is crucial for ensuring a durable and watertight bond. Depending on the type of sink and countertop material, different adhesives offer varying levels of effectiveness. Here’s a detailed guide to help you select the right adhesive.
Key Adhesive Types
Silicone Caulking
- Material Compatibility: Best for ceramic or laminate sinks
- Water Resistance: High
- Bond Strength: Strong but flexible
- Application: Easy to apply with a caulking gun
Silicone caulking is ideal for most bathroom sinks. It provides a robust bond while preventing water from seeping through, which protects your countertop from damage.
Granite Adhesives
- Material Compatibility: Tailored for granite surfaces
- Water Resistance: Excellent
- Bond Strength: Very high
- Application: Requires careful application with specialized tools
For granite countertops, use adhesives formulated specifically for granite. These ensure a stronger bond that can withstand the heavy weight of the sink.
Epoxy Resin
- Material Compatibility: Works with both ceramic and granite
- Water Resistance: Excellent
- Bond Strength: Superior, rigid bond
- Application: Requires mixing of two parts before application
Epoxy resin is versatile, offering a durable and waterproof bond for various sink types. Ensure precise mixing and application to achieve the best results.
Polyurethane Adhesive
- Material Compatibility: Suitable for various materials, including granite and laminate
- Water Resistance: High
- Bond Strength: High
- Application: Easy to use but requires clamping
Polyurethane adhesive provides flexibility and a strong hold, making it suitable for sinks that experience frequent use.
Adhesive Selection Tips
- Consider Countertop Material: Match the adhesive to your countertop material. For instance, granite requires specialized adhesives.
- Check Adhesive Specifications: Ensure the adhesive is water-resistant and strong enough to support the sink’s weight.
- Follow Manufacturer Instructions: For best results, adhere to the application guidelines provided by the adhesive manufacturer.
| Adhesive Type | Ideal for Sinks | Material Compatibility | Water Resistance | Bond Strength | Drying Time | Application Method |
|---|---|---|---|---|---|---|
| Silicone Caulking | Ceramic, Laminate | Ceramic, Laminate | High | Strong | 24 hours | Caulking gun |
| Granite Adhesives | Granite | Granite | Excellent | Very High | 48-72 hours | Specialized tools |
| Epoxy Resin | Various | Ceramic, Granite | Excellent | Superior | 24 hours | Mixing of two parts |
| Polyurethane Adhesive | Various | Granite, Laminate | High | High | 24 hours | Clamping required |
Choosing the correct adhesive ensures both a secure installation and longevity of your sink setup. Different adhesives offer specific advantages depending on the materials involved, so make your selection based on these key features for optimal results.
Preparation for Application
Preparing the surfaces properly ensures a strong and durable bond when attaching a sink to a vanity. Address these key points to ensure optimal adhesive performance:
Cleaning Surface
- Thoroughly Clean:
- Use a mild detergent and warm water to remove dust, grease, and other contaminants.
- Rinse with clean water and dry completely.
Drying Surface
- Ensure Dryness:
- Moisture can weaken the adhesive bond.
- Allow the surfaces to air dry, or use a lint-free cloth for quicker drying.
Surface Roughening
- Roughen Surface:
- Lightly sand the bonding surfaces to create a better grip for the adhesive.
- Use fine-grit sandpaper and clean off any residue with a dry cloth.
Fit and Alignment
- Check Fit:
- Position the sink on the vanity to ensure proper alignment before applying adhesive.
- Mark positions as needed for precise placement.
- Gather Tools:
- Ensure you have all necessary tools, such as clamps, applicator guns, and cleaning materials, on hand.
| Tools | Purpose |
|---|---|
| Mild Detergent | Clean surfaces to remove dust, grease, and contaminants |
| Water | Rinse surfaces after cleaning |
| Lint-Free Cloth | Dry surfaces to ensure no moisture remains |
| Sandpaper | Roughen surfaces for better adhesive grip |
| Clamps | Hold sink in place until adhesive sets |
| Applicator Gun | Apply adhesive precisely and evenly |
Addressing these preparation steps ensures the adhesive bonds effectively, providing a secure and durable attachment for your sink.
Step-by-Step Guide to Attach Sink to Vanity
To securely attach your sink to the vanity, follow this straightforward guide. Proper preparation and the right adhesive ensure a durable installation.
Cleaning and Preparing Surfaces
Properly cleaning and preparing the surfaces is crucial for a strong bond.
- Clean the Surfaces: Remove dirt, dust, and old adhesive from both the sink and the vanity. Use a solvent, such as acetone or rubbing alcohol, to clean the surfaces thoroughly.
- Dry the Surfaces: Ensure the cleaned surfaces are completely dry before proceeding. This prevents moisture from interfering with the adhesive.
Applying the Adhesive
Choosing and applying the correct adhesive is essential for a secure attachment.
- Choose the Right Adhesive: Use silicone adhesive (100% silicone sealant) for most bathroom vanities. It provides a strong bond and resists moisture. For granite or marble countertops, consider using liquid nails for granite and marble or a two-part epoxy.
- Apply the Adhesive:
- Undermount Sink: Apply the adhesive to the rim of the sink.
- Top-Mount Sink: Apply the adhesive to the edge of the vanity cut-out.
Distribute the adhesive evenly to avoid gaps.
Securing the Sink
After applying the adhesive, secure the sink in place to ensure a firm bond.
- Position the Sink: Carefully position the sink on the vanity. Ensure it aligns properly before pressing down.
- Press Down: Apply pressure to the sink to secure the adhesive bond. Hold for a few minutes to ensure the adhesive begins to set.
- Let it Cure: Allow the adhesive to cure for at least 24 hours. This ensures a strong, durable bond.
Adhesives Comparison Table
To help you choose the best adhesive, refer to this detailed table. It compares common adhesives based on key features.
| Adhesive Type | Best For | Drying Time | Key Features |
|---|---|---|---|
| Silicone Adhesive | Most bathroom vanities | 24 hours | Strong bond, moisture resistant |
| Liquid Nails (Granite) | Granite and marble counters | 24-48 hours | Excellent for heavy materials, durable |
| Two-Part Epoxy | Various countertops | 24 hours | Exceptional strength, versatile application |
By following these steps and selecting the right materials, you ensure a solid, long-lasting installation of your sink to the vanity.
Common Mistakes to Avoid
Choosing the right adhesive and applying it correctly can make a significant difference in the durability and functionality of your sink installation. Here are common mistakes you should avoid to ensure a successful attachment.
1. Skipping Surface Preparation
- Importance of Clean Surfaces: Adhesive won’t bond well to dirty or dusty surfaces. Ensure you clean both the countertop and the sink thoroughly before applying any adhesive.
- Drying Surfaces: Moisture can interfere with the adhesive’s bonding capability. After cleaning, make sure surfaces are completely dry.
2. Using the Wrong Adhesive
- Material Compatibility: Not all adhesives are suitable for every surface. For example, a silicone adhesive works well for ceramic sinks and laminate countertops but isn’t ideal for granite sinks.
- Water Resistance: Bathrooms have high humidity levels. Using an adhesive that’s not water-resistant can lead to eventual weakening and detachment.
3. Applying Insufficient Adhesive
- Uniform Application: A narrow or irregular bead of adhesive won’t form a strong bond. Apply a consistent bead around the entire edge of the sink.
- Adequate Amount: Too little adhesive can cause the sink to come loose over time. Ensure you’re using enough to create a secure seal.
4. Ignoring Drying Times
- Curing Period: Different adhesives have different curing times. Ignoring these can result in a weak bond. Check the manufacturer’s instructions and wait the recommended time before using the sink.
5. Over-Tightening Fasteners
- Balanced Pressure: Over-tightening can crack the sink or countertop. When using brackets or clamps, apply balanced pressure to avoid damage.
- Proper Installation: Secure the sink properly with appropriate fasteners based on the type of sink and countertop.
Summary of Tips
- Clean: Thoroughly clean and dry all surfaces.
- Choose Correct Adhesive: Match the adhesive to the materials involved.
- Apply Evenly: Ensure a consistent adhesive bead.
- Allow to Cure: Respect the adhesive’s drying time.
- Avoid Over-Tightening: Do not apply excessive pressure with fasteners.
| Adhesive Type | Ideal For | Water Resistance | Drying Time |
|---|---|---|---|
| Silicone Caulking | Ceramic, Laminate | High | 24 hours |
| Specialty Silicone | Granite | High | 24-48 hours |
| Liquid Nails | Granite, Marble | Moderate | 24-48 hours |
| Two-Part Epoxy | Various (Heavy Duty) | Very High | Up to 72 hours |
Avoiding these common mistakes ensures a successful and enduring sink installation. Proper preparation and attention to detail are key.
Conclusion
Choosing the right adhesive for attaching your sink to the vanity is crucial for ensuring a secure and long-lasting bond. By focusing on key factors like strength, water resistance, and compatibility with materials, you can make an well-informed choice that will prevent future issues.
Remember to prepare surfaces thoroughly and follow the recommended application steps to achieve the best results. Whether you opt for silicone adhesive, two-part epoxy, or Liquid Nails, each product has its unique benefits tailored to specific materials.
Avoid common mistakes by adhering to drying times and applying the adhesive uniformly. This attention to detail will help you achieve a professional and durable installation, keeping your sink securely attached for years to come.
Frequently Asked Questions
What adhesive should I use to attach a sink to a vanity?
Waterproof silicone adhesive is ideal for attaching most sinks to vanities. For heavier sinks or materials like granite, use a two-part epoxy or Liquid Nails specifically designed for such applications.
Is Liquid Nails suitable for bathrooms?
Yes, Liquid Nails Silicone Premium Universal Sealant (LS-205) is recommended. Ensure all seams and fixtures are sealed with 100% pure silicone to prevent water damage.
How do you secure a sink to a vanity?
Apply a bead of silicone adhesive around the edge of the vanity. Place the sink and press firmly. For additional hold, use clamps or weights to secure the sink until the adhesive sets.
What are the steps to attach a sink to a countertop?
Clean and dry both surfaces. Apply the chosen adhesive around the sink flange. Place the sink into the cut-out of the countertop. Secure with clips for undermount sinks or leave to set for top-mount sinks.
Can I use silicone caulk to secure a sink top to a vanity?
Yes, run a thick line of silicone caulk along the top edges of the vanity. Place the countertop on top and press firmly to ensure a secure bond.

